What unusual vegetable seeds are you trying this year?

seeds

I’m always interested in what unusual seeds people are trying (or have had success with).  So I’m sharing what seeds I will try, where I got them and I hope some of you will do the same. For a complete list of all my crops for 2014 go here.

2014 unusual seeds that I will try:

African Bushel gourd-big round gourds the size of a bushel basket! Suppose to be good to use as containers after they dry out. You know me and giant things!

White Egg gourds-from Southern Exposure Seed Exchange-small egg gourd-looks like white chicken eggs-sounds like fun! Now I can pretend my old girls are still laying!

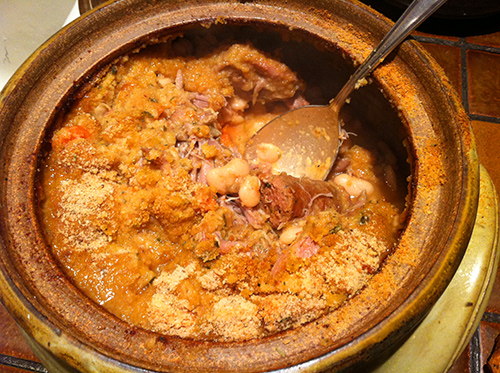
Tarbais beans-from Baker Creek Heirloom Seeds-a pole bean that you dry out and cook for bean stews, soups and cassoulets. More delicate flavor than navy beans. These use to be hard to find in the states but thankfully Baker Heiloom Seeds has carried them for 2 years now.

Eyesines de Galeux-from Baker Creek Heirloom Seeds-a salmon warty winter squash that tastes divine. The more ‘worts’ the sweeter it tastes. More worts=more sugar in it.

Sweet Meat-Another great winter squash-so sweet you don’t have to add anything to it to sweeten it. Also a great keeper-I just finished eating our last one in February.

Peredovik sunflower seed– from Southern Exposure Seed Exchange-this is the black oil sunflower seed that your birds eat in bird seed food.

Jimmy Nardello pepper-a red ‘chili’ looking pepper but sweet-from Southern Exposure Seed Exchange-a sweet long red pepper delicious when sautéed.

Bullshorn (Corno Di Toro) pepper-a red ‘chili’ looking pepper but sweet-from Southern Exposure Seed Exchange-another sweet long red pepper delicious when roasted or sautéed.

‘Canoncito’ landrace red hot chili pepper-This one I got from the Santa Fe Farmer’s Market and is a local seed from north of Espanola.

Charentais melon-from Baker Heirloom Seeds-one of the most flavorful melons from France or so they say.

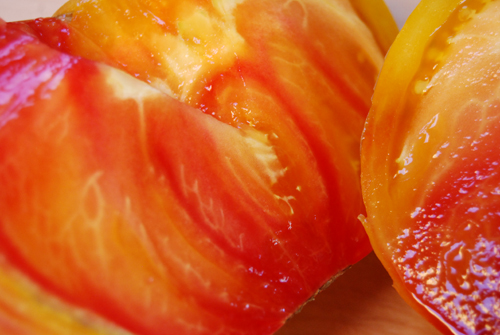
Purple Bumblebee tomatoes-from Baker Heirloom-small purple and green striped larger cherry tomato. Part of the new Artisan tomatoes out this year.

Round Black Spanish radish-from Baker Heirloom Seeds-I got one from our local organic market and it was delicious so I’m gonna try them this year.

Craupadine beets-from Baker Heirloom Seeds-one of the ugliest but sweetest tasting beets ever-from France.

Winter greens for the greenhouse or early planting outside

I can’t wait anymore! I got this newly completed greenhouse and am antsy to try it out. I’ve done a lot of research on which plants might do well in the winter and am ready to rock n’ roll! So I am planting cold hardy seeds this week inside the house. I will transplant them into my new greenhouse when they are bigger. I’m also going to try some direct seeding in the greenhouse in the raised beds like arugula, spinach, kale, baby bok choi and mache in mid-February-all of which can handle some pretty cold weather. How cold? We will see soon although you wouldn’t know it by this week. I will also plant other greens like some winter hardy lettuces, peas, and a winter hardy variety of chard called Argentata at the end of February-beginning of March. Everything planted in the greenhouse will have to have row cover over it even in the greenhouse at this early date because of our cold nights. For those of you who do not have a hoophouse, or cold frame, the seeds in the list below will do well outside only you have to wait a little longer.

Here is my list of cold hardy crops to try in the greenhouse. You can also plant these outside in March once the soil is not frozen and cover them with row cover:

From Johnny’s Seeds:
‘5-star greenhouse’ lettuce mix
‘Space’ Spinach

From Southern Exposure Seed Exchange:
‘Even’ Star’ Winter Arugula
‘Winter Bloomsdale’ spinach

From Kitazawa Seed Co:
‘Mei Qing Choi’ (dwarf pak choi)-recommended in ‘Four Season Harvest’ by Eliot Coleman
‘Tatsoi’ (pak choi)-recommended in ‘Four Season Harvest’ by Eliot Coleman
‘Golden Yellow’ pak choi
‘Astro’ arugula

From The Cooks’ Garden:
‘Red Grenoble’ lettuce
‘Forellenschluss'(speckled trout) lettuce
‘Rouge D’Hiver’ lettuce-recommended in ‘Four Season Harvest’ by Eliot Coleman

From John scheepers Kitchen Garden:
‘Argentata’ Chard-recommended in ‘Four Season Harvest’ by Eliot Coleman

From Agua Fria Nursery: transplants ready to plant
mache (corn salad)-recommended in ‘Four Season Harvest’ by Eliot Coleman
endive-recommended in ‘Four Season Harvest’ by Eliot Coleman
‘Winter Wonder’ lettuce
‘Marshall Red’ romaine lettuce

Tarbais bean/cassoulet part 2

cassoulet

Cassoulet is a hearty winter dish which was originally created by poor farmers or peasants in southwest France. Only god knows what the rich and royal were eating if this is what the peasants ate cause this is very rich! There are different types of cassoulets in France depending on the region you live. Some cassoulets made in mountainous areas might have lamb as their main meat, others close to the sea would have fish and the most famous cassoulet is made with duck but no matter, they all used the Tarbais bean (pronounced Taar Bay) as a main ingredient to make this famous dish. To find out more about my experience on growing Tarbais beans go here. I made cassoulet with duck and my Tarbais (cassoulet) beans that I grew.

Cassoulet is slow cooked in a ceramic dish called a cassole which is a basically a covered ceramic casserole dish that can go in the oven. It traditionally is made with sausages, pork, duck confit and Tarbais beans-not for the faint of heart and I mean that literally!

So on with making a cassoulet with duck. Don’t be in a hurry cause it takes several days to make this dish-yes I said days—like as in 3 days!

First, Whole Foods ran out of duck confit, so I had to go online and learn how to make it myself which was a blessing as duck confit is very expensive and evidently not as good if you don’t make it yourself. There are many recipes on the internet but here is the recipe for both the Duck Confit and Cassoulet that I use from: Cassoulet by Anthony Bourdain and Michael Ruhlman as presented by ‘The Daring Kitchen’: http://thedaringkitchen.com/recipe/confit-cassoulet . Here is their recipe as a pdf – Confit_Cassoulet_Jan_2011 which is helpful to print out as your computer will run out of juice before you can finish making the recipe in 3 days!

I wouldn’t want to go to all this effort all the time but once a year in the winter is great. Plus I did not line the ceramic pot with pork rinds-just seemed like overkill to me (literally).  Now don’t worry they also have several different versions of cassoulets at the link above for the more heart healthy conscious (like chicken confit in olive oil and vegetarian cassoulet) but I thought I’d try an original version once! Next time I will exchange the pork with smoked turkey necks (which taste like smoked pork) and the different pork sausages with turkey sausage versions as it has sooo much fat.

What was once a poor man’s dinner is now very expensive but oh so good. I like to eat this hearty winter dish on a cold winter’s night with a glass of red wine by the fireplace. I think the red wine cuts the fat, or least that’s what I tell myself!

Tarbais bean/Cassoulet Part 1

Here is what Tarbais (pronounced Taar bay) beans looks like on the vine and closeup, after dried but before shelling and when shelled in jars. I like to cook and wanted to learn how to make a french dish called ‘Cassoulet’ last year (2012) and had a heck of a time finding this particular bean that hails from France where I would have to pay $34.00 an ounce for heirloom Tarbais beans ! That’s because our USDA and the cost of their inspections drives up the price to get them into the US. The ones to grow can be different from the beans to eat. The ones you can purchase to eat might not be a true heirloom, mixing genetically with other beans but they will taste the same unless you try to grow them out.  The heirloom variety were not in any seed catalog last year but I finally found 4 people who offered their heirloom seeds through Seed Savers Exchange (SSE) in their Members Catalog ($4 for shipping only) and each gave a lot of beans (30+). Well worth joining because 1) you are supporting growing heirloom seeds and 2) many people grow unusual vegetables and offer their seeds through SSE. They were the only ones who had them in 2012 in the US. This year (2013) I saw them offered at Baker Heirloom Seeds in their catalog and got more although now I have my own supply of them as well.

tarabais and navy bean

Navy bean (top) and Tarabais bean (bottom)

So what’s so special about the Tarbais bean? I probably could have used a white Navy bean but I read that the Tarbais bean is slightly bigger and becomes creamy without disintegrating and becoming mushy like many other beans do and I wanted to be authentic and grow out that variety of bean.

The Tarbais bean originally came from the village of Tarbais, in southwestern France and is used in cassoulet dishes. Tarbais beans were developed by generations of farmers that lived in that area. The Tarbais Bean in 2000 obtained IGP status (Indication of Protected Geographical Origin). Only members of a small, closed cooperative in Tarbais are allowed to use that name for their beans, and production is tightly regulated. The original seed is a New World runner bean (Phaseolus coccineus) and most think it originated in Mexico.

That’s one of the great things about growing your own vegetables-you can grow something you might not find in the grocery store. That doesn’t mean it will taste exactly the same as where it originated from (like I doubt a New Mexico chili grown in New Jersey would taste the same as our conditions and soil are very different) but at least I could try. The beans are grown like any pole bean that you are going to leave on the vine until dried. They were harder to start as the birds liked the ‘bean sprouts’ when they popped up so I had to replant several times and cover them with row cover to protect them until they were about 3 inches tall. After that it was a breeze. Just water them regularly. They will produce many pods that you just leave on until fall when they dry on the plant.

Part 2 of this will be the about Cassoulets and the recipe I used.

Tomato Tasting Contest

tomato contest1

Today I held a tomato tasting contest with some of my friends. I have to say I was very disappointed. Not with my friends but with my tomatoes. I went last to taste them and could not believe how many of the tomatoes were either bland or watery. Some seemed weak in flavor. I’ve eaten them all summer and couldn’t remember them like this. They were not at all like the sweet flavorful tomatoes I ate last month.

Then it hit me-the 3 inches of rain we had this past week really weakened the flavors. I have had many split their skins this week from taking on so much water and that explains why so many of my favorites were rather bland vs a month ago they were very flavorful. They say if you want the flavors more intense, cut back on watering during harvest time which I did. Usually we don’t have an over-abundance of rain, but we have this year. I haven’t had the drip system on in 2 weeks but mother nature choose to give us more rain than I can ever remember getting at this time of year.

This slideshow requires JavaScript.

Never the less there were some outstanding tomatoes. Below is the ranking of the ones we tasted. There were many ties. I found it amazing that 7 of the tomatoes in the top ten were black or purple tomatoes. 6 were yellow and only 1 red tomato in the top ten. (Remember there were some ties which is why we have more then 10)

Many of the rest of the tomatoes were red which is interesting as most of us like to use red tomatoes for sauce where cooking brings out the flavors but don’t like to use other colors for sauce.

I think if I had had the contest 2 weeks ago before the rain, the results may have been very different but still feel the black tomatoes would have outshine the rest. Can you tell I’m partial?!

Thanks to all for helping out with the tasting and grading!


2013 TOMATO TASTING CONTEST

TOP TEN

1st place-Paul Robeson-black tomato

2nd place-Indigo Apple-black tomato

3rd place-Brandy Boy-black tomato

4th place-Black and Brown Boar-black tomato

4th place-Big Sungold Select-yellow cherry tomato

5th place-Cherokee Purple-black tomato

5th place-Southern Nites-black tomato

6th place-Sungold-yellow cherry tomato

7th place-Juane Flamme-orange tomato

8th place-Ananas Noire-green/black tomato

8th place-Virginia Sweet-yellow tomato

8th place- Porkchop-yellow tomato

9th place-Galon De Melon-yellow cherry tomato

10th place-Bloody Butcher-red tomato

———————————————————————————

11th place-Marmande-red tomato

12th place-Big Zac-red tomato

13th place-Costoluto Genevese-red tomato

14th place-Pantano Romanesco-red tomato

14th place-Green Grape-green cherry tomato

15th place-Cour Di Bue-red tomato

15th place-Gold Medal-yellow tomato

16th place-Orange Wellington-orange tomato

Biggest tomatoes 2013

tomatoes_biggest_2013

Here are the two biggest tomatoes so far this season. The yellow one on the left is 1 lb 11 oz Gold Medal and the red one on the far right is a 1 lb 10 oz Big Zac. I got second place at the State Fair with a little smaller Big Zac tomato but if I had found this Gold Medal I would have had first. It’s ok though as I took 5 first places, 1 second place and 1 third place at the State Fair. Can’t be too greedy.

The runaway

giant marrow 08-10

A BIG runaway! DISCLAIMER: This one is way too big to eat! I entered this in 2010 in the State Fair instead!

At this time of year if you’re a vegetable gardener, you’ve experienced it—zucchini runaways. One day you go out and see this cute little zuke and think I’ll give it one more day and the next day you go out and it grew into a baseball bat. It’s like overnight it got on some steroids and went ballistic.  Now it’s too big so what do we do with them besides hide them under the bed in case an intruder comes in? Well you could use them as door stops or take them to the fair but here are 4 ideas to eat them!

Savory Zucchini Pancakes
Take 2 cups of grated zucchini, add two beaten eggs, 2 tablespoons of flour, and 2 teaspoons of some fresh herb you have and 1 cup feta or mozzarella or cheddar or whatever cheese you have (please, no Velveeeeeta). If you want more, then just up the ingredients like 3 cups zucchini, 3 eggs, 3 tablespoons flour, etc. Just don’t up the herb, keep it at 2 tsp so not to overwhelm the flavor of the zucchini (what? zucchini has flavor? Yes, at least two varieties do – Costata Romanesco and Benning’s Green Tint (not a zucchini but a delicious summer squash). All the others, in my opinion, are worthy of either the compost pile or the chicken coop or both) Then saute them in olive oil until brown on both sides. This is my favorite way to cook super-sized zucchini.

Garlicky Zucchini Medallions
Slice them into medallions and saute them in olive oil with some crushed garlic cloves until tender in a BIG fry pan. Sprinkle lightly some red pepper flakes and add fresh grated Parmesan cheese on top and cook a few minutes more till melted. This is also great with a little left over spaghetti sauce drizzled over them.  (Can you really drizzle spaghetti sauce. No—but you get the idea-don’t drown them.)

Zuchinni Soufflini (This one comes from my mom-thanks mom!)
1 1/2 lbs zucchini
1 large onion, chopped
3 TLB butter
1 cup shredded cheddar cheese
1 tsp salt and 1/4 tsp pepper
2 beaten eggs
1 1/2 cups soft bread crumbs
2 TLB butter

Cook squash whole for about 5 minutes in boiling water. Cool. Dice into cubes. Saute’ onion in 3 TLB butter and add to zucchini. Stir in cheese and seasonings and allow mixture to cool before adding beaten eggs. Spoon into buttered 1 quart casserole. Toss bread crumbs with 2 TLB melted butter and sprinkle over casserole. Bake 30-40 minutes at 350°F about 30 minutes or until knife inserted comes out clean. Serves 4-6 people.

Of course there is always the infamous zucchini bread but how about chocolate zucchini bread? I got this recipe from a friend many moons ago and it is excellent. Your kids, friends, spouse or partner will never know they are eating something healthy!

Chocolate Zucchini Bread
2 ¼  cup all-purpose flour
½ cup unsweetened cocoa powder
1 tsp baking soda
1 tsp salt
1 ¾  cup sugar
½ cup butter
½ c vegetable oil
2 eggs, large
1 tsp vanilla extract
½ cup buttermilk
2 cup unpeeled zucchini, grated
6 oz choc chips
¾ c chopped walnuts

-Preheat oven 325 degrees. Butter and flour a 13” x 9” x 2” baking pan
-Sift flour, cocoa powder, baking soda, salt into large bowl.
-Beat sugar, butter and oil in large bowl until well blended. Add eggs 1 at a time, beating well after each addition. Beat in vanilla extract. Mix in dry ingredients, alternate w/ buttermilk in 3 additions each, fold in zucchini. Mix in choc. chips + nuts. Pour into the baking pan. Bake until toothpick inserted in center comes out clean in about 50 min. Cool completely in pan.

So the next time you get a runaway, don’t despair, now you have some ideas on how to use them besides hiding them under your bed!

Pickle class a success!

pickle class

Duskin with picklesPickle making class went well today. We processed 15 lbs of cucumbers into about 15 pint jars. Pictured above are some of the finished pickles. Duskin, who co-taught the class with me brought his giant pressure cooker. We didn’t use it as a pressure cooker this time but instead filled the big pot with water to sterilize the jars and to use for processing the pickles using the water bath method. I brought my camp stove to make the brine and syrup. It was a beautiful day for making pickles outside instead of over a hot stove. After a short talk on the how to process food safely, everybody got involved—Duskin sterilized the jars, while the students cut up the cucumbers and garlic, mixed up the brine and syrup, added all the ingredients and cucumbers into the hot sterilized jars as they came out of the pot, poured the brine and syrup, wiped the lips of the jars and put the lids/caps on them. Then we put them back into the hot water and brought the water back to boiling and adjusted the processing time for our high altitude. While we were waiting for them to finish processing, Duskin showed them around Milagro Community Garden. When the pickles were done, we pulled them out of the hot water and let them cool enough and then the students took home a jar of each type of pickle. Good job folks!

Here is the one handout that wasn’t available today that I told the students would be available tonight:

Preparing and Canning Fermented and Pickled Foods

Here are the handouts that were given out in class:

General Canning Information

Duskin’s Favorite Pickle Recipes

Lastly, here is the Lemon Dill Refrigerator Pickle recipe that Randy asked for:

Fresh-Packed Refrigerator Lemon Dill Pickles

Food Preservation Class TODAY-canning pickles

799px-Pickle

Do you have too many cucumbers? Do you want to learn how to make pickles? It is much easier than you think! Today from 12 noon – 3 pm I will be teaching a preservation class on pickling for Home Grown New Mexico.

pickle_cornichonThose who show up will learn how to make two types of pickles-bread and butter pickles and dill pickles. We will review canning safety at high altitudes and then make the pickles using the water bath method. This is a hands-on class.

Pickle Making Class- 12 noon-3pm

Milagro Community Garden – located in parking lot behind:

2481 Legacy Ct, Santa Fe, NM

Tomato Lady of Santa Fe at Farmer’s Market this Saturday

3omato_costuluto genevese

Saturday I will return to the Santa Fe Farmer’s Market as the ‘Tomato Lady’. I don’t have lots of tomatoes yet but everyday more are ripe so come early to get the best choices like the beauty pictured above from Italy called “Costuluto Genevese”. I have 12 new varieties as well as the ones I grew last year.

Curly Top Tomato Virus and Beet Leaf Hoppers

Photo credits: curly top disease - photo courtesy of http://ucanr.org/blogs/blogcore/postdetail.cfm?postnum=3352

Photo credits:
curly top disease – photo courtesy of http://ucanr.org/blogs/blogcore/postdetail.cfm?postnum=3352

Curly Top Tomato Virus
Last year, the Beet Leafhopper which transmits ‘Curly Top Tomato Virus’ was rampant in our gardens and devastated many tomato plants. I lost 50% of my tomato plants. The Beet Leafhopper flies in on the winds in early June through July, jump on the tomato plants and taste them. They don’t even like to eat tomato plants but sample them, transmitting the disease in the process.

Identifying Beet Leafhoppers
You will know if they are here as they come in waves and when you walk around your garden, you’ll see a lot of jumping  little green bugs that fly off when you walk by. Then they leave—flying to the next garden. Because of this, you can’t really spray anything to get them—here today, gone tomorrow. By the time you notice something is wrong with your plant, they are long gone. It takes about 2 weeks for symptoms to show up.

Symptomscurly top virus_helthy plant
Your tomato plant leaves will start to curl and the underside of the leaves will turn a purplish color The leaves then start to wilt and the plant will look stunted. You might think it needs water but it doesn’t, it is sick and won’t recover. ‘Curly-Top’ is only transmitted from bug to plant is NOT transmitted from plant to plant hence you will see a healthy plant next to a sick plant.

Remedies
There is NO CURE for this virus and if your tomato (or pepper for that matter) shows signs of the disease, you should pull the plant. You could leave the plant in BUT if another wave of leafhoppers come by and a healthy leafhopper bites your sick plant, it only takes 10 minutes in 90°F weather for it to be able to transmit the disease to one of your healthy plants. The best thing to do is pull any sick plant and dispose of it.

Leafhoppers do not like shade and if your plants are partially shaded, that may help keep them off but since most of us grow tomatoes in full sun that might be difficult.

Create a physical barrier with row cover

Row cover over the tomato plants in my garden

Another thing you can do is create a physical barrier between the bugs and your plants. This year, I’m covering my tomato plants with row cover until the bugs pass. Wrap the row cover around your tomato cage and put a piece on top of the cage BEFORE they come.

Lastly you could put out some tomatoes later in the season after the bugs leave. Last year when I was out at the Santa Fe Community Garden I noticed many rows of sick tomato plants but one row of perfectly healthy plants and when I asked about them, it turned out they were put out about a month later than the rest of them and by then the leafhoppers were gone.

Dry, sunny, windy weather are perfect conditions for the leafhoppers so look out this summer-conditions are ripe again!

Wall of Waters 101

I think Wall of Waters are one of the best early season aids for tomatoes and peppers in cooler areas of the country acting like little greenhouses keeping the plants warm at night, protecting them from our ferocious winds in spring and for getting a great head start for growth but they can be hard to put up around the plants especially if you are trying to do it yourself. I have another post addressing what amendments I use when planting  and how to plant tomatoes  but this primer is about wall of waters. You can still use wall of waters right now as the nights are still very cool for tomatoes and peppers.

1wow begin by watering

Here is the planted tomato with a big well around it. If the well isn’t big enough than the wall of water will sit lopsided. (I still had to put the drip line around the plant BEFORE I put the wall of water on it). Notice the green wall of water on the ground and the 5 gallon bucket. Some tomatoes are too tall for the bucket so I cut off the bottom of this 5 gallon bucket, first using a drill bit to drill a hole big enough so my sawzall tool could get inside and cut off the circular bottom. The bucket can go over the plant without smashing it over tall tomatoes.

2wow placing over bucketPut the bucket over the plant and then slide the wall of water (henceforth known as WOW) over the bucket.

3wow waterer

Another great tool for filling the WOWs is this watering wand. I like this one because it has an on-off switch and a lever for control of how fast the water comes out. Here I took off the end so it will fit easily inside each cell. (this is my favorite gardening shoe-can you tell-well worn?!!)

4wow-begin filling

Now put the wand into each ‘cell’ and fill with water. The 5 gallon bucket will keep the WOW from falling on the plant.

5fill cells each side

Fill a couple of cells, then go to the OPPOSITE side and fill a couple of cells and do this on all 4 sides instead of starting on one cell and going around where it will have a tendency to collapse. This will help the WOW to stand up better as you fill up the cells.

6wow finished

After filling all the cells, reach in a pull the 5 gallon bucket out and the WOW will now support itself. A perfect little greenhouse. But sometimes…

7wow REPAIRED

a cell will get a hole and leak after the WOW is a few years old. This is a problem as the WOW needs every cell  full to support itself, so…

8wow replacement cell

So you can buy replacement cells or make your own. Just take that leaky WOW and cut some good cells out of it for use as replacement cells for other leaky WOWs.

9wow installing rep cell

Take your replacement cell and fold it lengthwise in half as shown and slide it into the cell where the water leaked out.

10wow w replacement cell

Then fill up the replacement cell with water and it will hold up that cell. Now one last thing…

11wow finished with stakes

I put 3 bamboo stakes inside the WOW’s right next to the walls and make a tee-pee out of them and tie them together at the top in case the WOW wants to collapse from the wind, the tee-pee will hold the WOW up so it doesn’t crush the plant. These plants have been inside the WOWs for a while and I will take off the WOWs now. Just grab the WOW on opposite sides and pull them off the plant and dump the water back in the wells.

44 tomatoes planted today!

This slideshow requires JavaScript.

Phew! What a day. Three of my friends came over this morning and all together we planted 44 tomato plants from 8:30-12:30! What a bunch of busy beavers! Janet started out the morning before the others came and screened all my vermicompost and filled three-5 gallon containers. Then Lava showed up and Janet and her put in all my amendments in each hole (I had previously dug out most of the holes and Bob Z came by yesterday and finished digging them for me-another great friend)! Then today, I could barely keep ahead of the girls, me setting out plants, making sure each plant had a drip to it, name tags, map of all the tomatoes, providing stakes and wall of waters while Lava planted them and Mernie and Janet followed up behind putting the wall of waters on all of them. Then we all had other things to do and off we all went.  A wonderful day to plant- not too windy and not too hot-it was overcast! A huge thanks to Lava, Mernie and Janet for helping me today and to Bob for helping me yesterday-would of taken me days to get that far. It takes a village to do this much! Mucho gracias!

Soil temperature is Important When Planting Tomatoes

TOMATO COSTOLUTO

Now is the time to start planting our tomatoes and other warm season veggies outside in our gardens. So often we concentrate on only the air temperature to decide when to plant these crops but the soil temperature is actually just as important. Tomatoes should be planted when the soil temperature reaches a minimum of 60°F in the daytime. If you plant too early in cold soil, tomato (and pepper) seedlings sulk and will not be happy. Root development is very slow and the roots have difficulty absorbing nutrients. The plants could show phosphorus deficiency which shows up as stunted plants with purple leaves on the underside. If your plants get this, top dress them with some powdered rock phosphate and water in.  Nothing is gained from planting too early in the ground. This may account for why we always seem to get the bulk of our tomatoes in August and not earlier when planted outside no matter when we plant. The tomatoes will just sit there until the soil temperature is optimum.

To measure the soil temperature, use a soil thermometer. I prefer using a compost thermometer because they are much longer, usually around 24″ and can be used to check both the temperature of my compost pile and the soil in my vegetable bed before I plant tomatoes. Remember to push it in deeper into your bed as the tomato plant won’t be in the top 3″ but more likely planted deeper where the soil is cooler. I find the short soil thermometers just aren’t long enough to measure the soil temperatures more than about 5 inches and quite often I plant tomatoes much deeper. I got my compost thermometer online but I recently saw some at Payne’s Nursery here in Santa Fe.

To warm up soil sooner, you can put black plastic over the bed to pre-warm the soil. I use black plastic garbage bags that I tack down with rocks. That way I can reuse the bags later instead of buying a roll of black plastic. Leave it on for 1-2 weeks and take the temperature to see when the soil warms up to the optimum temperature. Many warm season vegetables could benefit from planting in warmer soil.

Here is a chart I found from Farmerfredrant giving the optimum soil temperatures for planting vegetables. I’m showing it here but also listed it as a pdf (soil temperatures for veggie seeds ) so you can print it out as well.

soil temperatures for veggie seeds

Tomato Class Review

closeup of striped german

Yesterday, Duskin Jasper and myself taught a 2-hour tomato class intensive at Milagro Community Garden to about 35 gardeners where we talked about planting and caring of tomatoes. In it we talked about what general amendments to add to your vegetable beds, how to plant tomato transplants, what amendments to add to each hole to boost tomato production, benefits of adding mycorrhizal, pruning techniques, benefits of adding Epsom Salts and dry milk when planting tomatoes, tomato deficiencies and tomato diseases. We also gave a demo in actual planting of these tomatoes and how to use and install Wall of Waters (to sneak your tomatoes in before the last frost date) and benefits of using row cover. Thanks to all for coming!

Here are my handouts as we ran out of them for those of you looking for them:

PLANTING TOMATOES

Tomato Deficiencies_Diseases_Viruses

TOMATO DISEASES

Mycorrhizae