Remineralization-For Better Vegetable Gardens

Last winter I read about remineralizing gardens and how it’s not enough to add compost every year as minerals will eventually get depleted too as the plants use them up. I’ve been adding compost to my vegetable garden for ten years and have created a fairly rich soil but have never added minerals or trace minerals to my whole garden. So this season I decided two things-add something to remineralize the soil and get a soil test to see how my soil was. I haven’t had a soil test done in about 4 years so I knew I was long overdue especially since I garden so intensively.

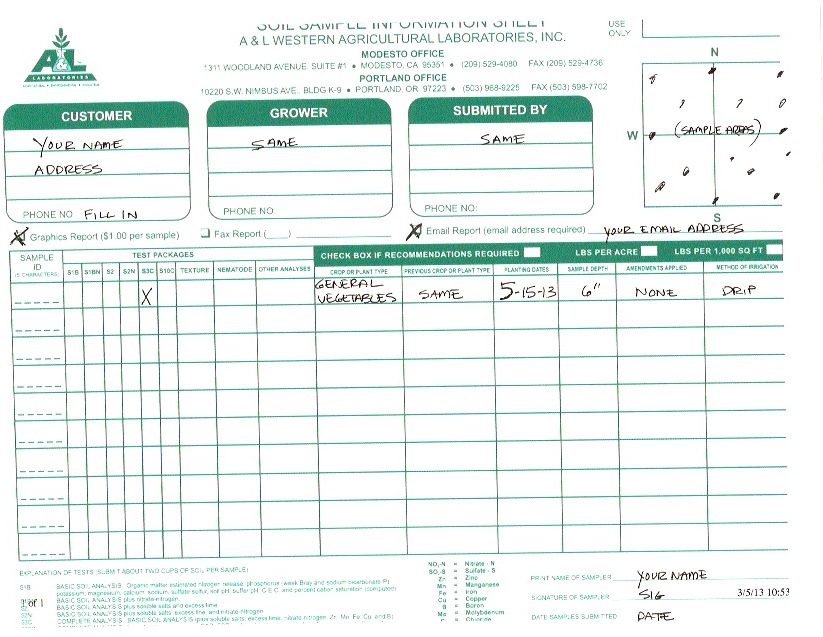
The test results showed my soil was good except it was low in manganese, sodium and iron and medium for copper, boron, salt, magnesium and potassium.

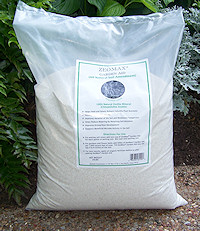
So I researched out what product I should add and I decided on AZOMITE. Azomite is a rock dust mined from Utah and is actually an ancient deposit of aluminum silicate clay and marine minerals. It is a rich source of available potash (0.2%) and over 70 trace minerals, including calcium (1.8%), sodium (0.1%), and magnesium (0.5%). I bought online a 44 lb bag of micronized (consistency of flour) Azomite from Peaceful Valley Farms Organic site but they are not the only source-Amazon sells it in smaller size bags. After I added my usual 2-3 inches of compost in the spring while prepping the beds, I sprinkled Azomite on top of each garden bed and and gently turned it over in the top four inches of soil. I also read you can top dress your plants after you have them in with it. So for my strawberry plants, I just sprinkled it on top of the plants and watered in.

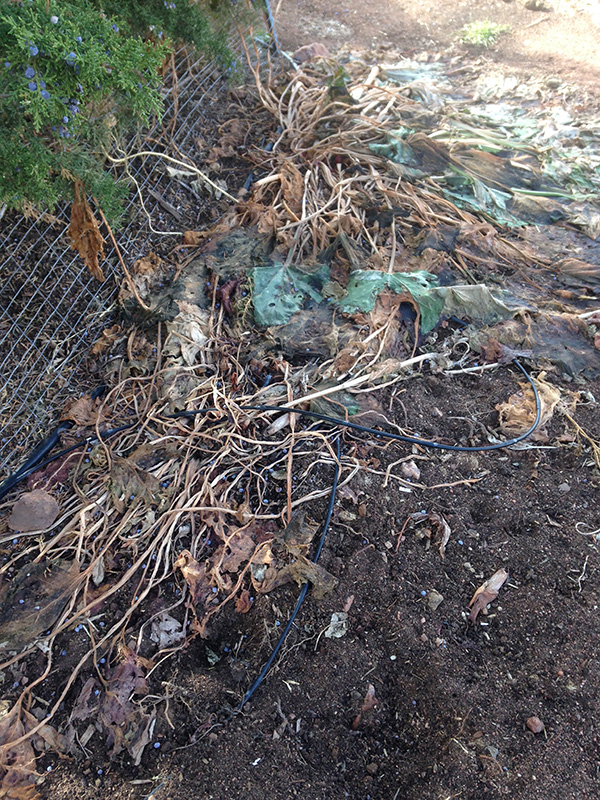
Here is my strawberries in April. It is just coming back from winter but was struggling

The results are amazing-WOW! is an understatement.

Strawberries grew 14″tall with the addition of Azomite this year

I don’t think I’ve had such a lush garden ever and I’ve had some amazing gardens. My strawberry beds went from struggling last year (part of that was the drip system wasn’t working very well but part of it was it needed something) to the tallest, happiest, most fruitful plants.

The main thing I’ve done differently this year is add Azomite. Now I know we’ve gotten some good rains in August which can only help a garden but all the plants in my veggie garden have gone ballistic growing and producing veggies-it’s like a frigging jungle.

I only used around half the bag in my 3000 sq foot garden, so a little goes a long ways. I will sprinkle the other half in next year and will get more for my perennial plants and fruit trees as well for next year. Once done, you won’t have to keep replenishing it every year but every few years, I’m going to add Azomite again.

First REAL winter storm Nov 16

winter storm_ Nov 2015a

Sure we had some light snow on November 6th but it only lasted a couple of hours and promptly melted off but it still felt like fall. This Monday November 16th we returned a day early from the San Juan River fishing trip because of a storm coming in. Didn’t want to be caught hauling an RV trailer on icy roads. Good thing we did as it turns out we had our first major snow and now it feels like winter. This pic was taken about 4 pm on Monday after coming home. We got about 5 inches total by Tuesday morning. Yikes! The garden is dead but isn’t out yet. I have to get it out soon before the ground freezes!

Final Clean Up in the Garden

Nick unloading manure

I’ve now cleaned out most of the beds except where the gourds are, the kale bed and the 2 perennials in the garden.

gourds in wheelbarrow

The gourds are drying nicely and I picked some of them this week. These are African Bushel Gourds.

rhubarb in dec

The 2 perennial plants in the garden have gone to sleep-the rhubarb and the strawberries. I will cover the rhubarb crowns shown above with straw (they look dead but they are not).

strawberrys in Dec

I will put row cover over these strawberry plants as I don’t like raking out straw from the strawberries in the spring-too much work. It is much easier to just uncover them. Look how the leaves turned red.

Since the kale is still alive, it is covered with row cover for now. I expect it to die too once we get really cold at night again.

nick closeup

My friend Nick and myself put 2 huge trailer loads of horse manure on all the beds after we cleaned them out of the dead plants  in November.

beds finished

Then we lightly turned the manure over in the soil to add more organic matter to the soil as shown above. This will break down over the winter and be ready to plant by spring. Yea! Because of him I actually got all the fall clean up done! Finally the garden can go to sleep and maybe me!

Fall garden clean up-slow and easy

Nov tomatoes

Fall is a wonderful time of the year. The pace slows down for us gardeners. The perennial plants are looking sleepy now as am I, ready for our winter slumber. I want to prune the plants as they are shaggy but don’t dare as pruning now could kill them with these cold nights.

Just about everything is done. The outside beds have been cleaned up and I only have a few more beds to put horse manure in. I cut the smaller sunflower heads (with all their seeds) and laid them on the ground for the birds – they’re  crazy for them. I just planted garlic before the cold snap and watered it and covered with straw for the winter so it will get a head start before next spring. The herbs will get compost and straw over them to help see them through the winter. I’ve built 2 big compost piles that are hot (140-150°F) that should be ready by next month but will be saved till next spring for the beds. I still have some gourds left in the field, hoping they dry ok. Gourds are always iffy about drying properly especially with our winters, at least for me. I’m waiting for them to get lighter (in weight) before I take them out.  And most important, the plants and trees have been watered since I turned off the drip systems. All this sounds like a lot and it is, but I have the luxury of taking my time now.

The only tomato plants left were in the greenhouse and froze this last week with the 13°F nights. I had finished buttoning up the greenhouse before the arctic cold blast hit but it still killed the rest of the tomatoes as the greenhouse is not heated. I’ve already planted cold hardy lettuces in there which I can harvest in December and they made it through the cold blast with some winter weight row cover over them. I put a coffee pot in the greenhouse for me when I tinker in there. Perfect! The greenhouse will be very warm in the daytime and pretty cold in the nights which is always a challenge with unheated greenhouses in winters.

The goats, horse and chicken water heaters have been turned on and fixed after discovering one of the heaters was not working. The old chickens get a heat lamp to keep them warm at night. The bees have been readied for winter. The barn cats which never came in the house last year are now coming in the house at night which is such a relief. We are ready for winter here at the little farm. Can’t wait to read a good book by the fireplace when it’s cold outside.

And lookee! I still have tomatoes in the house and here it is-Nov 15th! I will relish each one now as I won’t be getting any homegrown for a long time!


Saving water in your vegetable garden

polymer crystals2Saving water is so important now in our high desert especially with the drought. Last year I read an article on a company who created oasis in the Saudi Arabia deserts where they get less water than us. I noticed the main ingredients used were polymer crystals and a volcangenic sedimentary mineral (volcanic ash) called Zeolite, both of which absorb water and hold it and nutrients close to the root systems where the plant can use both as needed. I didn’t buy any of the company’s product because they had chemical fertilizers in it but instead experimented on my own with those 2 ingredients and adding my own organic fertilizers/amendments. It doesn’t take a lot of these 2 ingredients.  The brand of  Zeolite I got is called Zeomax Garden Aidzeomax_gardenaidbag and both that and the polymer crystals came from Amazon.com. The results were amazing.

Some of you may know that I expanded my garden last year by 1000 square feet going from 2000 sq ft to 3000 sq ft in my main garden. I put about a tablespoon of both ingredients along with my usual yum-yum mix, compost and other stuff I put in the bottom of each hole for my tomatoes. Then I mixed it up well and planted the transplant on top of the amended soil in the bottom of the hole. All of my garden is on a drip system.

I expected my water bill to go up substantially. Amazingly there was no increase in my water bills from the previous year-a savings of about 33%  (since I had increased the garden by  1/3 its size or 1000 sq ft) and I only used them on 50 transplanted tomatoes in a brand new raw garden that hasn’t been that heavily amended yet (better amended soil =better water retention). This year I’m going to use them on everything I grow. For seeds I plant, I’m going to dig a trough and amend the soil with both of these items, sprinkling it in and plant the seeds on top of it in hopes of saving more water. You can get polymer crystals at Payne’s Nurseries here in town if in a pinch but they are expensive locally and I could not find Zeomax at all locally. Amazon cost less and if you plan ahead before planting this year, I believe you could save some substantial money in your water bill and cut down on your water usage. You can also dig holes around your new plant or an established plant and mix these two ingredients with some dirt and put it back in around the plant being careful around the roots if you already planted.

Soil Testing For Your Garden

Gardeners should consider getting their soil tested to see where their soil is at-if it has adequate organic matter, what the Nitrogen, Phosphorus and Potassium levels are at, what the pH is of their soil, how high the salt content is, and calcium, sulpher, iron, magnesium levels and much more. The problem is we use to be able to give soil samples to our county extension agent and he would send it off to the state lab for analysis but that service is no longer available to us here in New Mexico. You can still get a soil analysis done but will have to send it away.

I like A & L Labs in California and have used them before. It was well worth it as I found out a lot about my soil. The first time I submitted samples and the form, I had someone walk me through it as it seems complicated but is not. So here’s how to submit your soil samples to A & L labs. This one is in California but there is another one back east if you like. They offer many different kinds of tests but you only need a soil test.

1. Go to their site http://www.al-labs-west.com/

2. Click on ‘Analytical Services’ . They have many different services but you want the  ‘Soil Analysis’ section.

3. Click on ‘Sampling’ to see how to collect the soil specimens. Follow their procedures and send the samples (I put mine in a big ziploc baggie) to the address listed along at the bottom of the ‘Sampling’ section with the money $35.00. The price may seem a little steep but when you consider how much money we spend on gardening, it is not a lot to find out about your soil.

soil analysis report

SAMPLE-Soil Analysis Report-say what??! I didn’t understand this!

Graphical Soil Analysis Report

SAMPLE-Graphical Soil Analysis Report-I can understand this much better!

4. Then go back and look at ‘Example Reports’. See examples above. I got the ‘Standard Soil Report’ and be sure to get the ‘Graphical Soil Report’I didn’t understand everything in the standard soil test but you have to get it to get the graphical soil test which is easy to read and understand.

Scan

5, Next print out the ‘Submittal Form’ and fill it out.  See example above. Put what crops you are growing and other information they ask for. I just put in general vegetables. Check off  SC3 report (complete analysis-$35.00) and check off Graphical Soil Report-additional-$1.00. (The ‘soil analysis fees’ are in the blue column on the left side of the web page if you are wondering where I got these)

6. Mail soil samples, money and form back to them. Be sure to check off email return on the form as you will get it sooner than snail mail. It takes about a week to get the results after they receive it.

New vegetable garden section update

Here is a picture of the new vegetable garden section this morning after a dusting of snow. It is now fenced completely except for the 2 gates, one of which was created today but still needs to be hung. All the raised beds are done.

My friend Adam, has been helping me and boy what a help he is! Quite the worker bee! He came out the other day and finished creating the beds except for one area that has a giant rock in it.  I swear  this rock keeps the whole neighborhood from sinking! So we let it remain (like we could dig it out-ha!) and will make an area with a bird bath and flowers to show it off.

The new garden has gone through an amazing transformation since I cleared the land last fall. I still have to put the horse manure in the new beds. It’s been a lot of work but is coming along nicely and should be ready by tomato planting time.

So many things to do for the vegetable garden in March!

Time to Get Busy!!

March is an incredibly busy month for gardeners. So many things to do (or should do) that it makes my head swim. New garden sections to make, ordering my final seeds, starting seeds inside, starting seeds outside, transplanting seedlings, amending the beds-the list goes on and on and I love it! Soon my hands will be brown again from digging in the dirt. No wonder I liked to play in the dirt when I was a little kid!

Next I will complete the new beds, finish the area around the new garden, make two gates for the new garden section to keep the rabbits out. Then I will put horse manure as a soil amendment on all the beds both new and old. My trailer was so full, my Forerunner could barely pull it. I bet I have about 2000 lbs of poop in it!  The stuff I got is still a little hot (oh really? the manure was a little steamy when it was loaded!) but will cool down over the next 2 months before I plant tomatoes. I’ll use my really aged (6 months or more) horse manure, aged chicken manure and compost for the potatoes and fava beans that will go in the old section later this month. The vegetables I plant in May will get this newer ‘aged’ manure as it will have time to decompose and cool down.

I’ve decided to put the greenhouse on the back burner until the garden is in and then have it ready for fall which makes more sense anyways as it will be hot in June.

Master Gardener Intern Class-Vegetables

I’ve been totally busy teaching classes lately and the last class I taught was the Santa Fe Master Gardener Intern Class on Vegetables. All I can say to the interns is hang in there. Yes there are some difficult classes to get through but there are some great instructional classes as well that are like a breath of fresh air. It wasn’t till I became a Master Gardener that I really blossomed as a gardener. And now I am a rabid gardener! The knowledge you will continue to gain afterwards, the contacts, camaraderie and friendships you will develop will help you grow as well as the plants you will be growing! Hopefully you enjoyed and learned a lot from the Vegetable class. (Yes it was my favorite class when I was an intern!) So for those of you who couldn’t come to class or aren’t in the program but are interested, here are the information sheets. I want to make them available to all.

VEGETABLE GARDENING IN SANTA FE  gives an overview of vegetable gardening in Santa Fe.

INFORMATION SHEET covers what the differences are  between an Heirloom, Hybrid and GMO plant and explains what mycorrhizae fungi is and how it helps plants grow.

HERBS is a list of perennial and annual herbs we can grow here in Santa Fe.

PLANTING TOMATOES and PLANTING SQUASH both address how to transplant them into the garden and some of the things I add to help grow these beautiful vegetables and also how to help thwart the dreaded squash vine borer and squash bugs.

SEED STARTING DATE CALCULATOR from Johnny’s Seeds is the same one from the previous post but if you didn’t read it, then here it is. A great tool for when to start seeds or transplant them into the garden.

And now if you will excuse me, I will continue starting my seeds inside! Perfect day-cold, windy and snowy!

Fall Garden Projects-First up-putting the pumpkin patch to rest

Horse manure on top of pumpkin patch

I’ve been really busy this fall around the garden since the Pumpkin Bash. It seems like I never have time to do any projects when the garden is going so I try and get some of the projects done in the fall before the dead of winter. Last week cleaned out the pumpkin patch and then I rented that Bobcat where I spread out about 4 yards of horse manure on top of it. I really needed to dig it in or it would blow away before spring.

giant rototiller-16 hp

So yesterday I rented a giant rototiller (16 hp) and plowed in the 4 yards of manure, 50 lbs dried molasses (it smells so sweet), 50 lbs mushroom compost (are we cooking here?), and 50 lbs of gypsum (for calcium-makes strong bones, I mean strong plants!) in the pumpkin patch.

final pumpkin patch done

Now it looks so beautiful and is ALMOST ready for next spring! I still have to dig in some leaves (in the holes where I will be planting the pumpkin plants next spring) and a little (I mean very little) composted chicken manure to start the decomposition process so they can decompose over the winter and become leaf mold or should I say leaf gold by spring. This will be the third year for this pumpkin patch and boy what a difference three years makes when you add amendments each year. It’s starting to look good and the rototiller just cut through it fluffing it up together. I don’t like to rototill very much because of how hard it is on the soil microbes but felt that I needed to do it for now since this dirt was so void of any organic material and hard as a rock. I think after this year I’ll won’t have to do it again. I will add more mychorrizial next spring to help replenish the soil microbes.

My Future Veggie Garden (can ya see it!?)

MY FUTURE GARDEN-CAN YA SEE IT!??(click picture to see bigger)

Well, I told everyone on my blog and in the Master Gardening classes about Arrow Ranch’s free horse manure here in Santa Fe that they load for free  and when I went to get some, they were all out! So I had to scrounge around to find some OLD manure and finally did in Eldorado horse stables. Went and got 2 trailer loads full and got it all dug in main veggie garden except for 3 small beds that I will finish up this week. I will hook up the drip system and make sure it is working also this week. Here is a picture with what will be! Not much now but just you wait!

We’ve been having some great weather, but this week it’s suppose to get cold at night again so I think unless the weather changes, I will wait till next week to plant tomatoes. Now all I got to do is wait for good weather…

10 Things to Do in March in the Garden

Now is the beginning of our season for fruit and vegetable gardeners. I got my light boxes out! Woo! Hoo! Here we go! Here are 10 things to do for or in your garden this month.

1. Finish ordering your seeds or getting your seeds if you haven’t already.

2. Get your light tables and heating mats out and ready to go. Use florescent lights that are at least 3000 lumen. I use the daylight ones. They produce less ‘leggy’ veggies.

3. Start tomato, pepper and eggplant seeds indoors to set out later as transplants depending on variety.

4. Finish your garden plans

5. Get your soil tested to see what amendments you might need to add to it.

6. Put  horse manure that has been aged for at least 6 months on your garden beds and dig in. Don’t put on ‘hot’ manure.

7. Hurry up and finish pruning your fruit trees. Not much time left.

8. Spray your fruit trees with dormant oil before their buds turn color to smother any dormant bugs.

9. Water your trees.

10. Plant COOL SEASON vegetable seeds OUTSIDE on ST. PATRICK’S DAY.  Some varieties include carrots, beets, lettuces, spinach, arugula, bok choy, swiss chard, onions, brocolli, cabbage, peas, radishes, mustard, kale and other greens.

The garden is CLEAN.

Finally-done.  It only took 4 months but the garden is finally ALL raked up and I put it in my trailer. Then I  took my trailer that was overflowing with all the garden debris to the dump. I don’t keep any of the dead plants because I don’t want any possible disease or pests harboring in my compost-especially in winter when it doesn’t get so hot. It all came out to 600 lbs! That’s a lot of loading.. and dumping..

Testing Your Garden Soil

Not having great soil is really a problem here in Northern New Mexico and makes growing anything a challenge. Having good soil where you want to plant veggies is the most important thing you can do. People ask me all the time how do I grow such great veggies and the secret is-it’s all about the soil!  So the more we learn about how to improve our soil the better our growing results will be. So read on.

Here is an excerpt from Payne’s Nurseries site here in Santa Fe on ‘How to Build Your Northern New Mexico Soil’ which is worth reading in it’s entirety.”We have three basic types of soil here in Northern New Mexico: caliche, adobe and sand. All are alkaline, with a pH often over 7.0, and tend to contain abundant quantities of sodium, calcium and potassium. Caliche, adobe, and sand all lack organic matter, the nutrients and organisms of which are essential for sustaining high quality plant growth and production. Caliche is made up of sand, gravel and clay. Adobe is essentially fine clay. Neither soil type is easily penetrated by water. Sand, on the other hand, allows water through but has a limited ability to hold nutrients or moisture.” Check out the article. Most of us have some combination of these 3 types.  Fertilitzers feed the plant but not the soil which also needs to be fertile and more and more people are just learning that.

One of the things I mentioned in an earlier post is I’m getting a soil test specifically for growing my giant pumpkins and I will get one for my veggie garden where I grow tomatoes also. I researched where other pumpkin growers are getting their soil analysis done and I will use A & L Western Laboratories in Modesto, Ca for mine as they can test for any crop I specify versus a general soil test. My fellow pumpkin nuts tell me to get the  S3C COMPLETE Analysis package from A & L and to get the recommendations as well. The soil sample collected should be a composite from 10 to 20 locations within a selected area; a sufficient number to “average out” variations. You can learn how to properly take soil samples from them here. Other soil testing companies may have other protocol so check with whoever you use as to how they want you to collect soil samples.

There is nothing wrong with getting a general soil test (instead of for a particular crop) and that is what I would get if I didn’t grow competitively but I want to get the most out of my soil for my pumpkins.

You can also get a general soil analysis from a NMSU laboratory here and you can go to NMSU Soil Test Interpretations site to learn what your test means. Reading the tests isn’t easy but once you get one done you’ll be better able to understand what needs to be added to your garden for next year’s growing season so you can have a wonderful lush, productive garden next year. I’ll post what the results are as soon as I get them back.

summer squash and cucumber seeds in

When I think of all the things I still need to do in the garden, I’m overwhelmed.  So I break all the things I need to do into bite size projects and surrender that it will get done when it gets done. Yesterday I was  down in the main garden preparing some holes and adding amendments with composted horse manure, fertilizer, rock phosphate and mycorrhizal in it. Today I planted the summer squash and cucumber seeds in them. Thirteen of my 35 tomatoes look pitiful. Luckily I have some more to replace them which I will do by the end of the weekend. They either froze or thrashed by the wind-tough winter and spring. Tomorrow I need to focus on a glassblowing workshop we are doing so looks like I wouldn’t get back to it till Saturday.