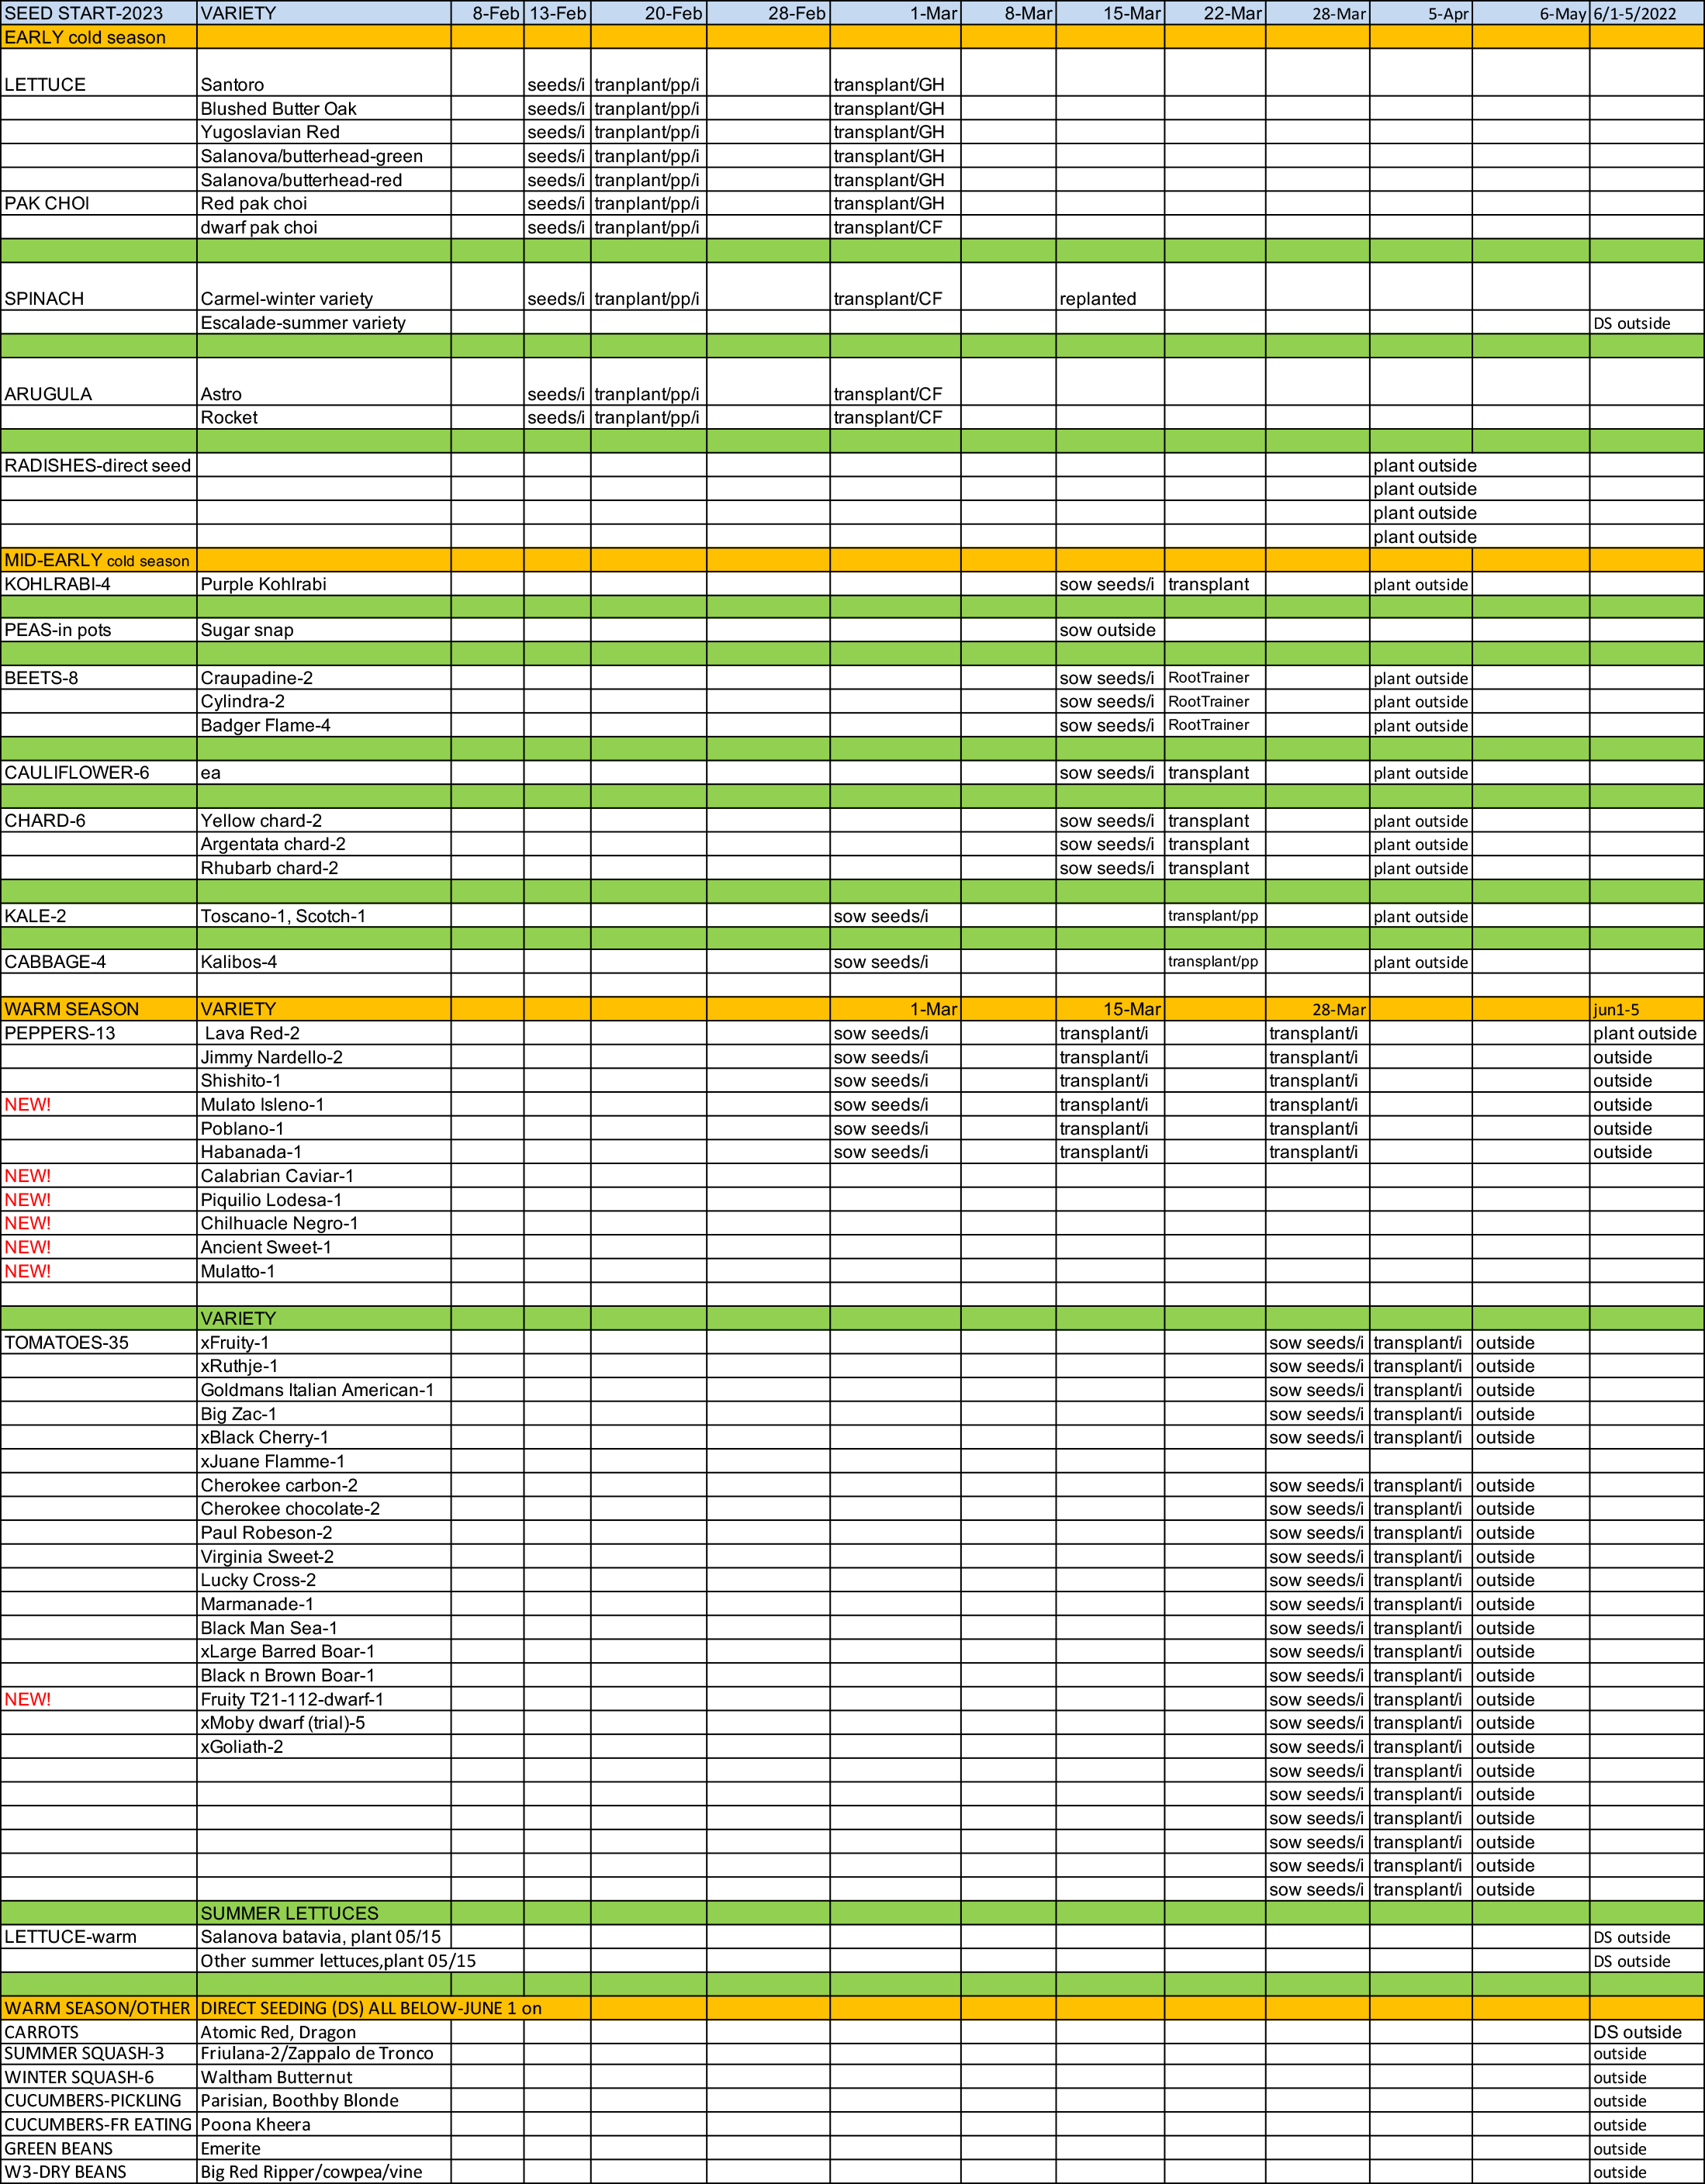
Greens/lettuce seeds started inside January, 2026 (this is an updated post with more current info from a previous post here on my blog).
I’m trying to grow cold season crops even earlier inside in 2026. I planted some lettuce and greens seeds.
Here’s how I did it:

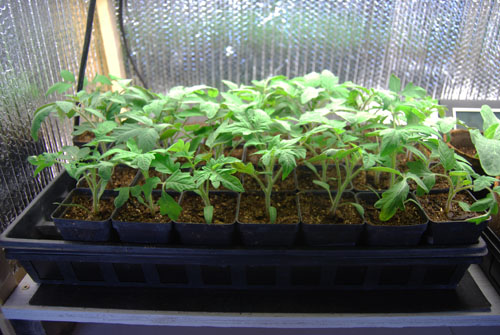
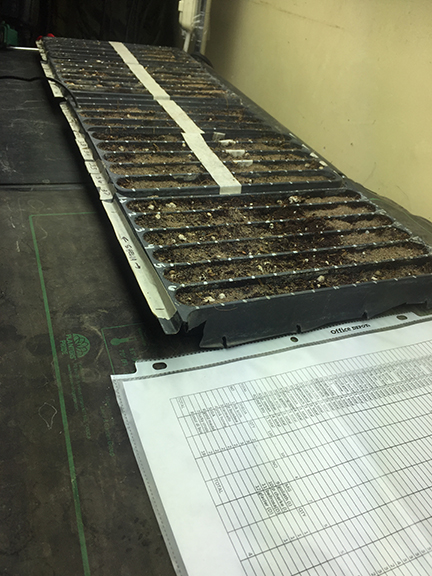
I cut this tray into thirds but you don’t have to. You can keep the tray intact.
I like shallow containers to start SMALL seeds as it is easier to get the correct soil temperature needed for germination and I can plant a lot of seeds in a small space. Bigger pots for small seeds are harder to get the soil temperature correct. Optimal seed germination temperature for greens and lettuces it is 65-70 °F and it should take between 7-10 days to germinate.
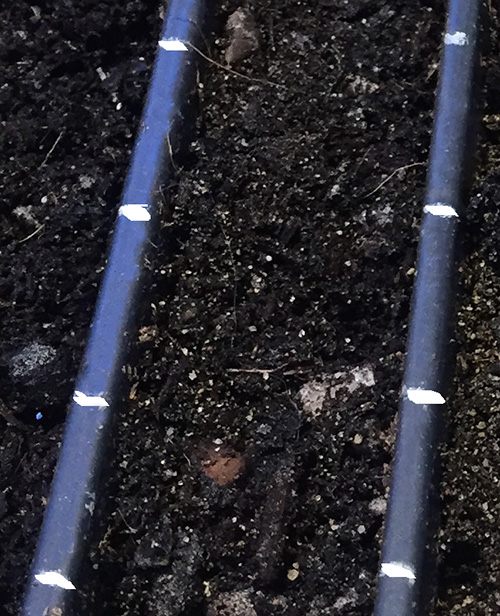
I mark each row every inch and plant a seed there
Before I put in the seeds, I marked each row with a dot (I used a silver sharpie) one inch apart so I could evenly space the seeds and that way I can also see if a seed germinated by that dot.
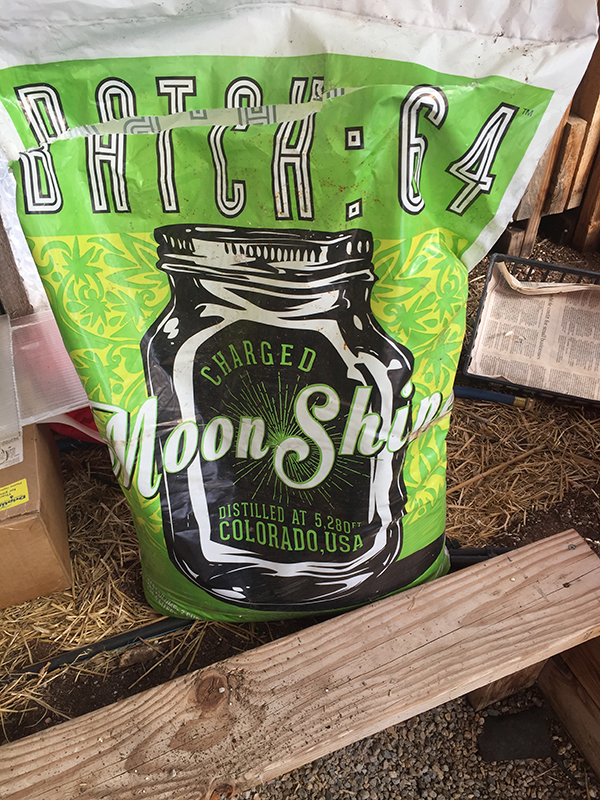
I use to get ‘Moonshine’ from Agua Fria nursery here in Santa Fe but now it’s called, ‘White Lightning’-same great product, a different name. Only at Agua Fria Nursery here in town. I don’t know if you can find it online. I pre-moisten the soil. Don’t plant seeds in dry soil and keep the soil moist. Picking s good soil or starter mix is important. Many people have shown me their plant basically suffocating from too wet of soil that never dried out You want planting soil that dries out and White Lightning works great. Everything germinates sooner in it.

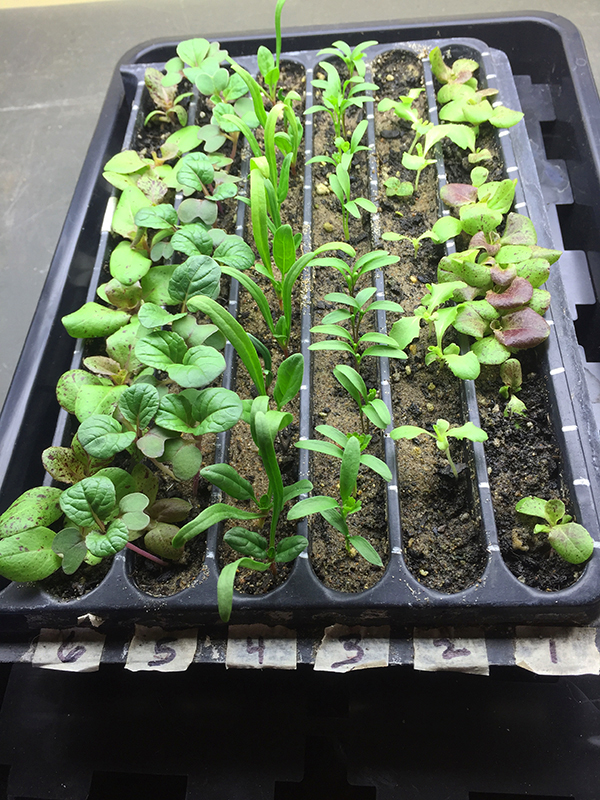
Put kiddie (play) sand on top after putting seeds in rows.
I used a pencil to make a small hole in the White Lightning and put a seed in it. Afterwards I put ‘kiddie’ play sand over each row to cover the seeds and pat it down. Small seeds can easily break through the sand when germinating. I would use bigger pots for larger seeds. You must keep the soil moist at all times till they germinate. Because the trays are so shallow, I only have to mist the pre-moisten soil with a sprayer, sometimes several times a day. You could put a clear top on it till germination happens. I never put the trays under a faucet to water as that could move the seeds around.


Here I have them sitting on a heat mat but I don’t turn the mat ‘on’ for greens. For greens/lettuces I put the probe in the soil to see what temperature it is at with the thermostat. I find for greens/lettuces the lights above the seed trays provide all the heat needed to stay in that temperature range. Here the thermostat reads 66°F. I’ll turn seedling heat mats on later for warm season crops like tomatoes which like the soil temperature much warmer for germination. The thermostat is great for controlling the temperature.
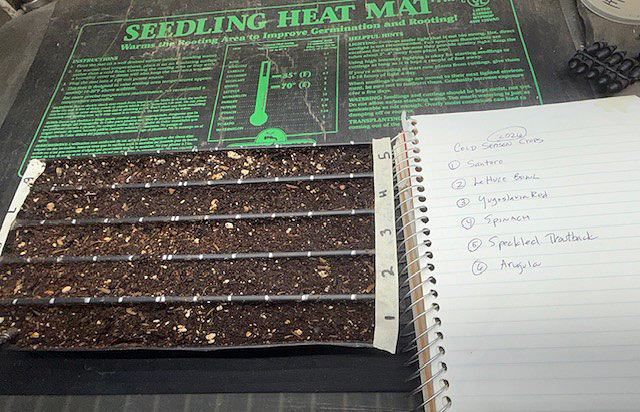
I identify each row with a number and then keep a record of what each number represents instead of trying to write down what it is on that little piece of tape. There are 12 dots so that means since there are 6 rows in each ‘mini-flat’ that there are 72 seeds in this tiny space! After they germinate and their first two true (cotyledon) leaves appear, I will transplant them each plant into a 4 pack and from there directly into a cold frame, low tunnel or greenhouse. Still too early to throw them outside without protection.
Here is what I planted:
1-Santoro butter lettuce
2-Lettuce bowl-loose leaf
3-Yugoslavian Red lettuce-butterhead
4-Carmel Spinach and Escalade
5-Forellenschuss (SpeckledTroutback) lettuce-romaine
6-Arugula
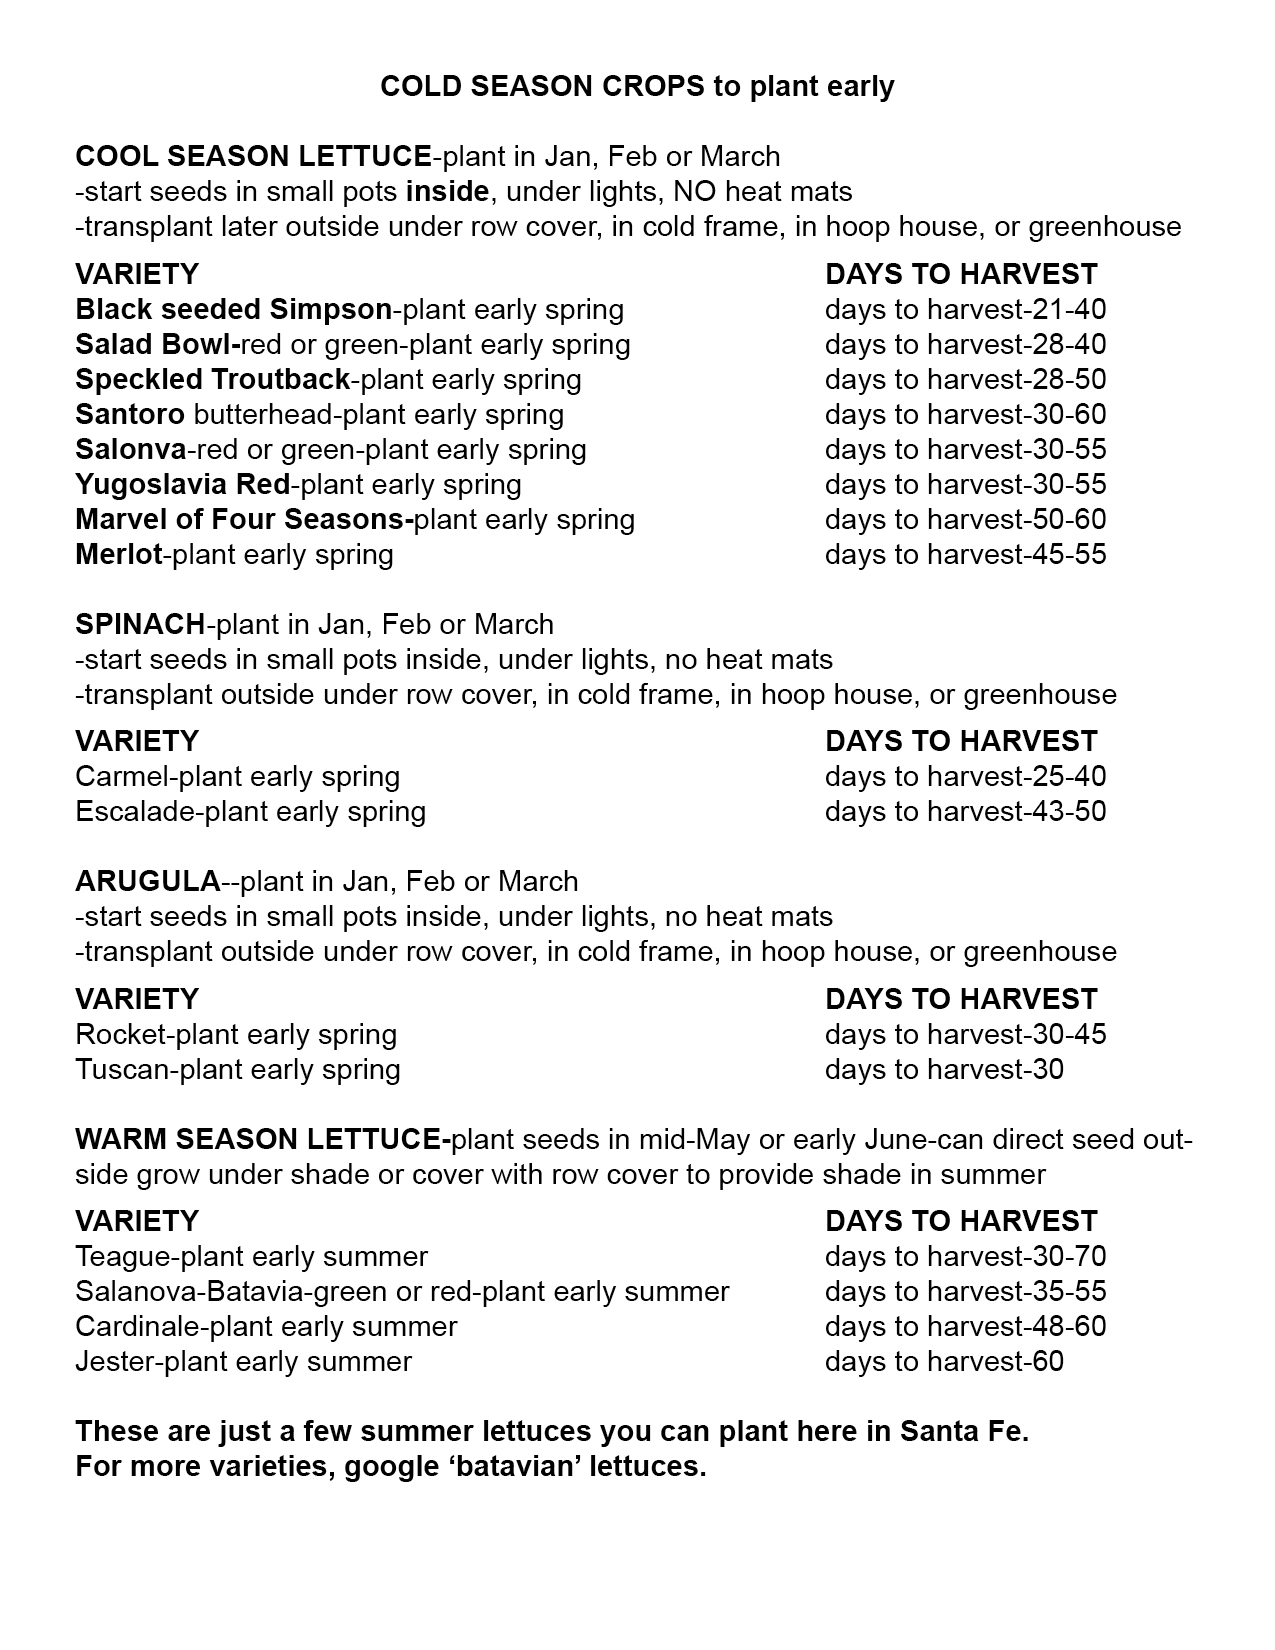
NOTE: Cold season crops-Left is a Days to Harvest chart, to help me decide what i want to plant and when. Some plants have a much shorter days to harvest and others take longer. When it says 30-50 days to harvest that means you can start harvesting as early as 30 days after germination by taking the outer leaves. The higher number is if you want to harvest a mature head but you can harvest anytime as well. Here it is as a pdf for you to print COLD SEASON CROPS to plant early-days to harvest
And lastly, here are some previous posts on this subject from my blog here:
https://giantveggiegardener.com/?s=lettuce&submit=Search


 The
The