Create a Garden Hotbed using an Old French Technique

Hotbeds have been used for hundreds of years. Hotbeds are basically the same as a cold frame, but use manure with compost as a heat source in early spring. In France, when transportation was done by horses, not cars, people would take the stall litter which was a mix of manure and straw for heat and make what is called a hotbed. They surmised the bed would get warmer as the manure decomposed and they could start some crops earlier while getting nitrogen in the soil. You can use this method in greenhouses, cold frames or poly-tunnels on top of your raised beds.

The only thing is if you use horse manure, you need to ask whoever you get it from if the hay they fed the horse wasn’t sprayed with an herbicide (like Roundup). Herbicides are weed killers. You don’t want to use any manure with an herbicide in it as it lasts for 4-6 years in the soil and will kill anything you want to grow. Basically it will ruin your bed. Having said that, our hay comes from a safe source. As a thought, you could use bagged cow manure but know that it is hotter than horse manure so it should probably age a little longer-use a soil thermometer to make sure your soil is not too hot.

Looking back in my notes, here’s what I tried in January 2020-I took out all of the soil in my center raised bed in my unheated greenhouse and put the soil on a tarp to put back in one of my other beds. I then put about 14-18″ of hot horse manure and 6 inches of straw in a wheelbarrow and mixed them up. Then put the mixture in the bottom of the bed and packed it down lightly and watered it till it was moist but not soggy. I then added 6″ of homemade compost/soil on top of that leaving a couple of inches of free space at the very top of the bed for plants. Then I watered again. A few days later, I put a compost thermometer in the bed and saw that the temperature had come up substantially deep inside in the manure/straw mix. It will get from 125°-150°F in the beginning but will come down pretty quick by the time you put your transplants in later. I didn’t take the temperature at the top compost layer but the fresh horse manure/straw mix got the compost in the top layer warm, and the 6″ of the aged compost kept it from getting too hot.

If you have a cold frame with a lid or plastic tunnel over a raised bed, you could do the same as in the top photo with spinach in it. I have one cold frame that I use in this way in the spring as well. It isn’t dug into the ground (like in the diagram above-not in my ground-too hard!)) but sits on top of the soil so I put some straw bales around the sides to add some insulation to it.

While the manure was cooking, I started lettuce/spinach seeds inside under lights (with no heat) in late January which took 3-4 weeks to get big enough to transplant in that top layer during which the soil temperature came down more as the manure mixture decomposed. Do not plant in the manure section but only the top compost/soil layer.


Once I planted them, I still had to cover the greens with medium weight row cover at night (and I double it up with layers of row cover on it if the weather was going to be very cold in the day/night (like it is now). It worked!

It was a fun project to learn how to make a hotbed and how ingenious people were in the old days!

Happy New Year!

Ok, I for one am glad 2022 is over and looking forward to a new year and a new growing season. But I have much to be grateful for despite my dismal yield of tomatoes last season. So instead of looking at the negative which there is plenty of that in the news, I’m going to focus on the positive from last year’s garden. So here are some of the successes in 2022:

-Because we had such a good rainy season (monsoons), my annual flowers (in fact all my flowers, perennial and annual flowers were absolutely fantastic. All the annual seeds I threw out on the ground (I didn’t even start any inside last season) came up and in fact I had to thin out some of them to keep from overcrowding. I don’t think I have had a more beautiful flower garden inside the veggie garden.

-Actually most veggie crops did well for me except the tomatoes. All cool season crops continued to produce very well throughout the summer because of those rains and cooler temperatures-kohlrabi, kale, chard, lettuce, onions, potatoes did great.

-The raspberries and finally the blackberries  produced LOTS of berries, again because of the rains. Still, no salmonberries or honeyberries last season but am hoping for their berries to show up this year.

-My winter and summer squash did exceptionally well with very little disease-I grow butternut squash and Friulana summer squash because they usually don’t get many (if any) squash bugs. Only one butternut squash out of 8 squash got them but it is interesting to note that all the butternuts were crowded in one bed (as in overflowing) so they were all very close together and only one plant got them and none of the rest got them and no squash bugs or disease in the Friulani summer squash plants either.

-I grew Yukon Jack potatoes in 2021 and that harvest was dismal. But in that same bed I had 5 volunteer potato plants that came up and produced very well and most were good sized spuds. I guess I missed some of the teeny-tiny potatoes during the previous year but again with all the rain, it was a good harvest.

-My carrots were bodacious! I still have about 10 lbs stored from this last season. I really liked the ‘Dragon Purple carrots with their dark purple skins and bright reddish orange flesh inside.

-The Italian dry pole bean variety, Casalbuono di Panzareidd, a white bean with red splashes was super productive and super tasty.

So as we enter the new year with many new growing possibilities, I get excited with new hope for a great 2023 growing season. I wish you all a happy new year where you all prosper and flourish in your gardening and personal lives.

Tips for Ripening Green Tomatoes

Get Ready for cold weather. We’ve been waiting all season for our tomatoes to ripen. What do we do when you know that a hard frost is going to hit and you still have lots of green ones on the vine? After ripening green tomatoes inside, I’ve had tomatoes into November and then I’m done. I won’t eat another tomato till the following season-July or August. A long wait but consider me a tomato snob as the store-bought tomatoes are never very good.

Tips on ripening tomatoes inside:
-Become a weather bug-we should check the weather for when the first freeze will arrive which historically comes mid-October here in Santa Fe.

This week Sunday through Monday is forecasted to get pretty cold at night–down to 34°F. This is not freezing (32°) but I will check the weather again on Saturday to see if it changes and if they predict a freeze or not. If it stays above 32°F, I will leave them as quite often we can squeeze out a few more weeks of decent weather for them.

-Pick em before the freeze-Pick all decent size green tomatoes and ripen inside. Leave the little ones. Ripening green tomatoes will never taste as good as sun-ripened tomatoes but they are still much better than store bought tomatoes. If you pick after the freeze, they will be ruined.

-Sort the tomatoes-Sort from rock hard green to almost ripe and put them in grocery paper bags and fold over the top. That way you don’t have to go through each bag every day and pull out the ones that are ripening sooner.
 Put them 2 layers deep.

-Use a slice of apple-In the bags with the green ones, I will put a slice of apple in the bag to help encourage ripening. An apple releases ethylene gas (the tomatoes produce this as well) which helps the ripening process. That is why you fold over the bag to help trap the gas that both the tomatoes and apple are releasing.

-Check bags every few days-When they start to change color, I pull those out and put them in other bags where they are all similar in the ripening stage.


-Leave them stem side up-they won’t rot as quickly.

-Almost ripe tomatoes-When your tomatoes are almost ripe, to increase flavor, pull them from the bags and place in a warm spot in your house a couple of days before you want to use them.


-Storage-Be sure to store them in a room that is at least 55 degrees. I made the mistake once and they didn’t have much flavor and many didn’t ripen at all. If they won’t ripen or aren’t flavorful they were probably stored in too cool a place or perhaps they were too small to begin with.

-Green tomatoes-Lastly you can always pickle green tomatoes or cook with them!

Better gobble up all the ripe tomatoes that you can! Soon the season will be over and we will be longing for flavorful ripe tomatoes again!


Borlotto Beans

Borlotto beans in the garden

Last season I planted a new dry pole bean called Borlotto  (also called Borlotti). They are an Italian heirloom variety. The variety was Lamon which is supposed to be the best for flavor. It got around 6 feet high and I grew it in the garden on one of the 3′ high perimeter fences. As it got taller, I added bamboo stakes to let it continue upwards. They are a very beautiful bean on the vine when growing. I planted around 12 plants, 6 inches apart right at each drip emitter. You can shell the bean fresh but I just left them to dry on the vine.  I got my seeds from Seeds of Italy.

I particularly like dry beans. I picked them after they dried on the vine which is towards the end of the season but before the first freeze. I find dry beans are so easy to grow, needing nothing except water and a vertical support of some kind and then harvesting at the end. They are very different then fresh beans which you must pick daily. There is also a bush variety of these beans but they are not Lamon.

I left them in their shells in a basket until last week when I took the beans out.  I find it fun to shell them on a cold winter night. The beans are very beautiful being cream color with maroon stripes. I got 3 cups of the precious bean. Good for 1 meal.  I will save some to replant too. This year I will definitely plant more.

Tuscan Bean Soup recipe from Ialian Food Forever

I like that I can make a hearty soup or stew from them and eat them in the winter. Here is a recipe from Italian Food Forever for a traditional Tuscan bean soup using Borlotto beans. When cooking the beans before hand, you must cook for a long time here in Santa Fe due to our high altitude at 7000 feet as you want them soft and creamy. I just cooked mine in a crock pot all day and it worked well. You can also leave out the pancetta for a vegetarian style soup. There are many recipes for Borlotto bean soup out there that all sound wonderful! Can’t wait to try them.

Here are some successes in the garden from failures

Not everything I do is successful in the veggie garden. So I want to share some of the veggies that failed and successes that followed. The point here is be flexible and don’t give up. If something doesn’t work, try something else.

Failed: Sweet potatoes/Success: watermelon– I planted sweet potato starts just before I left for a fly fishing trip. I got the new drip system in place and planted them and forgot to turn on the drips to that section in my haste. When I came home, all were dead. So I planted a Moon and Star watermelon plant in their place. Didn’t think there would be enough time to get any to ripen but got 4 nice size ones ranging 10-15 lbs. Sweet!

Failed: Giant pumpkins/Success: Charentais melons-I didn’t start my giant pumpkins this year but instead just planted seeds directly in the ground. Wrong! Nothing came up. Learned a lesson there. So I planted Charentais melon plants as I always wanted to grow them. They produced about 10 wonderful melons. Supersweet!


NEW! ‘Veggie Gardening 101’ radio show starts Jan 14

I’ll be on the Santa Fe Master Gardener’s Gardening Journal radio show with host Christine Salem twice a month now. My original show gives tips and advice about what to do in a vegetable garden each month as the gardening season progresses. This assumes you have an existing vegetable garden.

We are adding a Vegetable Gardening 101 show. It seems we have many people here in Santa Fe that either have never started a garden or haven’t had success here in our challenging garden area. Many want to be successful organically growing their own food and need help on where to start. So I will take us from the beginning through planning and building a garden, creating good soil, raised beds vs in-ground beds, starting seeds, transplanting plants, varieties that grow well for beginners and even harvesting tips. This will be more basic info but even advanced gardeners might benefit from some of the tips I’ll be giving.

Go here to listen to past radio show podcasts and pick up awesome information -https://giantveggiegardener.com/radio-show/

Here’s the rundown:

SHOW #1—my regular radio show-‘Monthly Veggie Garden Tips’

Where:  airs on KSFR 101.1 on the Garden Journal

When: on the last Saturday of each month

Time: from 10:00-10:30am

Topics: What to do in our gardens for each month, problems that arise and solutions

SHOW #2—my NEW radio show-‘Veggie Gardening 101′

Where: airs on KSFR 101.1 on the Garden Journal

When: on the 2nd Saturday of each month

Time: from 10:00-10:30am

Topics: Beginning vegetable gardening from start to finish and everywhere in between.

Growing Season for 2016/Fall Harvest

fall-harvest-crop_nov-2

Fall harvest in 2016-tomatoes, beets, carrots and kale are just a few of the vegetables still being harvested here on my micro-farm

This has been a most remarkable growing season this year. In fact, I can’t remember in all my 21 years here of weather like this. After two months of unseasonably hot summer weather at the beginning (when the tomato blossoms dropped because it was too hot) and then two months of very cool summer weather (when the tomatoes didn’t want to ripen because they need heat to ripen once they are set) we now have been in an unbelievably wonderful fall. Nice and warm in the 70’s in the day and cool but not freezing nights.

But all this is going to change very quickly now that we are in November. Weather prediction is for it to change to colder weather. Like duh, it’s NOVEMBER dude! Of course it will get colder! My fruit is done-apples (we made hard cider!), apricots, grapes, strawberries and raspberries are done here. Most of my warm season crops are gone (cucumbers, squash, peppers, eggplants, pumpkins, corn, etc. except the tomatoes, my favorite crop!)

Meanwhile the fall harvest continues with tomatoes still ripening (at least this week) and all the cool season crops are kicking it and should be for quite some time if I cover them with winter weight row cover. The kale is going gangbusters, cabbage is ready, onions and potatoes are ready to harvest, carrots and beets are ready to be dug out too and chard is busting out all over.  My broccoli and escarole I planted in August at my fall garden class are almost ready too. Then pantry is bursting and the refrigerators and freezers are overflowing too! Enjoy what we still have left of this season!

Organic Pesticide and Disease Control Class Review

class pests picToday I taught the Organic Pesticide class and added Disease Control too as we are or will  be dealing with pests and disease soon in the middle of the gardening season. The class was great and we had good comments from some of the attendees. I talked about what’s going on the our gardens now and what insect and disease controls we can implement. Attached is the pdf from the class for anyone who wants to know what I do.

ORGANIC PEST and DISEASE CONTROLS

Also attached is the pdf with photos of certain insects that may be attacking our plants now as well. This is in color so it would be a great reference for you to keep when you need to identify a bug you may think is a pest.

CLass pests pics

I recommended the book, Good Bug, Bad Bug for everyone to get which is a great ID book that will show which ones are good beneficial bugs and which ones we consider pests and what crops they attack.  I got mine at Amazon.

Good Bug Bad Bug book

Then we walked around the community garden and looked for plants that are being attacked or are sick and I showed everyone the plants so hopefully it will help them go back to their gardens and look at their plants and see what is going on.

Other than the heat, I thought the class was great. Thanks to all 20 of you that attended!

What’s up in the garden!

20140403122458-Meraviglia-di-venezia-a-grano-biancoStill catching up on what’s up in the garden. I planted a new bean called Climbing pole French Bean – Meraviglia Venezia that I bought from Franchi Seeds. It’s a Romano type of bean only yellow in color. I wonder what it will taste like. I also planted Emerite french filet pole bean from John Scheepers Vegetable seeds and a Chartreuse leaf colored scarlet runner pole bean which I grow for looks as the bright yellow-green leaves look fantastic against other greens.


Detroit Red beets, Craupadine beets and Atomic Red carrot seeds were planted directly in the garden. I put row cover over all of them to keep the birds from eating the bean seeds and to keep moisture in the ground for the beets and carrots.  If you’ve had trouble with birds eating germinating seeds, put row cover over them till they get about 3 inches tall. The Detroit beets and carrots are coming up nicely but the Craupadine beets are not. They are so hard for me to germinate compared to other beet seeds-still I try as I love the flavor of them.

cuke transplantsCucumber seeds planted in 2″ pots in the greenhouse at end of May, have germinated and will go into the garden today-June 15. The varieties are: Poona Kheera cucumbers (best tasting slicing cuke ever-never get bitter), Parisian cucumbers (I will make Cornichon pickles out of them), Boothby Blonde cucumber seeds will become Bread and Butter pickles and National Pickling cucumber seeds which will become dill pickles. Can’t wait to make pickles!

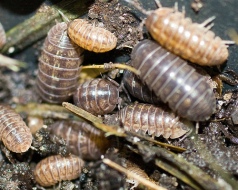
Pillbugs_(Armadillidiidae)Last year and every year before, I planted cucumber seeds directly in the ground but roly polys ate my cucumber seeds as they germinated last year in the soil. Roly polys, sow bugs, pill bugs, potato bugs are sort of interchangeable names for Armadillidiidae. They are actually good composters of horse manure so they are great in a compost pile but can damage small seedlings as they germinate in your garden when you plant seeds. Last year, I thought it was a cut worm eating all my seedlings, but found the roly polys instead to be the culprits. I had to plant 3x before I could get enough up and only after I sprayed them with Neem did I have success. This year I pre-started them in the greenhouse in 2″ pots to get them a little bigger. I find when seedlings are bigger, the roly polys don’s bother them anymore. They only like the young tender seedlings as they emerge.  If they do eat some of my other seedlings that are direct seed planted, they will be toast as I will spray Neem Oil on the roly polys on the soil where they live to get rid of them.

Rogosa-Violina butternut

Rugosa Violina Butternut Squash

The winter squash varieties I’ve planted are Rugosa Violina Butternut and Waltham Butternut. I grow Butternut squash because it doesn’t attract squash bugs! It’s the winter squash to grow if they are a problem.


calabacitas squash pic

Calabacitas squash

I’m also growing ‘Tahume’ Calabacitas squash which is really a winter squash picked very immature-we eat it like summer squash out here in Santa Fe especially in the dish called Calabacitas, which is a mixture of sauteed onions, corn, Hatch green chili and calabacitas squash. I got this from Botanical Gardens seed company. Very yummy!


costata romanesco

Costata Romanesco zucchini

Summer squash varieties I started are Costata Romanesco zucchini (best flavor ever) and ‘Bennings Green Tint’ patty pan. If I hadn’t had such trouble with the rolly polys last year I would just plant the seeds in the ground and you should too if they are not a problem for you. The soil has warmed up nicely—over 70°F which is perfect for squash seed germination.


bennings-green-tint-scallop-squash

Bennings Green tint summer squash

Should be done with all veggies planted this week. So if you think you are behind in the garden this year, don’t worry, you’re not alone!

What’s up in the garden!

I’ve been busy in the garden. Which is why I haven’t written lately. Hard to write when so many things need to get done. Here’s the latest update.

WEATHER: How about this crazy weather? Hot, cold, hot. Go figure! That’s how it is this time of year. It actually hailed 6 inches last Saturday between Harry’s Roadhouse restaurant and Seton Village Drive on Old Las Vegas Highway-a very small section of land. Drove through it right after it happened-would not have want to been in that one. Luckily we didn’t get much hail at the farm-thank you universe! Just missed us. One friend of mine was not so lucky and all her veggies got wiped out. Now it is getting warm again.

HARVESTING: Still harvesting lettuces and spinach. In fact I picked almost all the spinach as it will bolt soon with the warmer weather and the lettuce will also bolt soon, so much of that is picked too. The old kale is done now. The new kale ready to go in. The rhubarb is fantastic with many stalks ready to pick. I feel a strawberry-rhubarb gallette coming soon!

PLANTING: The main garden is about half weeded-Ugh! But the beds are all cleaned up and ready for all the tomatoes that will be planted next Wednesday. Now I just have to finish weeding the pathways.

DRIP SYSTEMS: The drip systems are now up and running. I hate it when they act up. Sometimes it takes 2-3 days to get everything going and not leaking. Feels great when it’s done. I can’t believe it went as smoothly as it did this year.

GIANT PUMPKINS: My first giant pumpkin was planted today at my friend, Deborah’s house. Hope it does well out there! Still have 3 more to plant next week here in my garden plus I have some giant long gourds and 2 giant zucchini (marrows) to put in. I’ve had trouble the last 3 years with getting any of my giant pumpkins successfully grown. Hopefully one of the pumpkins will do well this year. I have a plan!

DEER!: We had some deer come and eat all the Orach (which is ok) and half of one of my grape plants (which is NOT ok). Ate the leaves and the flowers of what woulda been future grapes. I covered the rest up with row cover. Hopefully they will not explore and find the plants. There is not much in the main garden to eat so hopefully they will move on. Luckily they did not eat the garlic plants!

MORE PLANTING: The peppers and eggplants starts will be planted the first week of June and the seeds of other warm season crops will go in next week too.

Busy time of year! Phew!


Tomato tapenade


tomato tapenade all tomatoes

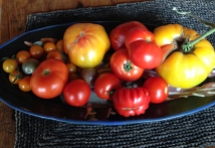
Being the Tomato Lady I have lots of tomatoes. One of the things I’ve done with my tomatoes, especially my older ones is making tomato tapenade. It’s easy to do and is so yummy you’ll want to make more with any tomatoes you can get your hands on at this time of year. The picture above I have mixed up all kinds of tomatoes.

1. Preheat the oven to 300°F

tapenade beginning

2. Take a cookie sheet and cover it with a big sheet of foil to protect your cookie sheet. Don’t try to piece two pieces together, it won’t work. The tomato juices will leak between the two pieces and what a mess it makes. I first tried it with parchment paper underneath and it was worse so don’t try that either. I learned the hard way and ruined a cookie sheet. Then I spread some olive oil on the sheet so the tomatoes don’t stick and cut my tomatoes in half and put them on the cookie sheet.

3. Put salt and pepper on the tomatoes and crush up some garlic (lots) and put that on top of the tomatoes.

red tomato tapenade

4. Put fresh thyme on top of the tomatoes.

sauteed onions

5. Then (this is optional but so good) Slice an onion or two and saute it in olive oil until soft and carmelized as above. Then spread the onions on top of all of it. Now I have made this both with and without the onions and it is definitely better with the onions but is really good without it too if you want to save more time.

yellow tapenade with garlic and thyme

6. Drizzle some good quality balsamic vinegar and then a little olive oil over it as well.

7. Cook and check often till soft and slightly caramelized. I start with half an hour and then keep checking every 15 minutes till done. Should take between 1-2 hrs if your tomatoes are bigger or juicy. There will be some black on the edges and that’s OK but watch closely as it gets closer to done as it can overcook quickly and the whole thing could burn black. A little black good, a lot of black bad. I scrap off the tomatoes (skin and all) off the foil and viola its done! I don’t puree it as I like it chunky and the skins are soft enough that you don’t even notice them.

8. I make some crostini out of some french bread toasting the slices till slightly crisp on the outside.

9. Then I spread some chevre goat cheese on the crostini and put a spoonful of the tomato tapenade on top. Sometimes I put a Kalamata olive on top, sometimes not. Divine!

Two cookie sheets makes about 2 cups of the tapenade. Refrigerate for immediate use or freeze or preserve it using a canning method for longer storage.


MIA (missing in action)

JC at Farmer's MarketI can’t believe I haven’t written in a month on this blog. Not that I haven’ thought about it often. In fact I write ideas and shoot pics all the time, all summer and throughout the year. But summer is particularly hard to write more because there is always so much to do in the garden and then there’s harvest time. This year was particularly busy for me what with the garden tour, farmers market and now harvest time. I am busy as a bee as they say. It would be good if I did write more as I always am learning something in my garden and from my garden and from all my gardening friends-you! So now that the garden is slowing down, I can slow down and share those thoughts and ideas. Not that I’m not busy anymore–I’m always busy, that’s the nature of this busy bee! So stay tuned as I’m about to flood your brains with more information then you’ll ever want to know…


Produce for sale from the Tomato Lady-Friday August 21

Jannine's bean tee pee

Hi folks.  I know many of you locals follow my blog. I have 125 tomato plants and 3o heirloom varieties this year.  For some unknown reason my tomatoes are taking their time turning red (or orange or striped or black or purple). This is weird as I would have thought that they would all be kicking ass by now and I would be at the Farmers Market. The weather has been nice and warm, the rain wonderful and the tomatoes look great-just still green. Ah mother nature! Whata ya going do? I’ve learned years ago to just surrender to her. So…

Since I don’t have enough tomatoes ready (I need boxes and boxes of them) for the Farmer’s Market this Saturday, I do have some heirloom tomatoes to sell plus I have LOTS of other heirloom veggies—Shishito peppers, wonderful varieties of french and Italian green beans—Rattlesnake beans, Italian Romano beans, Trionfo Violetto beans, Royal Burgundy beans and some french filets, tasty sweet cucumbers and fantastic huge ruby red chard that melts in your mouth when steamed and drizzled with a fine balsamic vinaigrette.

I will be selling them from 2 -4 pm this Friday August 21 at our studio:

Liquid Light Glass
926 Baca Street #3
Santa Fe, NM
Call me if you have questions. 660-4986

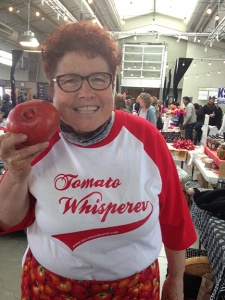
I will be starting at the Santa Fe Farmer’s market Saturday August 29th from 7 am-1 pm. But don’t be late as I will sell out probably by 11 am. You can find me inside the building-just look for my ‘TOMATO LADY’ SIGN above my booth.

So come catch up with me and get some fantastic veggies for yourself this Friday without the parking hassles! Hope to see you here at the studio!

2014 garden-then and now

long shot of garden

My tomatoes love the sun and warmth!

tomatoes ready for market

Tomatoes ready for the Santa Fe Farmer’s market

Last week was warm and sunny-just what tomatoes need to ripen. Temperatures in the mid 80s. It’s a little cooler this week but still nice. Suddenly I have all kinds of tomatoes ripening-yea!

tomato lady at Santa Fe Farmer's Market

Up till last week I’ve barely had enough ripe ones to go to the Farmer’s Market much less make tomato sauce but now I have plenty to sell-just get there early as I sell out pretty early even with all these tomatoes. Here’s my booth at the Farmer’s Market. It is located inside the big building. Just look up for a big sign that says, ‘Tomato Lady’ to find me.

I noticed the number of ripe tomatoes have been growing here at my little farm and now they are exploding! Yea! I’m hoping for an Indian summer-that means the rest of September will be nice and warm which should keep them coming.