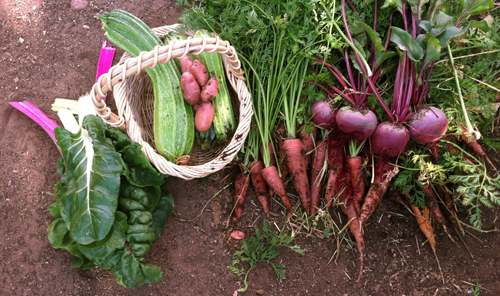
I killed my potatoes…

I’m sorry to say I killed my potato crop this year. I started with some fingerling potatoes seeds (and I have grown them in previous years with no problem). I planted them in a trough that was 12 inches deep and covered them with 3 inches of soil. Then I put my drip system on top of them. They grew nicely and after about 6 inches tall, I buried them with more soil. So far so good. Then when they got another 6 inches taller, I buried them again. Still no problems-they grew up through the dirt. Each time I moved the drip line up with them so it was always on the top not buried underneath.

I guess that was my problem as I left on a flyfishing trip and when I came home they never grew up through the soil-they just disappeared. I’m sure they died because of lack of water down by the roots. In hindsight, I figured maybe I should of left the drip system buried where the water would have reached the roots-I think it was too far away from the roots. This heat hasn’t helped either.

So that’s it, I killed the potatoes. If anyone has any advice, I’m open to it. Just leave your advice in the comments.

PS: I’ve decided I’m going to use that bed for fall crops-beets and carrots.

Growing Sweet Potatoes in Santa Fe? Yes!

Sweet potato vines with chard at end of bed


I tried sweet potatoes this season. I wasn’t sure if we would have enough time for them to get big. Plus they like really hot, damp climate like in the South where they are grown a lot. Sweet potatoes take between 90-170 days to mature. Yikes! Many varieties would not mature here in our short season. I ended up getting a variety called Georgia Jett because it has one of the shortest growing times—90 days to harvest. It has orange flesh.

I got a dozen sweet potato slips in spring. They arrived in the mail too early to plant. And they were not in good shape when they came. I had to keep them alive in the house till the weather and soil warmed up in late spring. At first, I put a damp paper towel in a plastic bag with the slips to keep moist. I lost 7 of them. Then I eventually had to put them in a glass of water where they started producing roots. As it got close to planting time, I put them outside in a bucket with water. I planted them in June in Wall of Waters as the nights were still cool, We had a late snow on May 20. Five survived.

Sweet potato flower

Well it turns out those five slips filled and overflowed the 10′ x 4′ raised bed. They are easy to grow and not much bothers them, plus no bugs. They just need water and heat, which we got plenty of heat this summer. They are beautiful plants. I’m not sure where I coulda put the other 7 as they are rampant growers and need space. Plus I didn’t know they are related to morning glories and have a beautiful flower which is smaller than a morning glory flower. Another bonus!

Left side-sweet potatoes still curing Right side-sweet potatoes with dirt brushed off and ready for pantry

They have now been harvested and many of them are very large. They are curing inside the house because they must be kept warm during the curing process. Curing is a hardening off process for veggies like squash and garlic to harden the skins and in this case to sweeten them as well. When you dig them out, don’t wash off the dirt while they are curing. They have to cure for 10 days in a warm space. After that, you can lightly brush off the dirt but still don’t wash them till just before use. Store them in a dark space like regular potatoes. I don’t know about the flavor yet as they are still curing inside the house but they look good. I’ll let you know when I eat some of them about the flavor.

Veggie chips-yams, beets, carrots & red potatoes

veggie chips final

After making kale chips, I thought why not try making other veggie chips from some of my vegetables. After all, I’ve seen veggie chips in the stores and thought it would be fun to try make some. So far I’ve done yams, beets, carrots and red potatoes. Some of them I did in the dehydrator and some I did in the oven.

mandolinemandoline setting


For all of them I used a mandoline. Mandolines are used for slicing things very thin. The one I got was not very expensive but does the job well. It has 4 settings with #1 setting slicing the thinnest and #4 the thickest and all of the settings still slice thinner than you could do with a kitchen knife. Not having used one before, I started using #1 setting which slices super thin. I then tried #2 setting which I liked better for the dehydrator and then used the #3 setting which worked even better for both the oven and the dehydrator. It was all an experiment. Here is how I did them:

Yams
I started using the #1 setting of the mandoline to slice the yams which was too thin. Hard to believe it can slice veggies that thin. More like shavings. One big yam filled 10 trays!  I like the dehydrator for these as you don’t have to watch them so closely and they keep their gorgeous color. After they were done, they were paper thin. Subsequent batches I used the #2 and #3 setting which were more like a potato chip in thickness.

yam sliced

After cutting the slices of yams, I put lemon juice on them, about a tablespoon of olive oil and massaged them in till everything is coated.

yams on dryer

Then I put them out on the trays. You have to spread them out being careful to not overlap them so they can crisp up.I lightly put some crushed rosemary on some of them and just lightly salted all of them. The rest just had salt but no rosemary. Experiment. I set the dehydrator to 145-150°F for 2 hours and then turned it down to 135°F till the chips were crispy. Hard to say how long they take as it depends how thin you slice them and what temperature you use. It took 2 hours for super thin and maybe 4 hours for the #2 setting on the mandoline. They should be crunchy like potato chips.

beets sliced

Beets
I used the#2 setting on the mandoline but think you can use the #3 setting as well for a more substantial bite. I put lemon juice and olive oil on some of them and on some of them I dipped in a cane sugar solution to make the beets sweeter-no lemon juice on those. I saw that as an ingredient in the store bought chips but afterwards felt it is not really necessary. Put on trays and lightly salt them.

carrots drying

Carrots
I used the #2-3 setting on the mandoline. Do the same as above with just olive oil and salt.


Red potatoes
For these I decided to try them in the oven as the thought of dehydrating raw potatoes didn’t really appeal to me. They were easy. I sliced them in my mandoline using the #3 setting which works well. I think they need to be a little thicker when using the oven as it gets done faster than using the dehydrator.

potatoes ready

When using the oven to dehydrate or baking the chips, you must really pay attention. If you do them in the oven, set your oven on 250°F (the lowest setting on many ovens). They cook pretty fast-about 45 minutes. You’ll have to watch them closely towards the end so not to burn them. Some recipes say set your oven at 300-400°F but when I did that they burned very quickly and were inedible.

For these I put about a tablespoon of apple cider vinegar and olive oil massaged in, then spread them out single layer on cookie sheet lined with parchment paper and then added salt on some, salt and pepper on others and salt and smoked paprika on still others. I tried onions but they turned out kinda funky.

potatoes_dried

Here are the finished potatoes.

Curing Potatoes

potatoes just dug up

Dig up potatoes when the soil is drier so not much dirt sticks to them.

A friend of mine asked me why a few of her potatoes that she just harvested are soft. I honestly don’t know except that I know we need to ‘cure’ potatoes for about a week before we store them to heal any abrasions, minor cuts and thicken the skins a bit. So here’s how to cure potatoes.

Dig up potatoes in the fall, when the plants are dying, then the tubers will be as big as they will get. When you first dig up your potatoes, don’t wash them right away. Dig up potatoes when the soil is a little drier so not much dirt sticks to them. Discard any bruised, green ones or soft ones. Use up any damaged ones right away. Put them somewhere where it is a little cooler and they get good air circulation out of direct sunlight. I put mine in a basket lined with newspaper (so the dirt doesn’t get everywhere) with the dirt still on them inside my pantry as it is darker in there. If I had a garage, I’d put them in there but I don’t. They just need to be out of direct sunlight. Then after about a week, I take them out and brush off the dirt well with my hand but I still don’t wash them. I wash them as I use them. You want the skins to be dry. I also again look for any soft ones and discard them as they can ruin the rest and I put them back where the sun don’t shine as I don’t want them to turn green. Don’t eat any green ones as the skin has some photo toxins in them from being exposed to too much sunlight. I’ve never gotten sick from eating one as it is mildly toxic but why eat anything that is toxic. That’s the point of organic gardening right? I use to think store bought potatoes tasted the same as home grown potatoes but not so. Nothing better then fresh potatoes. They’re fantastic and not so starchy tasting.

Are you chitting those potatoes?

chitting potatoes_closeup

Are you chitting your potato seeds yet? Careful how you say that! You can get potato seeds at the local nurseries now if you plan to grow them this year. Potato seeds are actually smaller potatoes that you plant. Don’t use grocery store potatoes as most of them have a sprout inhibitor on them to reduce sprouting which is what we want.

chitting potatoes

Chitting is letting your potatoes grow those little ‘eyes’ out. Put them in indirect sunlight. I use egg cartons to hold them so the eyes don’t break off. After they grow ‘eyes’, you should plant them this month-April. Chitting potatoes now will let you harvest them 2-3 week earlier when harvesting them later in the late summer.

This year, I’m growing them in ‘potato bags’ instead of a garden bed. My friend, Janet had fabulous luck with them last year-in fact she got more than I did in a raised bed so I’m trying her way this year besides it opens up another bed for me to grow other veggies in.

For more info on growing and chitting your potatoes, go to my original post ‘Growing and Chitting Potatoes’

Review of 2012 vegetables

fall harvest

2012 VEGGIE LIST

Here is my review of what I will and won’t grow again from last year’s vegetables that I tried and why. I will put tomatoes in another list since there are so many of them!

WILL GROW AGAIN
ARUGULA
-Apollo-nice leaf size and flavor

BEANS
-Rattlesnake bean/pole-remarkably flavored pole bean-grows very tall-great for trellises or arbor
-Tarbais bean/pole-dry bean-after much work FINDING IT last year in the states, you can now get this wonderful bean from Baker Creek Heirloom Seeds this year. I will make a french dish called cassoulet with it.
-Fava Bean/bush-wonderful flavor and 2 crops last year. A little work shelling it twice but worth it. Also is a good cover crop replenishing the soil with nitrogen.
-Golden Scarlet Runner/pole-I grow runners for their flowers/foliage-the foliage on this one is a striking chartreuse color against the scarlet flowers-simply beautiful
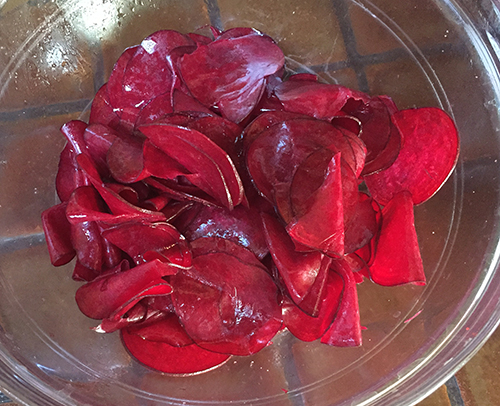
BEETS
– Craupadine-BEST tasting (but ugly) beet around
-Cylindra-long cylinder shape, great taste, easy cutting into slices

BOK CHOY
-Extra Dwarf Pak Choy-wonderful flavor-I like to cut one in half, saute it in olive oil, and add tamari when you flip it
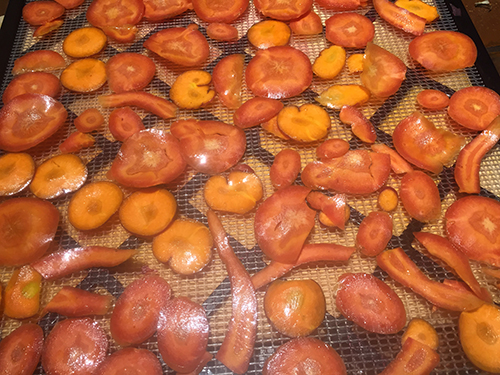
CARROTS
-Atomic Red-great color and flavor
-Cosmic Purple-one of my favorites

CHARD
-Bright Lights-adds great color tucked into the garden and good flavor
-Argentata-thick juicy stalks with huge leaves-very cold tolerant
-Ruby Red-one of the prettiest and tasty chards out there

CUCUMBERS
-Parisian Pickling-used for making cornichon pickles
-Boothsby Blonde-used for making bread and butter pickles
-Poona Kheera-best flavor for eating
-Armenian– fun to grow, good flavor, few seeds

EGGPLANT
-Fairy Tale-sweet, no bitter taste and tender (not tough) skin

LETTUCES
–Provencal Mix, Mesclun Mix, Buttercrunch, Yugoslavian Red, Santoro Lettuce

PEAS
-Dwarf Sugar Gray-great in salads or steamed, grows about 3 ft tall

PEPPER–want to try some different varieties from Europe this year as well
-Shishito (Japanese non-hot pepper)-one of my favorites
-Poblanos-mildly hot (I call it warm), great for chile rellanos or scrambled eggs, wonderful smoky flavor

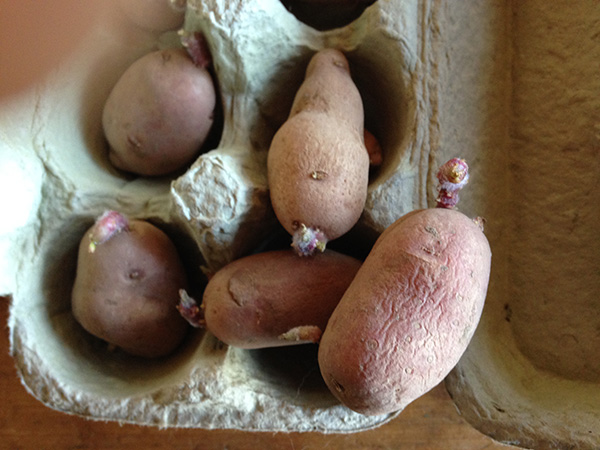
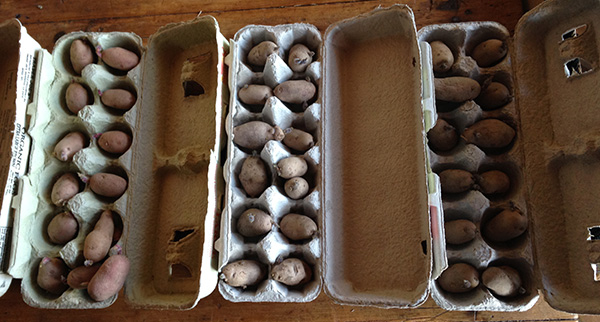
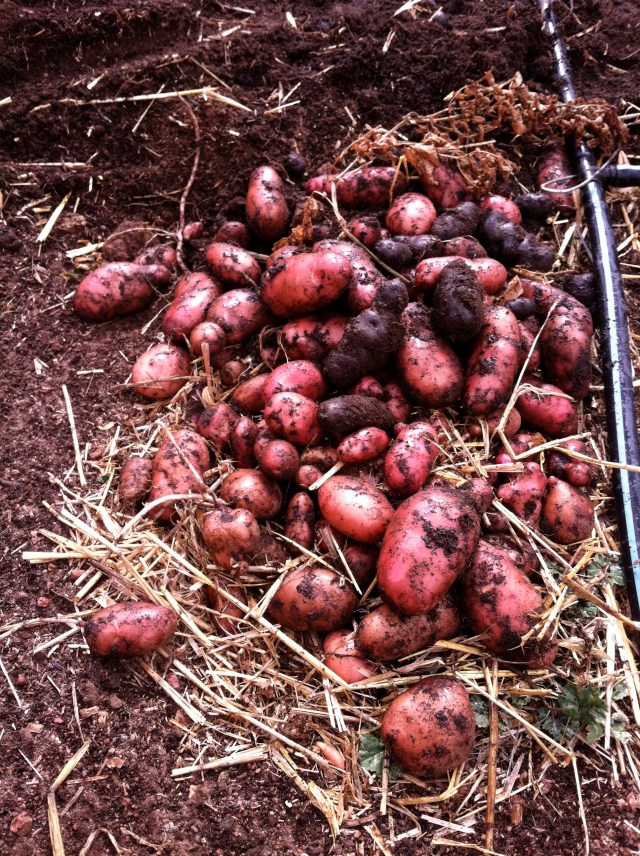
POTATOES–first year grower and I’m hooked!
-French Fingerling-OMG, the best flavor!
-Peruvian Purple-I loved the flavor of these as well

SPINACH
-Bloomsdale and Tyee

SUMMER SQUASH
ZUCCHINI
-Costata Romanesco-best tasting zuke around

SUNFLOWERS-technically a flower but they are veggies for the birds!
-will grow another huge patch of different varieties-beautiful and the birds love them
-Russian Mammoth AND Titan– for us/birds to eat
-Black Oil-for the birds only

TOMATILLO-Green-good for tomatillo salsa-only need one plant as they are so prolific.

WON’T GROW AGAIN
BEAN-Emerite bean/pole bean- great flavor but didn’t grow high enough to cover my teepee and I will grow others this year.

CARROTS
-Paris Market-too small, bland flavor, not impressed

CALABICITAS SQUASH
-seed from local grower-turns out it was a native winter squash, not calabacitas squash.

CORN-again not this year (I’ll get it from our Farmers Market)

FENNEL/FINOCCHIO
-Di Firenze-might grow one or two but not 25 plants like last year!

PEPPER
-Jalapeno-I don’t use them enough to call for space in the garden. I’ll just buy the few I use throughout the year.

POTATOES
-Russian Banana-too crunchy and watery

Potatoes harvested! Garden asleep!

Potatoes dug out just in the nick of time!

Potatoes dug out just in the nick of time!

Well all my potatoes were harvested before the first snow fall last week. Lava, Adam, Janet, Bob and Mernie all helped dig them out (and of course they all got some too). Thanks to all! I have about a half a bushel left of potatoes after we dug them out. I’m going to try a buttermilk potato leek soup with some of them and will share the recipe later.

From left-Peruvian Purple, French Fingerling and Russian Banana

From left-Peruvian Purple, French Fingerling and Russian Banana

I only grew gourmet fingerlings for my first try at growing potatoes this year. Here are the three kinds of fingerlings I grew-Peruvian Purples, French Fingerlings and Russian Bananas (I think). I loved the Peruvian purples but they  were small and I didn’t get many of them. I also loved the French Fingerling which are the red ones and the whitish ones are Russian Banana fingerlings. Both the Peruvian purples and the French Fingerlings have a wonderful flavor-kind of  a sweet, nutty potato flavor and are creamy in texture. I will definitely grow them again. The Russian Bananas were watery, not sweet, and when never got completely soft when cooked-they stayed crunchy. I won’t be growing these again. Plus I think I will try to grow a little bigger purple potato as the Peruvians were very small. You can check out hundreds of varieties at Irish Eyes Garden Seeds where I got mine online. They have a great choice of potatoes. I will definitely grow potatoes again.

Garden finally asleep!

Garden finally asleep!

Lava helped me unload 2000 lbs of manure in the garden and Beto and Beto Jr. came by and dug in the manure in each bed and finished cleaning up the main garden and pumpkin patch.  Nice to get it all done before winter really hit. So now the veggie gardens are sleeping!

Potato update!

First thing in the morning with a cup of coffee looking over the potatoes-time to WAKE UP!

My potatoes are growing so fast that I can’t keep up on burying them. Besides that, I don’t have enough dirt to bury them either as some of them are already 4 feet tall. I wonder how farmer’s grow potatoes in fields? I mean who has soil three feet deep to bury them?

Potatoes are corralled, straw put around potatoes and cardboard put on inside edges to keep light out

I built a temporary corral around the potato patch with small green t-posts and some chicken wire I had laying around.  I then cut some cardboard boxes open and lined the corral with them. Afterwards I got some straw to put inside the corral to cover the potato plants. I put the straw top of the soil which is already 18 inches deep. The corral keeps the straw from blowing away and the potatoes will (hopefully) grow inside the straw where it is dark.

Here are what potato flowers look like. After flowering the plant starts producing potatoes. I can’t wait! My friend Mernie thinks I might get around 150 lbs of potatoes! I might have to go to the Farmer’s Market as the POTATO LADY!

What have I been doing?

I’ve been busy in the garden! It is ALMOST  finished. I have 8 more tomatoes to plant tomorrow that I forgot to get that are some of my standards at the SF Farmer’s Market. OPPS! But they will be ready in time.

Two weekends ago I had 7 friends/family help with planting the majority of the tomatoes. A great big THANK YOU to all that helped-Elodie, Flynn, Ronnie, Lava, Tom, Sharon and myself! I couldn’t have done it without you! I also have a few more flower seeds to plant by the entry. Otherwise it’s done-FINITO! Yea right-there is always something to do in the garden! Here are some of the things happening in the garden:

The fava beans are looking good. Here they are flowering. I like the black and white flowers. I don’t think I’ve ever seen black and white flowers on a plant before. They had some aphids so I sprayed them with insecticidal soap and they are looking better. They have baby fava beans on them now.

The beets and carrots are coming along quite nicely. They are outside the pole bean tent area and will fill in nicely

Here are some beet greens I harvested while thinning out the beets to give them room to grow. They are yummy in a salad and are so beautiful.

In the shadiest part of the garden I planted some bok choi and lettuce and have had it covered with row cover since planting to help keep them from the heat and bugs. They both are looking great. I’ve never grown bok choi before so I’ll have to research when to harvest as they are getting to be pretty big and won’t like the heat for too long.

The fennel bulbs are getting bigger and are almost ready to harvest. Maybe another 2 weeks. They also won’t do well in the heat. I wonder if they will get as big as the ones in the grocery store..

About half of the tomatoes I previously planted are growing out of the top of the wall of waters and I need to take them off before it gets too difficult.

It’s been fun growing some early stuff. The bok choi, fava beans, fennel and lettuce are more cool season crops and will have to be harvested soon because of the heat. Probably all of them will be harvested BEFORE July.

I also have potatoes that are growing through the roof, strawberries that are being harvested and rhubarb that is ready to pick but will save that for other posts.

Fingerling Potatoes-May 7

The potatoes I planted Mar. 30 are doing great. Most of them came up with a few exceptions. Not bad for my first try. Of course the proof will be if I get some nice potatoes. Right now they are about 8 inches tall and when they hit 10 inches I will start the hilling process. Basically every ten inches or so I will add soil slowly filling the trench and burying the base of the potato plant I started with. I thought I would use straw for the hilling process but decided to stick with dirt because it is so dry here and I thought the straw would probably blow away anyways. Besides when I dig them out it will be like an Easter egg hunt! Since this is my first year at trying to grow potatoes, I am excited about what might happen.

Potatoes Were Planted on March 30th

Potatoes planted in deep rows-covered in straw

I’m trying a lot of new varieties of vegetables this year besides the varieties I always plant. I’ve never planted potatoes before but thought I’d give them a try this year. I actually planted the potatoes on March 30 and am just now getting around writing about them. I just couldn’t wait any longer. I put them in my best bed that is 12 inches deep with very rich fluffy soil. I figure even if it snowed (which of course it did), the ground wouldn’t freeze up 3-4 inches below the soil where the potatoes are. Plus I got the drip in place (even though it isn’t turned on yet) on the potatoes and covered them with straw to protect them from the snow. I planted all fingerlings-French, Russian Banana and a purple variety. They are not up yet but can’t wait till they are. A brand new crop for me.

Chitting and Growing Potatoes

A gardening friend of mine, Gene asked me to explain ‘Chitting Potatoes’. Why do we want to chit potatoes? It will knock off a couple of weeks to harvest time so you’ll get them sooner. Now I am new to this myself being a first year potato grower but basically it is ‘prespouting’ the potatoes to force healthy new sprouts before you plant the potato ‘seeds’. Potato seeds are not seeds at all but the actual potatoes.  We keep potatoes we want to eat in the dark so they won’t turn green and quite often they start to develop smaller flimsy white sprouts while in the dark but what you want is thicker healthier sprouts that are either green or purple. If you missed the opportunity to chit the potatoes, it’s ok to just plant them when the time is right. I’m going to try growing fingerlings-Russian Banana, Purple Peruvian and French fingerlings.

Here’s how to ‘chit ‘ them (sounds southern doesn’t it?!)

1. Get a couple of egg cartons so you can stand the potatoes with the pointed side down. The blunt side generally produces more sprouts so keep that side up. The egg cartons make it easy to support them this way. Sometimes there is no pointy side which you should then just look at your potato and put the side with the most ‘eyes’ or sprouts up.

2. Put them in a cool space that gets good light in your house and they will develop thick sprouts  in 2-4 weeks instead of those flimsy one that grow in the dark.

3. Plant them outdoors when the soil is 50°F or warmer. There are many ways to plant potatoes which you can research on the net but I’m going to dig a deep trench about 10 inches deep in heavily amended fluffy soil.

4. Place the presprouted (or chitted) potatoes with the sprouts up (the sprouts become the leaves) and bury them 4-6 inches deep depending on the size of the potato. BE CAREFUL NOT TO BREAK OFF THE SPROUTS. Spacing them 12 inches apart and rows 12-24 inches apart.

5. After the sprouts come up and they get leaves, I’m going to start filling straw around the plants instead of dirt to make access to the potatoes easier come harvest time. I hope they stay cool enough with the straw.

6. I should see the sprouts come up through the dirt in a couple of weeks. If it is still freezing at night, I will cover the plants with row cover.

7. Potatoes will start producing tubers when they flower.

8. Fingerling potatoes should be ready to harvest when the plants die back in about 90 days. Leave in the ground 2 weeks to harden off before harvesting.

For more information on growing and buying good potato seed go to: http://www.irisheyesgardenseeds.com/growers10.php