This year’s Kale

scotch curly kale

Scotch curly kale

Kale (and chard) are loving the cooler weather while the warm season crops are fading. I grew two kinds of kale this year. The first one is Scotch Curly Kale shown above which has done really well. No aphids or cabbage looper damage (from the cabbage moth). A super producer!

cabbage looper damage on Lacinato kale

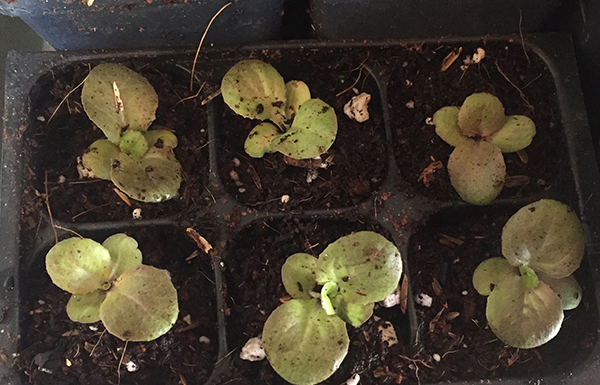
Cabbage looper damage on Lacinato kale

The other kale which is my favorite, is Lacinato kale. It is also known as Tuscan kale, Italian kale, dinosaur kale, black kale. It has struggled with  attacks from cabbage moths which resulted in very ‘holey’ kale from the cabbage moth looper. I don’t know why they attacked the Lacinato but not the curly kale but I left them in as a trap crop to attract the cabbage looper to them. I could of sprayed Bt, an organic caterpillar insecticide but didn’t get to it. The crops were not close to each other.

Tops of Lacinato recovering from damage

Top leaves of Lacinato recovering from damage

Today I noticed that the new leaves on the Lacinto are perfect-no holes so I think the cabbage moth is gone. So I trimmed off all the holey leaves on the bottom and gave them to my chickens and will harvest the nice leaves soon. The chickens love it.

I will leave all the kales in the garden for now as they love the cooler weather and will cover them with row cover when the first freeze comes next week (WEATHER FREEZE FORECAST TUESDAY OCT 12!).

I have to confess I never have liked kale finding it too tough for me.  But I do really like it in stews and soups where it softens up. To prepare it to use later, I trim off all the leaves from the stalks, rough chop it and steam the kale for 2 minutes. I super cool it quickly under water with ice to stop the cooking.  I then drain and squeeze out all the liquid and put it in 2 cup increments in freezer ziplock baggies and freeze it. It’s the perfect amount to put into stews and soups in the winter.

Cool season crops have begun

transplants-2-weeks-old

When I was looking through what I plant each year, I realized I actually grow many varieties of cools season crops (like greens/lettuce). I started some seeds of cool season crops inside under lights but no heat on Jan 17!  I never put the heat mats on for cool season crop seeds, only for warm season crops and it is way too early for them just yet.

I started:
Asian greens: bok choy, pak choy, Wasabi arugula

Lettuces: 4 Season Lettuce butterhead, Yugoslavian Red butterhead, and Santoro butterhead lettuce. Can you tell I like butterheads?!

Leeks: Solaise, King Richard and American Flag

Onions: Candy (it is an intermediate or neutral variety) which is they type of onion we have to grow here.

Spinach: Carmel-Just planted the seeds today. Still have some spinach plants that have overwinter nicely outside in a raised bed with only winter weight row cover on it. By planting a crop of spinach last fall, I’m hoping I get a bumper crop of spinach in March! The variety of spinach I like the most is called Carmel which overwinter last year and looks to do the same this year. You can get seeds from Johnny’s or plants from Agua Fria Nursery.

4-season-lettuce

four season lettuce is looking good

Today I transplanted up lettuces and Asian greens to pony pots from seed trays. The plants are looking good but need to grow more before I put them out in my green house or cold frame. You can plant outside in sunny raised beds in March but all-greenhouse, cold frames or just plain old beds will need winter weight row cover on the little starts to protect them from our cold nights.  I’m hoping to put them out by beginning of March. The varieties I grow at this time of year are very cold hardy. I’m trying to get a head start as our cool season crop season is pretty short here before it gets too hot and everything bolts. And there is nothing better than spring spinach or lettuce!

Harvesting Bok Choi

Bok Choi. Photo courtesy of http://www.diynetwork.com

I’m growing new exciting vegetables for me this year and one of my favorite that I’m going to replant for a fall crop was Bok Choi (also spelled Bok Choy). I thought they were baby Bok Choi when I planted them but they ended up full size. No difference-they are delicious! I love chopping them up and putting them in rice dishes and stir-frys.

I also like to cut them in half and then saute them in a little olive oil. Once they are brown on the cut side, I turn them over and cook some more till slightly brown. Then I put a little water (like 2 tablespoons) in the pan and a lid on to finish cooking them. The steam from the water makes them tender. Then just before taking it out of the pan, I splash a little tamari on them in the pan and then serve them. Another wonderful vegetable!

10 Things to Do in March in the Garden

Now is the beginning of our season for fruit and vegetable gardeners. I got my light boxes out! Woo! Hoo! Here we go! Here are 10 things to do for or in your garden this month.

1. Finish ordering your seeds or getting your seeds if you haven’t already.

2. Get your light tables and heating mats out and ready to go. Use florescent lights that are at least 3000 lumen. I use the daylight ones. They produce less ‘leggy’ veggies.

3. Start tomato, pepper and eggplant seeds indoors to set out later as transplants depending on variety.

4. Finish your garden plans

5. Get your soil tested to see what amendments you might need to add to it.

6. Put  horse manure that has been aged for at least 6 months on your garden beds and dig in. Don’t put on ‘hot’ manure.

7. Hurry up and finish pruning your fruit trees. Not much time left.

8. Spray your fruit trees with dormant oil before their buds turn color to smother any dormant bugs.

9. Water your trees.

10. Plant COOL SEASON vegetable seeds OUTSIDE on ST. PATRICK’S DAY.  Some varieties include carrots, beets, lettuces, spinach, arugula, bok choy, swiss chard, onions, brocolli, cabbage, peas, radishes, mustard, kale and other greens.

How to Make a Coldframe

My coldframe

A dear friend of mine, Kim, asked me if I would explain how to build a coldframe while there is still time before planting time in early Spring. There are many designs available online to make a coldframe or hot bed. Here is the coldframe plan (as a pdf) that I basically used when building my coldframe with a few small exceptions. Now mine isn’t super refined as you can see in the photo but seems to be working! (Be sure you look at the pdf because there is a lot more information in it). As you look at the plan, it’s pretty self explanatory but here is what I did for the sides and the bottom inside.

one page of the coldframe plan

I used 2 inch x 10 inch lumber for the bottom section all around and another 2″x10″ section for the top side slanted pieces. Cutting the diagonal piece is easy, I drew a line from one corner across diagonally to the other corner and cut on the line then I used one piece for each side on top of the bottom piece. The only thing I did differently is I put one more 1 x 2 inch piece vertically in the middle on each side  (screwed in-see photo not diagram) and in the back to join the top and bottom piece together. I added a 2 x 4  (long) piece on the lid that I screwed in (not tightly) so I can raise and lower the lid and prop it up vertically (see the piece holding up the lid on the right side). In the photo you notice I taped BIG bubble wrap (not small bubbles) with duct tape on on the inside of the plexiglass lid to add extra insulation in the dead of winter. I also divided mine into two sections.This isn’t in the plan but in the left section I started with hardwire cloth on the bottom to keep out gophers. Then I added dirt and compost on top of the hardwire so I could plant in it but the soil isn’t heated. The right side has a garden heating cable. I attached the cable with twist ties to the hardwire cloth that is cut out to fit the bottom. Then I turned over the hardwire cloth so now it is on top and place it on the bottom. I did this so I can’t put a spade through the cables while digging around in the dirt when planting. Then I put dirt on top like the other side. So the right side is a contemporary hot house when I plug in the heating cable (which I haven’t done yet). I will use it to heat the soil to a temperature so the seeds will sprout. A traditional hot house has a dug out area where ‘hot’ green manure is placed into. Then on top of that is the dirt that you would put your plants or seeds in. The manure gives off heat as it composts, heating the soil just like the heating cable. Now I love the idea of the manure and doing it naturally but I don’t want to have to replace it every year so I chose the heating cable. I will use an extension cord to bring power from the house. I’m experimenting with the non-heated and heated side to see if it really makes a difference in early Spring. If it does, I’ll heat the left side too next year.

Last time I reported, the right side which I planted with transplants in November, is still doing well while the left side where I planted transplants in January all died in the -20°F we had one night (except the parsley which survived) which is interesting cause I don’t even like parsley! I think the left side all died while the right side didn’t because they did not have any time to grow roots while the right side planted in November did. Remember I haven’t heated the right side yet so I know that wasn’t a factor. Anyways I’m sure the plans will help you more than my description!

my lettuce patch

lettuce patch in early spring

Here are my cool season crops coming up by the house in my lettuce patch. I like the idea of walking out the front door and picking salad stuff without going down to the main garden by the barn (which isn’t in yet anyway-way too cold at night) In the picture, from the back to forward-peas are back by the fence, then little cauliflower (they are soo slow to grow) is next closest, then romaine lettuce next, then 3 types of butter lettuce, and in the front row is spinach on the left, arugula in the middle and provencal mesclun on the right. I need to start thinning everything to give them room to grow. They are loving the cold nights. Still haven’t planted tomatoes though! I am waiting for the last of the freezing nights to end. Last night was 28 degrees F (-4 degrees C). Looks like we might go right up to the May 15 average last freeze date here in Santa Fe before getting any warm season crops in..

more cool season crops in!

Well the weather is going to be beautiful here this weekend. YEA! It’s going to be in the 70’s temperature wise in the daytime. Both the veggie plants indoors and me are anxious to get in the garden!  They are taking over the house! It’s still too early to get the warm season plants in the ground as the nights are still cold but now ALL the cool season crops are now in my raised beds outside up by the house.  Lettuce, spinach, arugula, mesclun, orach (mountain spinach), cauliflower, broccoli, kale, chard, bunching onions, carrots and beets.

cool season vegetables planted

This week I finally planted one of my raised beds up by the house. But first I prepped the soil by digging in 3 inches of composted horse manure-then I planted spinach, snow peas, cauliflower, lettuce, arugula, lettuce and mesclun seeds. Then I put the existing drip system  in place that I will use after it stops freezing at night. Afterwards I covered the bed with medium weight row cover. For now, I hand water right through the row cover which is nice as it doesn’t disturb the seeds and gives protection from the cold at night and the rabbits when the seeds sprout. I’ll take pictures as soon as they come up.