Spring Equinox

Yesterday,  March 20 was Spring Equinox, (or Vernal Equinox as it is sometimes called) where the sun passed directly over the earth’s equator and spring was official here in the Northern Hemisphere at 12:57 pm. ‘Down under’ they were having Fall Equinox. The word Equinox means ‘equal nights’ which translates to equal days and equal nights. It’s the first day of Spring. Many past people have celebrated spring equinox as they knew that soon their food sources would be renewed. Here’s one more interesting fact: The early Egyptians built the Great Sphinx pointing directly towards the rising morning sun on the day of the vernal equinox. Pretty cool.

What a beautiful day it was – unlike the day before with cold temperatures and cold winds.  Thanks you universe for that!

Seed Starting For Early Spring Crops-Class handouts

The Seed Starting For Early Spring Crops class that I taught today was sponsored by one of the organizations I’m a member of called Home Grown New Mexico. Home Grown New Mexico puts on many classes about growing, raising, making and preserving your food throughout the year. They are about sustainability, urban farming and growing organically which is right up my alley and the classes are open to the public. If you’d like to see what other classes/workshop Home Grown New Mexico is putting on, check out their website homegrownnewmexico.org.

Now, here are the handouts if you weren’t able to make the class or if you didn’t get them as we ran out of them during the class today-it was definitely a full house with about 35 people attending. It was a good mix of Master Gardeners, Interns and the public that attended. I really like to teach when you all show up! Hope you learned something and enjoyed it!

Starting Cold Hardy Plants in Early Spring Inside-2014

seed germination chart

PRESPOUTING SEEDS

Cold hardy crops for early spring in March-April

COOL-WARM SEASON CROPS

Seed Starting For Early Spring Crops-Sat. March 15

coldframe crops

Saturday, March 15
Seed Starting For Early Spring Crops presented by Home Grown New Mexico
How to start seeds early for cool season crops
Time: 12:30 pm-2:30 pm
Instructor: Jannine Cabossel
Location: 3229 Rodeo Road (Rodeo Grounds/Large Annex building classroom)

Jannine Cabossel, a Master Gardener and ‘The Tomato Lady’ at the Santa Fe Farmers Market will teach a class on the basics of seed starting in spring for early crops: indoor seed starting for your spring garden, outdoor requirements for successful seed germination and basic indoor/outdoor seedling care. By starting seeds indoors in early spring you not only get a head-start on your year’s food production by protecting your crops from Santa Fe’s finicky spring climate, but you also get more time with your hands in the dirt. Many new tips this year plus learn varieties that do well in our cold climate.

Jannine has extensive experience in growing vegetables on her 3000 square foot garden using all organic methods. Follow her blog at giantveggiegardener.com. This class free! Become a 2014 Member for $35—includes all classes, potlucks and tour.

Spring has sprung! (well almost)

lettuce_greenhouse germinating

This lettuce is from Johnny’s called All-Star Gourmet Lettuce mix coming in the greenhouse.

In celebration of my FIRST CROPS coming up in the greenhouse, I’ve changed the background color on my blog back to green from winter blue. In my mind, winter is over although not officially – that won’t take place till the first day of spring on Spring Equinox on March 20 and of course we can still (will) get snow. No matter. I’m ready! I’m moving on and planting stuff (in the greenhouse). What kind of stuff? Read on to find out!

bok choy_yellow green

These are a golden yellow pak choi (shakushina) from Kitazawa. They’re already a great yellow-green color and will make a wonderful contrast to the tatsoi.

These first crops took about 12 days to germinate-they actually came up on March 1 so they were planted on Feb 17th. They are all still tiny but coming up nicely. The top picture is a lettuce mix from Johnny’s called All Star Lettuce Mix that’s suppose to grow out evenly. The second picture is a golden-yellow pak choi (shakushina) from Kitazawa. Also from Kitazawa are Pak Choi rosette (tatsoi) and white stem dwarf pak choi (both not shown). These were all recommended in Elliot Coleman’s book, Four Season Harvest (except the golden-yellow pak choi which I couldn’t resist because of the color). According to Elliot Coleman they all do well in cold greenhouses.   I have winter weight row cover over them now to protect them at night. I also planted Winter Bloomsdale spinach from Southern Exposure Seed Exchange at the same time and it’s coming up way slower but the first 2 seedlings broke ground yesterday, on March 3.

Ah, spring has sprung-and we got rain this week! What could be better?! I’m also going to plant transplants this week to see how they do in comparison to the seedlings. I’ll get pics later on that one.

What unusual vegetable seeds are you trying this year?

seeds

I’m always interested in what unusual seeds people are trying (or have had success with).  So I’m sharing what seeds I will try, where I got them and I hope some of you will do the same. For a complete list of all my crops for 2014 go here.

2014 unusual seeds that I will try:

African Bushel gourd-big round gourds the size of a bushel basket! Suppose to be good to use as containers after they dry out. You know me and giant things!

White Egg gourds-from Southern Exposure Seed Exchange-small egg gourd-looks like white chicken eggs-sounds like fun! Now I can pretend my old girls are still laying!

Tarbais beans-from Baker Creek Heirloom Seeds-a pole bean that you dry out and cook for bean stews, soups and cassoulets. More delicate flavor than navy beans. These use to be hard to find in the states but thankfully Baker Heiloom Seeds has carried them for 2 years now.

Eyesines de Galeux-from Baker Creek Heirloom Seeds-a salmon warty winter squash that tastes divine. The more ‘worts’ the sweeter it tastes. More worts=more sugar in it.

Sweet Meat-Another great winter squash-so sweet you don’t have to add anything to it to sweeten it. Also a great keeper-I just finished eating our last one in February.

Peredovik sunflower seed– from Southern Exposure Seed Exchange-this is the black oil sunflower seed that your birds eat in bird seed food.

Jimmy Nardello pepper-a red ‘chili’ looking pepper but sweet-from Southern Exposure Seed Exchange-a sweet long red pepper delicious when sautéed.

Bullshorn (Corno Di Toro) pepper-a red ‘chili’ looking pepper but sweet-from Southern Exposure Seed Exchange-another sweet long red pepper delicious when roasted or sautéed.

‘Canoncito’ landrace red hot chili pepper-This one I got from the Santa Fe Farmer’s Market and is a local seed from north of Espanola.

Charentais melon-from Baker Heirloom Seeds-one of the most flavorful melons from France or so they say.

Purple Bumblebee tomatoes-from Baker Heirloom-small purple and green striped larger cherry tomato. Part of the new Artisan tomatoes out this year.

Round Black Spanish radish-from Baker Heirloom Seeds-I got one from our local organic market and it was delicious so I’m gonna try them this year.

Craupadine beets-from Baker Heirloom Seeds-one of the ugliest but sweetest tasting beets ever-from France.

Arrrgh! It’s too warm!

apricot tree unpruned1

Go away warm weather! Never thought I’d say that in winter but it’s too warm right now and the trees will be fooled into sending out their flowers, thinking spring is here (it’s not) and then wham another freeze will come along and kill all the blossoms on the fruit trees and we won’t get any fruit again this year-just like last year-Wahhhh!

Early Spring Planting-Three Important Factors

Three important factors should be considered before planting seeds in early spring:

Amount of daylight hours-In the winter the sun is weaker in the northern hemisphere and we have less daylight hours. If you plant seeds too early either outside or in a greenhouse, the seedlings will be spindling when they germinate. Once we have 10 hours of daylight (we currently have over 10 hrs), we can start planting our cold hardy seeds. So in Santa Fe, we now have enough daylight hours. But wait, there are several more factors we need to consider before we plant seeds.

Soil temperature for germination for different vegetable seeds

Soil temperature for germination for different vegetable seeds

Soil temperature-If you are thinking of planting OUTSIDE, forget about it, your soil is probably frozen so of course you can’t plant anything! Even if it’s not frozen, it’s probably still too cold to plant outside. However it will warm up soon. How can you tell what temperature your soil is? You’ll need a soil thermometer. I prefer a compost thermometer that is about 18″ long so you can check both the soil and a compost pile. A soil thermometer is invaluable, as different veggies like to germinate at different soil temperatures. Insert it about the depth of the root zone of the plants, about 4”-6″ in the soil to see how warm it is. Notice the chart above gives an optimum range for each veggie.  If you have a cold frame, hoophouse or greenhouse your soil is probably much warmer already. So are you ready to plant? Not quite. There is one more factor to consider.

Air Temperature-The air temperature is also important and is the main thing people think of in considering when to plant seeds. It’s too cold at night to plant most veggie seeds outside or even in a greenhouse without extra protection BUT there are some wintergreens that are very cold hardy, some even hardy below 32°F at night. Even in an unheated cold frame or greenhouse, the temperature dips below freezing at nights so if you have a one, I suggest you put some row cover (winter weight-.9-1.0 mm.) over your beds. If you don’t have a greenhouse and will be planting outside in early spring, definitely put row cover over it at night but don’t forget to check your soil temperatures too.

I’ve compiled a list of these very cold hardy crops that can be started in a greenhouse now if the soil temperature and daylight hours are good. Many of these cold hardy crops can be planted outside as soon as the soil warms ups in March. For the list go to my blog at: http://giantveggiegardener.com.

Winter greens for the greenhouse or early planting outside

I can’t wait anymore! I got this newly completed greenhouse and am antsy to try it out. I’ve done a lot of research on which plants might do well in the winter and am ready to rock n’ roll! So I am planting cold hardy seeds this week inside the house. I will transplant them into my new greenhouse when they are bigger. I’m also going to try some direct seeding in the greenhouse in the raised beds like arugula, spinach, kale, baby bok choi and mache in mid-February-all of which can handle some pretty cold weather. How cold? We will see soon although you wouldn’t know it by this week. I will also plant other greens like some winter hardy lettuces, peas, and a winter hardy variety of chard called Argentata at the end of February-beginning of March. Everything planted in the greenhouse will have to have row cover over it even in the greenhouse at this early date because of our cold nights. For those of you who do not have a hoophouse, or cold frame, the seeds in the list below will do well outside only you have to wait a little longer.

Here is my list of cold hardy crops to try in the greenhouse. You can also plant these outside in March once the soil is not frozen and cover them with row cover:

From Johnny’s Seeds:
‘5-star greenhouse’ lettuce mix
‘Space’ Spinach

From Southern Exposure Seed Exchange:
‘Even’ Star’ Winter Arugula
‘Winter Bloomsdale’ spinach

From Kitazawa Seed Co:
‘Mei Qing Choi’ (dwarf pak choi)-recommended in ‘Four Season Harvest’ by Eliot Coleman
‘Tatsoi’ (pak choi)-recommended in ‘Four Season Harvest’ by Eliot Coleman
‘Golden Yellow’ pak choi
‘Astro’ arugula

From The Cooks’ Garden:
‘Red Grenoble’ lettuce
‘Forellenschluss'(speckled trout) lettuce
‘Rouge D’Hiver’ lettuce-recommended in ‘Four Season Harvest’ by Eliot Coleman

From John scheepers Kitchen Garden:
‘Argentata’ Chard-recommended in ‘Four Season Harvest’ by Eliot Coleman

From Agua Fria Nursery: transplants ready to plant
mache (corn salad)-recommended in ‘Four Season Harvest’ by Eliot Coleman
endive-recommended in ‘Four Season Harvest’ by Eliot Coleman
‘Winter Wonder’ lettuce
‘Marshall Red’ romaine lettuce

Heating the Greenhouse using passive solar methods?

wide angle view of GH interior

I like this wide angle view of the inside of the greenhouse

I want to heat the greenhouse in the winter using passive solar methods. There is nothing growing in it so far this winter but I’m doing some experimenting to see how warm I can get it (my goal is around 32°F or warmer) at night. To this end I’m experimenting using compost to help heat it, putting some barrels with water in them to act as a heat sinks and I’m insulating the structure inside a little better so as not to lose so much heat at night. If the sun shines, it gets between 70-80° in the day right now (which is delightful) and I’d like to keep some of that heat in at night and not lose it. Of course I had the opposite problem last summer when it got too hot but that’s another problem I’ll address this summer!

GH inside winter

The center bench has compost underneath it in a raised bed

The compost pile is only 1/2 a yard so is probably not enough to keep it significantly warmer  inside the greenhouse but what if it adds a degree or two? I’ll take it. Everything helps. The compost pile got up to 112°F  while the surrounding soil in the two raised beds is 40°F. Not that I’m planting in the compost but it shows it is significantly warmer. Now it has cooled down to 60°. The night temperatures are still below freezing inside.

Since I didn’t have a chance make shutters for the screen windows before winter set in, my friend, Jody, thought of putting plastic on both sides of the open screen ‘windows’ to trap warm air and slow the heat loss. I’ve done that now.

bubble wrap down on windows

The vents are covered with plastic and bubble wrap is on all the windows

I just put bubble wrap on the windows to hopefully act as insulation to slow the loss of heat at night as well. Plus I added bubble wrap on the ceiling between the rafters. Elodie said probably a lot of heat is loss up there through the uninsulated fiberglass roof. Now the green house looks like a  bubble wrap house on the inside! The night temperatures are still below freezing inside.

I painted the rain barrels black and filled them with  water to act as heat sinks

I painted the rain barrels black and filled them with water to act as heat sinks

I also have 4 rain barrels that I painted black and filled with water and installed hose bibs on the bottom so I can empty the water out at the end of winter. I put them under the growing tables and the night temperatures are still below freezing inside. And lastly I plugged up a lot of leaks where the roof meets the rafters.

Did it work? Are my nighttime temperatures above freezing? NOPE. I’ve only been able to keep it about 5 degrees warmer than the outside temperature which make me go to plan B.

What is plan B? Try planting only super cold hardy winter greens and see what happens. Stayed tuned…

HAPPY NEW YEAR! This year slow down!

hard_work_ant_droplet

Sometimes I feel like this ant!

I just read an article ‘Regenerate Yourself’ by Andrew French from the Permaculture Research Institute email newsletter that I get. A great story about a couple working on changing their property into a Permaculture paradise and all the hard work needed to transform their property into their dream. The above picture from the article shows a very hard-working ant moving a drop of water many times its size. Sometimes I feel like that ant when I seemingly have an insurmountable task to do. I think we should all read this article, whether a gardener or not.

The article hit home for me because it speaks to how hard we work and how little we care for ourselves. We keep on trudging and working until we are either exhausted or injured (or both) trying to meet our goals. Whenever this happens I think it’s the universe’s way of actually making us slow down and now after many years, I listen. I try to slow down and take care of myself (sometimes I’m not so good at this). I look not only at what needs doing but what I’ve already accomplished. This is a great read and seems perfect at this time of year when most of us are doing a little reflecting and recharging our internal batteries, getting ready for the 2014 gardening season.

May you all get excited about what crops you are going to try this year but do please stop and listen to what the universe is saying to you as the season progresses. Maybe 6 hours in the garden is too much (your body will let you know) so why not do 3 hours or less if needed. It will still get done and you’ll be less sore. As I get older I realize taking things in small bites is actually wonderful, letting me enjoy the process instead of just the end goal. It slows me down, let’s me see, smell and feel what is going on in my garden. I become more in touch with what I’m doing, what I’ve already accomplished and this wonderful universe we live in. So slow down, take care of yourselves this year and enjoy life while doing all your projects!

Reflections on the gardening year

winter veg garden

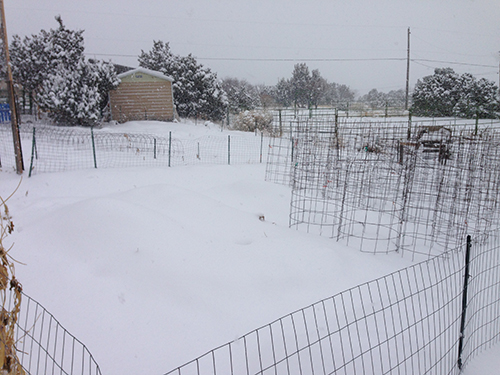
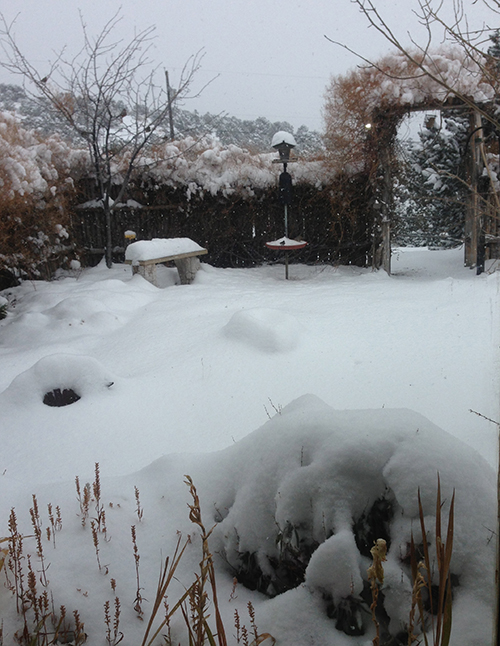
Here is the veggie garden in winter-now asleep

Happy Solstice! Yea-the days get longer now-and here it is the end of the year. As I look at winter, the first two months of winter-November-December are done and only two more months of winter (January-February) to endure. Then its early spring and off to the races! But let’s slow things down a bit. December is a great month to reflect on the gardening season and look at what worked and what didn’t work in the garden during the past year and what I might do differently.

So what worked and what didn’t?

-I only lost 10% of my tomato crops vs. last year’s 50 % tomato crop loss to the dreaded beet leafhopper.  I covered almost all of my tomato plants with row cover from May 15th until the first week of July. The leafhopper leaves when the rainy season comes and this year they hung out till the beginning if July when it started raining. -The downside of this is I really don’t like NOT SEEING my plants hiding under the row cover-I like watching them grow, but that seems to be a tradeoff. Also I want to try to transplant my tomatoes outside earlier than May 15th to try to get tomatoes earlier.

IMG_3363

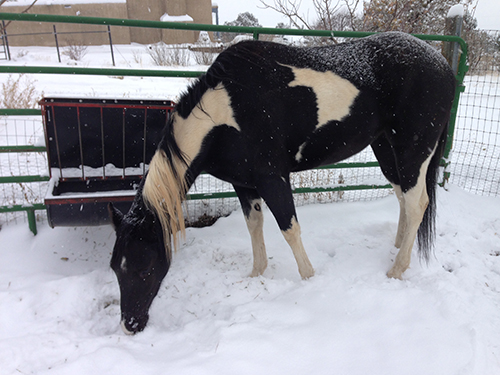
-Rotating my crops seem to help with diseases. I have everything on a three-year rotation, which is why I made an additional 1000 sq ft section last year, giving me a total of (3) 1000 ft sections.  I move the crops around so they only return to the same section every 3 years. The pumpkins use to have their own additional section in the horse corral but now that I have a horse (Koko), I will put them into the rotation in the main veggie garden since the corral has been reclaimed by Koko.

-Speaking of pumpkins, I need to find a way to keep critters from eating them although it was almost impossiblerabbit damage to keep the rabbits away early in the season when food was hard to find for them-even with 2 fences and row cover over the pumpkins, something ate my prized potential pumpkin plant, so I’ll be thinking on that one a lot more this winter. Plus I want to get the plants outside earlier too if I’m to have a chance to break the state record again…

-I covered my eggplants with row cover for a while this year thereby avoiding the first hail storm’s devastating damage. That first hail storm set back many of my vegetables due to the severe damage by about a month. The downside was aphids found the eggplants underneath the row cover and it was a battle to get rid of them. The aphids also went after the summer squash and peppers with all the rain we got. I controlled them with strong sprays of water on them and insecticidal soap. Also lady bugs appeared and came to the rescue eating many aphids (and I didn’t have to buy them). I think I need to remove the row cover earlier.

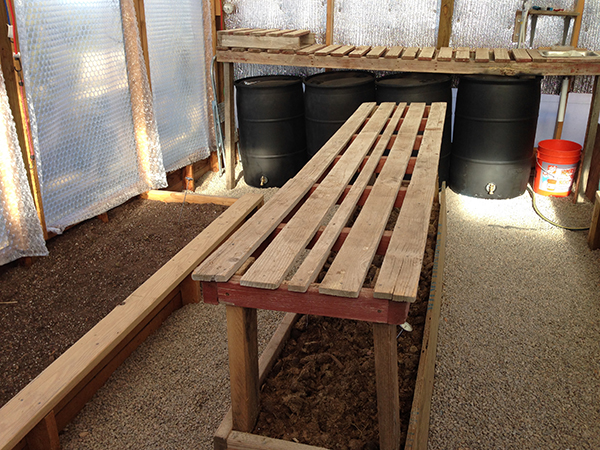
The almost finished greenhouse was unbelievably hot last summer-110°F. Too hot to grow anything which was ok as it wasn’t ready anyways. So after I work to button it up this winter, I will have to find ways to cool it down next summer. Still, I have a greenhouse! I’ll take the challenges it will present.

swiss chard hail damage-I have to say I enjoyed all the rain we got after 4 years of an extreme drought. The fruit trees loved all the rain but 2 more hail storms almost wiped out the vegetable crops especially the chard and squash. It was amazing anything survived plus the one week of rain that we got-about 3 inches-watered down the flavor of the tomatoes for about 2 weeks but then they bounced back.

Most of the problems came from Mother Nature and there is not much one can do about her-she does what she wants and we need to adjust. We always think we have everything in control and then wham! She does a number on us!

-I will grow more tomato plants and other veggies to sell at the Farmer’s Market as many people seemed excited to try some of the different varieties I grow. To this effect, I think the greenhouse will be great asset this spring.

So now I will be going over all the catalogs that are coming in and start to plan the veggie garden for 2014.

Happy Holidays!

It took a village to build my greenhouse!

final greenhouse

I haven’t posted much about the greenhouse I’ve been building but now that it is basically done (I still have a few more things to do) I want to share the greenhouse raising from the ground up and give thanks to those who contributed with their time, labor and knowledge. It has truly taken a village to build it! It all started in January of 2010 and has taken 3 years to complete it. Many, many thanks to the following people:

First, thanks to Caleb for coming out in January 2010 and jackhammering the holes out to set the posts. I was hoping to get it done back them by spring of 2010 so I wanted to get an early start-what a dreamer I was… 3 years passed because of everyone being sooo busy with other things (including me) and then this year in 2013 the magic happened.

Thanks Lava for helping me make it gopher proof, mouse proof, putting down the weed cloth, unloading the gravel for the floor and much more I’m sure I forgot about. Thanks Jacob, (Lava’s son) who generously put in 2 days of work on it when he was here visiting his mom earlier this year.

Thanks Elodie for helping in various tasks including putting the headers up in the framing, window framing, gopher proofing the raised beds, putting the sink in and much more as well.

And a big thanks to Tom Rivers. Without him I still would be at the beginning stages. What can I say about Tom? He is a great friend who came over week after week every Friday on his day off this year and with his constructions skills actually made it happen. Together we were able to build it or I should say I helped him build it. Both him and I are a lot alike-we became obsessive about building it, like dogs with their bones and we wouldn’t let go of it till it was completed. Truly a labor of love. Thank you thank you Tom!

I am now putting on the finishing touches and buttoning it up for winter to see how warm I can get it inside at night using passive methods-more on that later…But for now here is a pictorial on building it.

This slideshow requires JavaScript.

Snow photos from December 5

view of front yard from house

view of front yard from house

Looks like we are off the hook for watering our trees for December due to a big storm that came in this week and dumped 10-11 inches. Very beautiful. They say another one is on the way for Sunday. And if the ground froze around the trees don’t bother to water them until it thaws as it has been very cold and another storm is due in tomorrow. Here are some snow photos around the property.

This slideshow requires JavaScript.

Lookee What I Found!

Yesterday I found all kinds of things!  Now I’m not the greatest at putting my tools away after I’m done with them. In fact it’s like leaving a trail of breadcrumbs for anyone to see where I’ve been. So I decided to walk around the gardens here at the house before the Arctic Blast comes in this weekend to see what tools I could still find outside. I wanted to do #9 in my earlier post of 10 Things to Do for December’.

found _lopers

First I found one of my lopers (my best one) hanging on a chair on the deck—and it was in plain sight. I’ve must have walked by it a hundred times and never saw it before!

found _leaf rakeI was wondering where that leaf rake went! Here it is leaning on the arbor in the shadows!

found_rake and apple pickerAnd on the other side of the arbor is a fence and I found an extension cord,  mini leaf rake and apple picker leaning on it (what’s that apple picker doing there? There are no apple trees up by the house!)

found_coffee cupAnd lookee what else I found! My favorite coffee cup still filled with coffee!  Yes that is a cup (the handle is on the other side). I was wondering where I left it cause it’s been MIA for a while. That will be fun to scrub out!

found_sawAnd then when I went to the shop I found the circular saw that I had at the house that mysteriously disappeared.  I took it back to the house so I can finish the greenhouse!

10 Things to Do in December

xmas clip reindeer

HO! HO! HO! Here are 10 things you can do in December for your garden. I wrote in green where I’m at with this list!

1. Don’t forget to feed your worms in your vermicomposting bin! They get hungry too! Also if it has been dry, give them a some water on a warm day. Don’t give them so much food that it just sits there and freezes. For an outside plastic bin, maybe wrap it with a water heater blanket or surround it with straw bales to help keep the worms from freezing. You try living in a plastic box all winter without insulation! For bigger outside vermicomposting areas, put straw bales around the perimeter to add insulation. Also put straw on top.  (I covered mine with about 8-10 inches of straw on top of everything and will check them in about 2 weeks to see if I need to add more food)

2. Reflect on what worked in the garden and what didn’t. What could you do differently next year? (Where do I begin? I’ll write more on this later)

3. Order your new catalogs. That way you’ll have them by January. (Done!)

4. Speaking of catalogs, go through those old catalogs and throw them out! (Done!)

5. Research on the internet new and different veggies you may want to try next year while you are waiting for your catalogs to come in. I’m always wanting to try something new. Start a list of possible veggies and add to it as you find more. You may not try all of them but at least you won’t forget them! (I started mine and keep adding to it)

6. Water your trees and perennials if you don’t get precipitation. We got a great snow in November so that let us off the hook but if Dec is dry, water later this month on a warm day. Forget about it if your tree has snow around it and the ground is frozen-the water won’t soak in frozen ground. (Since it snowed, I didn’t water-yea!)

7. If you feed birds, be sure you give them a source of water too. If my waterer is frozen, I boil water in a teapot and add it to my waterer to melt the ice. If you have bees, keep providing to them water too. (I check daily to make sure they have both food and water)

8. Take a walk around your frozen tundra (garden) and start to plan your next year’s  garden. Walking around when it is barren can reveal problem areas. It’s hard to ‘see’ when the garden is going on in the middle of the season with all the greenery. Perhaps you want to make a new bed or fix an old one…or maybe you could be a nut like me and add a whole new 1000 sq ft section in the garden Now that was a big project in 2011. Was I insane or what?! (This year I vow to finish the greenhouse by early spring.)

9. Organize your garden shed. Find all those tools you left outside-they’re  easy to see on the ground now that the the garden is done! (Still have a few floating around that I need to collect)

10. Ask Santa for some gardening stuff! Give them suggestions of things you want! (Done!)