10 Things to Do in January

Now that the gardening season has slowed down to a snails’ crawl, put your feet up by the fireplace, drink a hot mug of chocolate and relax! You deserve it! But for those of us who like to stay busy, here are 10 things gardeners can do in January.

1. Reflect on what you did in the garden last year-what worked, what didn’t and what you might do differently this year.

2. Get those new seed catalogs and start planning next season’s garden.

3. On a warm day tidy up your garden shed or tool area.

4. Sharpen and oil tools. Sand rough handles and oil them too.

5. Sort and organize seeds you’ve collected and older seed packets/ Get new seeds for packets over 3 years old.

6. Catch up on all the gardening magazines you have lying around.

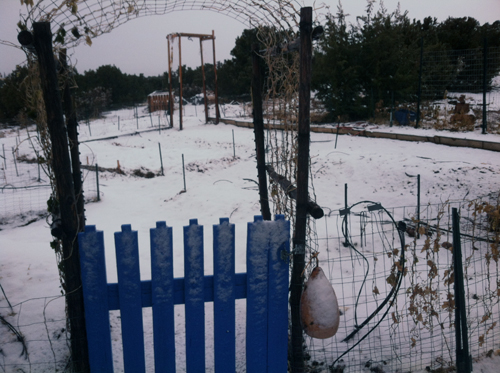
7. If we get snow, shovel it off the pathways and put on your trees nearby-they will love the extra moisture.

8. If we don’t get snow, water your garden on a warm day.

9. Empty the hoses out so they will be ready for the next watering.

10. Prune and shape fruit trees-cut off those waterspouts now that the trees are sleeping.

And don’t forget to feed and give water to the birds.
Can you think of more things?  I’m sure I’ve missed many things we could do and would enjoy hearing what you will be doing this January.

Cook green beans and other vegetables-Julia Child’s way!

Watch Julia Child/The French Chef cook vegetables the french way! Bon Appetit! Part 1

I found this video on you tube on Julia Child back in 60’s when she had her TV cooking show.  Besides finding it very entertaining (I kept thinking of the ‘Saturday Night Live’ skits on her), I also learned a lot. In it she cooks green beans, carrots, stuffed mushrooms and braised spinach. I was most interested in how she cooked green beans. I use to steam my homegrown green beans but I think this might be a better way to cook them as they keep their color and flavor (yes even store-bought beans). Besides I like her accent! Yessss. Watch it and see!


Watch Julia Child/The French Chef cook vegetables the french way! Bon Appetit! Part 2

Fall Bee Honey Harvest-2012

honey 2012

It is now almost January but I must share something that is very exciting for a first year beekeeper. I was able to harvest 12 jars of honey last fall from 3.5 bars of honeycomb before I put the bees to bed for winter last October. I still left them 14 bars full of honey and brood to survive the winter which should be more than enough food for them. This was my first year with Italian honeybees. I put them in an empty topbar hive (there is one more established topbar hive with Russian honeybees on the property that I didn’t take any honey from this year). The Italian girls did spectacular, producing many bars of honey for the first year in a rather dismal year for flowers and nectar. Molto Bene! I started them from a 4 lb package of bees I received last April and I did subsidize their food for a bit while they established their hive to give them a good start and I think it helped them kick ass later. That plus having my huge veggie garden for them to visit and I grew many flowers that they like such as borage, zinnias and waves of sunflowers.  I also have developed ‘bee gardens’ in other parts of the property with drought tolerant plants that bees like for nectar. My new motto is  ‘to only plant new perennials that the honeybees like’.

The bees are located on the back half of the property so after walking out to their hives, I opened it up and cut off the bars of comb loaded with honey, (you must leave the combs with brood in the hive for the bees). Then I put the combs into a 5 gallon bucket, put the lid on (the bees will try to get it) and took the combs up to the house. I crushed up the combs with a potato masher and strained the honey about a day and a half through a kitchen colander into a big bowl to get as much of the honey as possible. Then I re-strained the honey with some fine muslin to take out any impurities. Afterwards I poured the honey into the jars which you can see above. The beautiful jars are Bormioli Rocco Quattro Stagioni (wow-that’s quite a mouthful!) and can be bought from Amazon here. How appropriate! Italian jars for Italian bee honey! My good friend Mernie turned me on to them.

My bee teacher, Les Crowder from For the Love of Bees, a bee master whom I studied with this year told us in class that we could take the leftover comb wax which is still sticky with some honey (that won’t drain out) and put it outside and the bees will take any leftover honey from it. So I put the sticky wax on a cookie sheet and left it outside by the bees water source. (If you are new to topbar beekeeping and live in New Mexico, I highly recommend Les Crowder as you will learn so much from him and gain lots of confidence in handling bees.)

wax with bees on it

Within one hour they started visiting it.

wax with bees on it 2

By 2 hours I could barely see the wax-there were so many bees on it.

bee wax

Within 2 days they had cleaned up the wax so thoroughly that it was no longer sticky and they were no longer interested in it as they had taken all the remaining honey from it.

I put the cleaned wax in a plastic baggie until I decide what to do with it (the bees won’t reuse the wax). Since these combs were new this year, the wax is a beautiful whitish-golden color. Older combs turn brown or black as they get older.

Roo Apron

Roo apron

Got this nifty gift for Christmas-a ‘Roo Apron‘. It fits all and has a large kangaroo pocket where you put your harvest instead of putting it in a basket you lug around. Then you can easily empty it in whatever you want. Also has some handy pockets to hold your cutting tools. I see using it for harvesting my apples when I’m up on a ladder. I can see using it for potatoes, eggplants, peppers, corn and just about anything that won’t crack in the big pocket. When full the bottom opens up to release your produce. Can’t wait to use it next year. So many times I go into the garden and just take a few things and then before you know it my hands are full. Not anymore!

This was purchased at Peaceful Garden Grow Organic website:

http://www.groworganic.com/catalogsearch/result/?order=relevance&dir=desc&q=the+Roo+apron&x=0&y=0

Merry Christmas Gardeners!

red bird house

Merry Christmas and Happy Holidays to all my gardening friends!

Woke up today to a white Christmas today with 2 inches of fresh snow! Not much but we’ll take it! In the afternoon, it was a beautiful super clear day with visibility over a 150 miles. How do I know? We can see Mt. Taylor from our house today and it is 150 miles away! Albuquerque is only 55 miles away! Now that’s wonderful gift!

What do your carrots sound like?

Watch this-too cool!

Cosmic Atomic Carrot Soup

Check out the color in this carrot soup!

Check out the color in this carrot soup!

If you haven’t had carrot soup before, this is really good. I’m not a huge carrot eater but went back for seconds with this soup! It is made with Cosmic Purple carrots and Atomic Red carrots (hence the name) but can be made with any other variety of carrot as well.

Cosmic Atomic Carrot Soup

1 large onion

½ lb. Russet potatoes

½ stick butter

1½-2 lbs fresh carrots, cleaned and sliced

6-8 cups veggie or chicken broth

1 cup cream (or half and half)

salt/pepper to taste

honey (to taste) – tablespoon+

Saute onions in butter on medium heat in a SOUP POT till tender. That way you can just add the other ingredients without using more pots. Add carrots, potatoes and broth and cook till they are fork tender. Pour into a blender and blend till smooth. You will have to do it in batches. You could use a ‘wand’ but I find the blender purees it better and it should be silky smooth. Pour it back into the soup pot. Add honey to taste to just bring out the sweetness of the carrots and stir in well. Taste. Add more honey if needed.  Stir in cream. Reheat till warm but do not boil. Delicious!

Reflections on a Carrot

I like to take time at the end of the season and reflect on some of the new veggies I grow. It may help you decide if you want to grow something but it definitely helps me decide for the next year especially when my thoughts are fresh about them.  Mind you I’m no expert so this is strictly my opinion. This year I planted 3 varieties of carrots: Paris, Cosmic Purple and Atomic Red.

Paris carrot-photo courtesy of Huffington Post.com

Paris carrot-photo courtesy of Huffington Post.com

Let me start with Paris carrots. They are considered a gourmet variety from France. They look like large radishes only orange and are suppose to have superior flavor. They would be great in very hard soil where a long root would have a hard time penetrating. However, I was disappointed in the taste-rather bland and not all that flavorful so I wouldn’t be growing them again. Perhaps the New Mexico soil isn’t right for them.

cosmic carrot_kitazawaseed com

Cosmic Purple carrot-photo courtesy of Kitazawaseed.com

Next carrot that I grew was a Cosmic Purple carrot. The color is a very dark purple on the outside and bright orange on the inside-very pretty and they are about 6-8 inches long. The taste is excellent with an almost spicy carrot flavor-hard to describe but very good. I have grown these in the past and will grow these again.

AtomicRedCarrot_artefactual org

Atomic Red carrot-photo courtesy of artefactual.org

The last carrot I grew was an Atomic Red carrot-I love everything about this carrot. Although it isn’t a supersweet carrot, it still has excellent carrot flavor. It is also about 6 inches long. But the best thing about this carrot is it has the most fantastic red color.  When added to a carrot soup with other carrots, it gives the soup a deep rich reddish-orange color that is almost neon. It is also wonderful in salads. I will definitely grow these next year.

‘Rouge Crapaudine’ Beets-say what?!!

Rouge Crapaudine beet. Photo courtesy of www.frenchgardening.com

Rouge Crapaudine beet. Photo courtesy of http://www.frenchgardening.com

I tried a new variety of beet this year-a heirloom beet named ‘Rouge Crapaudine’. Do I dare try to pronounce it?! Ha! This beet hails from France and is one of the oldest varieties of beet in history possibly dating back 1000 years and still around! Craupadine means female toad in french! It’s not pretty-it’s shaped like a very rough fat carrot  (definitely toadlike) and it’s skin looks like tree bark (toadlike again) hence the name. In fact it’s downright ugly BUT the dense purple flesh is divinely sweet and sought out by chefs. In France they sell them at farmers markets both raw and roasted. I was curious so I looked up how they cook it over there.

craupadine beet cooked

Cooked Crapaudine beet. Now it needs to be skinned.

First wash the beets (you don’t have to oil  or skin them) and place them in several layers of foil (beets on shiny side) and close it up tight on the top and both ends. Then put it directly on hot coals in your fireplace (yes that’s right) but not on a direct flame. A fun thing to do in the winter after having a nice warm fire.

It will cook inside the foil on the coals. How long to cook it depends on how hot your coals are. Mine took about 45-50 minutes total turning halfway through. You’ll have to take it off the coals and check it for tenderness with a fork from time to time as there is no exact science as this is an art!

Wear gloves if you don't like your hands red after skinning beets

Wear gloves if you don’t like your hands red after skinning beets

The skin will come off easy after they are cooked once they cool down.  But be aware your hands will turn a lovely shade of magenta! For more details you can go here  at the website frenchgardening.com where I learned about this beet and French cooking method.

Crapaudine bet skinned and ready to eat!

Crapaudine bet skinned and ready to eat!

Crapaudine beets get a sweet smoky flavor cooking it this way. You can also cook them in a more traditional way in an oven for about 45-60 minutes at 350°F. They’ll still be good but without the smokiness. Do try it in the fireplace for a treat.

After cooking them in the fireplace, I made a salad with the beets sliced and placed on a bed of greens with some crumbled goat cheese, pinon nuts sprinkled on them and topped with a balsamic dressing-absolutely fantastic. I didn’t even like beets-until now.

Crapaudine beet seeds are hard to find but I found them at Baker Creek Heirloom Seeds. Sow them next spring and just be sure you sow more seeds than you think necessary as they are tough to germinate and some won’t come up. Plant them in spring as they will take at least 3 months to be ready to harvest. Then harvest in late summer and store in a refrigerator all winter if you like and save for a wonderful fall-winter treat. Crapaudine beets can also be used in any beet recipe.

Potatoes harvested! Garden asleep!

Potatoes dug out just in the nick of time!

Potatoes dug out just in the nick of time!

Well all my potatoes were harvested before the first snow fall last week. Lava, Adam, Janet, Bob and Mernie all helped dig them out (and of course they all got some too). Thanks to all! I have about a half a bushel left of potatoes after we dug them out. I’m going to try a buttermilk potato leek soup with some of them and will share the recipe later.

From left-Peruvian Purple, French Fingerling and Russian Banana

From left-Peruvian Purple, French Fingerling and Russian Banana

I only grew gourmet fingerlings for my first try at growing potatoes this year. Here are the three kinds of fingerlings I grew-Peruvian Purples, French Fingerlings and Russian Bananas (I think). I loved the Peruvian purples but they  were small and I didn’t get many of them. I also loved the French Fingerling which are the red ones and the whitish ones are Russian Banana fingerlings. Both the Peruvian purples and the French Fingerlings have a wonderful flavor-kind of  a sweet, nutty potato flavor and are creamy in texture. I will definitely grow them again. The Russian Bananas were watery, not sweet, and when never got completely soft when cooked-they stayed crunchy. I won’t be growing these again. Plus I think I will try to grow a little bigger purple potato as the Peruvians were very small. You can check out hundreds of varieties at Irish Eyes Garden Seeds where I got mine online. They have a great choice of potatoes. I will definitely grow potatoes again.

Garden finally asleep!

Garden finally asleep!

Lava helped me unload 2000 lbs of manure in the garden and Beto and Beto Jr. came by and dug in the manure in each bed and finished cleaning up the main garden and pumpkin patch.  Nice to get it all done before winter really hit. So now the veggie gardens are sleeping!

So much to catch up on!

Fall Garden cleaned up

Fall Garden cleaned up

I haven’t been posting much lately because I’ve been busy tearing out the garden before it snowed, preparing for winter inside, working (i.e. making a living) and am studying Permaculture design with an online study group. BUT I have LOTS to share with you and will in the coming posts. Some of it will be on the fall harvest, preparing the harvest to eat, review of last season’s vegetables and about the coming season (OMG! NOT YET-yes it’s true-the seed catalogs are coming in!)  I find winter is a great time to catch up on lots of things we were unable to do in the summer/fall because of the intense gardening and to catch up on the three R’s (rest, reading, and reflection). So stay tuned!

Baca Street Arts Tour this weekend Nov 30-Dec 2

What’s this got to do with gardening? Hey, it’s how I make my living to support my gardening passions! Besides there is glass art you can buy to make your garden beautiful! To pick up maps for this walking tour, start at Liquid Light Glass at 926 Baca Street in Santa Fe. For more info call Liquid Light Glass at 505-820-2222.

DON’T MISS THIS HAPPENING!!

How about giving your our own handmade glass gifts for the holidays! Liquid Light Glass will be offering walk-in paperweight, ornament, and flower making! Come on in- choose your own colors and start forming hot glass into beauty!  All items made will be ready to take home the next day!

Liquid Light Glass gallery represents these artists: Elodie Holmes, owner and glassblower extraordinaire, Jannine Cabossel, blown glass Wabi Sabi vases, Keihatsu vases, glass flowers and more; Marcy Albin, etched designs in goblets; Cia Friedrich, blown glass sculptures and shells; John Marks, blown glass cups and Chimayo Hearts. Many discounts during the tour and 5% of Liquid Light Glass artists revenue goes to Santa Fe Children’s Museum.

We will be hosting other artists that will be selling glass, fine jewelry and ceramics: Kristin Lora, fine metalsmith and jeweler; J9 Glass, flame worked sculptural jewelry; Ezri Horne, ceramics; and Patrice Jaguirreberry, flint knapped blades. Patrice will be doing knapping demonstrations on Saturday. There will also be glassblowing demos all three days!

In addition all up and down Baca Street will be other artists who open their studios up to the public- Baca Street Pottery, Reflective Images-jewelry, paintings, prints and sculptures at various artists studios.

All of Baca Street will be open and celebrating the holidays! Join us!


Pictures from the Santa Fe 4th Annual Pumpkin Bash

Santa Fe 4th Annual Pumpkin Bash!!

This slideshow requires JavaScript.

Yesterday I held the 4th Annual Pumpkin Bash here in Santa Fe and about 35 people came! IT was COLD but not as cold as later on during the day and people warmed up swinging an axe! My friend Jill Foster called them ‘the choppers’! I also supplied my pumpkin soup (the recipe is in the previous post) to warm the bones. This was the biggest turnout to date. All my friends, Master gardener friends and Homegrown friends came out for the big event. Everyone had fun and afterwards took some pumpkin home.  Must have given away over 300 lbs to friends and the other 85 lbs is going to Kitchen Angels! Let’s figure out how many pies it would make- Take 385 lbs x 16 oz (16 oz in a lb) = 6160 oz. Divide that by 12 oz (1.5 cups is the standard amount of pumpkin used in pies) and we get  513 pies!!  Even if we subtract some out for that stringy stuff and seeds we still get around 500 pies!

Pumpkin Soup from the 4th Annual Pumpkin Bash

Here is the recipe from yesterday’s Pumpkin Bash! It’s a great recipe for pumpkin or any winter squash soup. It can be made vegan using veggie broth but I used chicken broth yesterday.

JANNINE’S PUMPKIN SOUP

INGREDIENTS:
About 7 lbs of pumpkin or winter squash (can be more or less)
Chicken broth or vegetable broth or water (I used one box of chicken broth + some water as it was still thick)
1 can Coconut milk (whole or  lite)
fresh grated ginger (I used about 2 tsp)
honey to taste (drizzle it in, stir and taste!)

Cut, quarter and clean out your squash of seeds and stringy stuff.  Put oil on exposed edges and put face down on foil lined cookie sheet and place foil on top so it doesn’t dry out. Cook at 350 degrees for 30-45 minutes until soft when pierced by fork. Scoop out and place in a big soup pot and add 8-10 cups of either water, OR chicken broth OR vegetable broth-your preference. Then take a mixer or one of those hand-held  blender wands and mix till smooth. Heat and add the can of coconut milk, some fresh grated ginger (peel first) and honey to taste. Do not boil. Yummy!

4th ANNUAL GIANT PUMPKIN BASH!!

Wanted to invite you to my 4th Annual Pumpkin Bash where people take axes or mawls and try to split my biggest pumpkin in half (this year 385 lbs). Come take a whack! Then we cut it up and give it away to anyone who might want a piece of fresh organic pumpkin. The rest we haul away to Food Depot/Kitchen Angels. It’s quite the happening.  Hope you can make it!

4th ANNUAL PUMPKIN BASH!!
THIS SATURDAY, NOV 10 AT 9 AM SHARP
LIQUID LIGHT GLASS
926 BACA STREET #3
SANTA FE, NM
(Bring an ax or mawl if you’d like!)