Worm Farming-Vermicomposting

Finished vermicomposting area

Last spring when I planted my tomatoes I put worm castings in each hole before I put the plant in. Worm castings are a form of composting that are from (do I dare say it?) WORM POOP! I paid $25.00 for a 5 lb bag for this POOP at one of our local nurseries and I thought, next year I’m going to do this myself and save the money. Plus you don’t have to turn it like regular composting (now there is an idea I like-less work)! Worm castings protect the plants from soil borne diseases, conditions the soil and is a mild natural fertilizer with 1% Nitrogen. People also use it in their compost teas for their plants. I created a vermicomposting area a few weeks ago in my abundant free time (lol)! Here’s how I did mine.

I found out we need a certain type of earthworm called a Red Wiggler (decided not to show the worms-not a pretty sight!). It is a different from our regular earthworm (although they are great in the soil as well). This red wiggler worm has a huge appetite and will eat manures, peanut hulls, oak leaves, humate and other ingredients such as kitchen scraps-non meat-they are vegetarians!! lol

I put together an outdoor vermicomposting area right next to the chickens so they can go to work! Some people put them in special bins inside their people house (not chicken house) so they don’t freeze. Forget that noise-although if you don’t mind…

I decided to use straw bales to ‘frame’ my outside area. I heard they will go into the straw in winter and lay their eggs and they come back (I think they freeze and their babies come back) when it’s warmer but I had this soil cable that will keep the soil about 70°F and decided to try it to keep them from freezing this winter and keep them working. (Crack that whip!)  We’ll see if it works this winter. Here I put the cable down (above pic) .
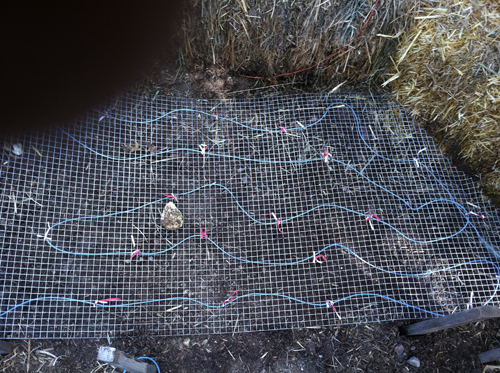
Then I put some hardwire cloth over it and wired it on with some twistie ties from my garbage bags. Make sure the wire is underneath the hardwire cloth. I did this so when I shoveled the compost out later, I won’t accidentally cut the wire.

Next I covered the wire with straw and newspaper to make a bedding for my new wiggly friends. I wet down the area so the materials were damp but not soaking wet. Worms like their environment moist but haven’t learned to swim yet!

After that I put some food down for them. What else but pumpkin! I have lots of that! Looks like they won’t starve this winter! (I heard they love pumpkin-good thing!)  I wonder if someone talked to them and the worm said, “We love pumpkin”. I mean how do we know for sure ?!! I also put in some old chicken manure, squash and coffee grounds for variety! Then I had a friend give me some of these wigglers and I put them on top of this so they would burrow in and feast! I forgot to take a picture of this and when I went back less than 1 minute later to take a picture they were already ‘down under’ this stuff.

Last I put more straw over the whole pile and wet it again so everything was moist. Now I check every week and pull up the top layer of straw and add more ‘food’ as needed. Also be sure to keep pile moist so sprinkle with water periodically. This winter when the hoses are frozen I will take a sprinkling can out to wet it. If you don’t get a soil cable, don’t worry, just follow the rest of this post.

One last thing to make it easy to separate the worms from their castings next spring, I divided my vermicomposting area in half and put a board between the two sections-you can see this in the very first picture at the top of this post. They are in the left section now and later when I see the castings I will stop feeding them on the left side and put the food on the right hand side. The worms will migrate over to the new food source leaving the castings for me to take (at least that’s the theory). I hope they are reading this too!

So now I’m a worm farmer! I can’t wait till next spring to get my very own free worm poop! YEE HA!!
Fall Garden Projects-First up-putting the pumpkin patch to rest

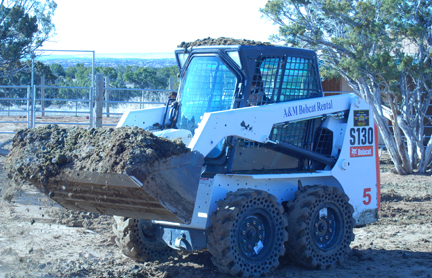
Horse manure on top of pumpkin patch

I’ve been really busy this fall around the garden since the Pumpkin Bash. It seems like I never have time to do any projects when the garden is going so I try and get some of the projects done in the fall before the dead of winter. Last week cleaned out the pumpkin patch and then I rented that Bobcat where I spread out about 4 yards of horse manure on top of it. I really needed to dig it in or it would blow away before spring.

giant rototiller-16 hp

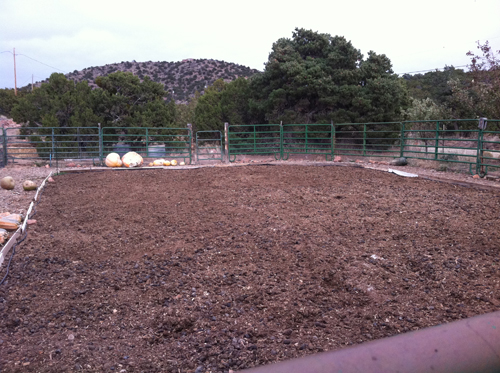
So yesterday I rented a giant rototiller (16 hp) and plowed in the 4 yards of manure, 50 lbs dried molasses (it smells so sweet), 50 lbs mushroom compost (are we cooking here?), and 50 lbs of gypsum (for calcium-makes strong bones, I mean strong plants!) in the pumpkin patch.

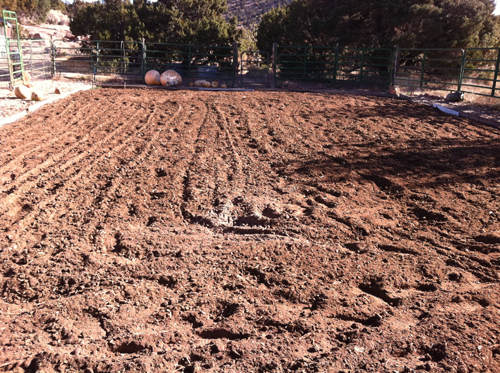
final pumpkin patch done

Now it looks so beautiful and is ALMOST ready for next spring! I still have to dig in some leaves (in the holes where I will be planting the pumpkin plants next spring) and a little (I mean very little) composted chicken manure to start the decomposition process so they can decompose over the winter and become leaf mold or should I say leaf gold by spring. This will be the third year for this pumpkin patch and boy what a difference three years makes when you add amendments each year. It’s starting to look good and the rototiller just cut through it fluffing it up together. I don’t like to rototill very much because of how hard it is on the soil microbes but felt that I needed to do it for now since this dirt was so void of any organic material and hard as a rock. I think after this year I’ll won’t have to do it again. I will add more mychorrizial next spring to help replenish the soil microbes.

Bobcat madness!

I rented a Bobcat yesterday to regrade the driveway. It was bad. Really bad. How bad? Well a friend said it was like a third world road! We had 2 storms this summer with torrential rain that wiped it out. The ground was still damp from that little snow storm  and perfect for working it. Anyways I had to rent the Bobcat for a whole day. It only took about 3.5 hrs to do the driveway and then I thought hmm, what can I do with it now?! At that moment, Javier pulled up with 2 trailer loads of horse manure, so I spread it out over the pumpkin patch that I had just cleaned up the day before. How fortuitous!  Then I went out to what will be the new garden addition (say what?!) on the back of the existing main garden. I know I said I was done adding on but I’m trying to get a three-year rotation for my tomatoes. I had cactus, piles of dirt, old compost bins and a lot of junk over there just on the other side of the long gourd tower. Well I took the Bobcat and ripped out the cactus, smoothed out the area, removed the junk and cactus, and spread out the old compost inside a couple of hours. Still had some time left so I ran it over to the area I want a greenhouse and leveled it out, removed rocks and cactus and dug up old tree stumps that would have been right in the middle of it. I had to get out of the Bobcat to push  a big piece of cement and some tree stumps into the bucket and dropped a big tree stump on my big toe loading it. Not sure but it’s either broken of severely bruised. I’ll figure that out tomorrow as I am dirt tired as I say.

Phew! Got it all done under 8 hours!

How to collect heirloom tomato seeds

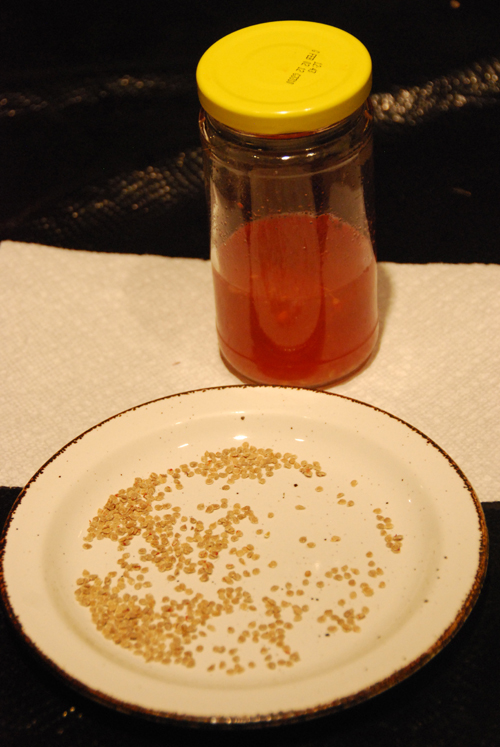
Tomato seeds fermenting in a jar. On the plate are some dried seeds.

I don’t collect hybrid tomato seeds as they may not grow back true.What that means is they may revert back to one parent or the other that they were crossed with. Heirloom tomatoes will grow back true.

The only heirloom tomato seeds I collect are from my giant tomatoes as I’m trying to get some seeds that do well in our high desert and give me some big, really big tomatoes. Last year I got 3 tomato seeds from a giant grower who grew a tomato over 7 lbs in Ohio. This year I got a pretty large tomato from one of those seeds. I kept the tomato which measured 19 inches in diameter and almost weighed 3 lbs and recently got the seeds. I will try some of these seeds next year as well as other big tomato seeds that I got from another grower this week.  Here’s how you can collect your favorite heirloom tomato seeds.

To collect tomato seeds, cut the tomato open, squeeze and scrape out all the seeds and put them in a little jar with some water. Then put the lid on. Try to not get too much pulp in with them. The seed/water mixture will start to ferment in a couple of days and it might bubble a little which is good. The fermentation will remove the slime on the seeds and the seeds will fall to the bottom of the mixture. When almost all the seeds are on the bottom, pour out the liquid, seeds and pulp through a fine sieve, removing the pulp. Keep rinsing until only the seeds are left. Spread them out on a paper towel to drain the excess water and then put them on another paper towel to finish drying. Before the seeds dry completely I move them around so the paper doesn’t stick to them. After they are thoroughly dry, put them in a ziplock baggie, label and store. You can keep any heirloom tomato seeds this way.

My only concern with collecting tomato seeds is if you plant cherry tomatoes too close to the heirloom tomato you want to keep, they may cross-pollinate so think about where they will be in your garden next spring and don’t plant them right next to each other. Tomatoes aren’t pollinated by bees but by the breeze or are self pollinating. Tomatoes originally came from South America and honeybees came from Europe or Africa so tomatoes aren’t native plants to the honeybee hence they aren’t interested which actually makes pollination easier to control.

Time to Collect Seeds

Cosmos, scarlet runner beans, rattlesnake beans, pumpkin, sunflower, zinnias and tomato seeds drying out to be saved-check out my tomatoes in the upper right corner-still have a few and its Nov 7th!

I should have put this post before the previous one. Now that our summer garden is done, we should start collecting any seeds we want before we tear out the garden and add amendments in the fall. I have left many flowers and beans to dry on the vine so I can collect their seeds.This has saved me TONS of money and is a fun thing to do.

After I collect them, I put them in open containers (cereal bowls or cookie sheets)- not plastic bags until they are thoroughly dry or they will mold and go bad. After they are dry, you can then put them in ziplock baggies. Be sure you date and label the bags so you know in future years what is what. The rule of thumb is seeds will stay usually viable for 2-3 years, sometimes more but the germination rate goes down as they get older-so use your older seeds first next year. Having said that, my only giant squash seed I grew this year came from a 07  seed and germinated and grew beautifully. I thought what the heck, I’ll try it anyways and it set a state record!

-I haven’t bought zinnias, cosmos, nasturtiums, sunflowers, marigolds, scarlet runner beans and rattlesnake beans in several years since I’ve saved their seeds.

-Of course I do keep my giant seeds of all varieties-giant pumpkin, squash, and marrow

-I will also keep all the gourd seeds but must let them dry out before we cut them open to get the seeds-otherwise the gourds will rot.

-I don’t save the seeds from my cucumbers as I grow many varieties and they are pollinated by bees so there is a good chance they have crossed.

–I don’t keep some hybrid seeds as they may not grow back true. That means they may revert back to one parent or the other.

-I only keep seeds from a few heirloom tomato plants as I grow cherry tomatoes and they easily cross with other tomatoes that are close and I don’t want to mix them up with my favorite tomatoes.

Max and Kryptonite done

Max and Kryptonite are done. Gone. Cut up and given away for food. A good ending to a great story. The giant pumpkin season is now done. In fact all the vegetables are done. Well almost. Gardening is never really over. Now it’s time to  get ready for the next gardening season or you can wait for spring.

Either way, you should clean up your vegetable garden of all the plants that have by now frozen and died and dispose of them with the garbage collectors or in a landfill. Why take them to a land fill and not compost them? Most of us don’t really compost hot enough to kill all the disease pathogens especially going into winter. I do compost the actual fruit or vegetables just not the plants. Powdery mildew, early blight and other diseases can be spread to next year’s crops- so bag the plants and dispose of them in a landfill. They’ll still break down, just not in YOUR garden.

MAX gets AXED tomorrow morning

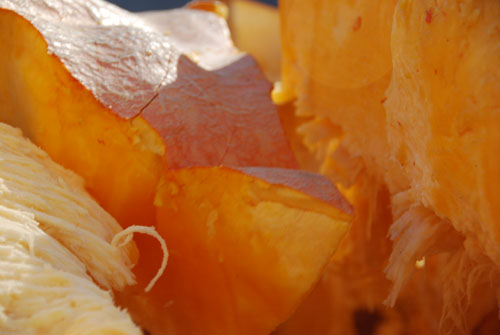
The inside of giant pumpkins are beautiful

Yes folks it’s true, Mad Max will get axed tomorrow morning at the 4th Annual Pumpkin Bash  here in front of  Liquid Light Glass’s studio at 10AM. We are looking to give away mass quantities of fresh organically grown giant pumpkin tomorrow by noon. And if anyone sez they don’t taste good, then either they weren’t grown organically or they’ve never tasted one cause they are delicious. Better come early cause last year it was gone in one hour!  Any Leftovers will be donated to Kitchen Angels or any charitable organizations that feed the hungry.

Some people have asked me if it’s hard to see my giant pumpkins get cut up and the answer is yes. I have to work through the thought of cutting them up but then I tell myself it’s better than rotting in some compost pile-which isn’t bad either as it goes back to feed the earth.

But they have a higher purpose-feeding people. Besides I need the seeds!

JANNINE’S PUMPKIN SOUP
Here is a great recipe for pumpkin or any winter squash soup

INGREDIENTS:
About 10 lbs of pumpkin or winter squash
Chicken broth or vegetable broth or water
1 can Coconut milk (whole or  lite)
fresh grated ginger
honey to taste

Cut, quarter and clean out your squash of seeds and stringy stuff.  Put oil on exposed edges and put face down on foil lined cookie sheet in a little water and place foil on top of squash  so it doesn’t dry out. Cook at 350 degrees for 30 min-1 hr or until soft when pierced by fork. Scoop out  flesh and place in a big soup pot and add 8-10 cups of either water, OR chicken broth OR vegetable broth-your preference. Then take a mixer or one of those hand held  blender wands and mix till smooth. Heat and then add the can of coconut milk, some fresh grated ginger (peel first) and honey to taste. Do not boil. Yummy!

What to do with a Giant Pumpkin? putt, putt, putt..

You can make them into boats and have a regatta!

What to do With a Giant Pumpkin? SPLAT!

To compost giant pumpkins they must first be broken up into smaller pieces!

What Can You Do with a Giant Pumpkin-BOOM!

What can you do with a giant pumpkin? oh-oh!

MAX TO GET AXED/4th Annual Pumpkin Bash on Friday Nov 4

MAX GETS AXED at 10 am this Friday, Nov 4th at our studio at the 4th Annual Pumpkin Bash. Afterwards at 11 am, we will give all of Max away to anybody that wants a piece to cook and the leftovers will go to Kitchen Angels and the Food Depot.  It will be especially fun as this year we will also crack open the giant greenie squash as well. That’s 788 lbs of pumpkin squashes to give away! I let my friends and the guys who lugged the squashes around take a whack at Max to see who can split it open. Anyone who wants to take part as Mad Max gets axed come on by and please take some nice organic fresh pumpkin home as well!

PBS program-Lord of the Gourds on today, Sunday Oct 30

For any of you that might be interested in seeing the program that got me into giant pumpkin growing (where I thought they were a bunch of nuts) it will be on TODAY on KNME, Sunday afternoon at 2pm entitled ‘Lords of the Gourd: The Pursuit of Excellence’ featuring Joe Pukas from New York and the Cooperstown Weigh Off. A really fun program!

Mad Max goes to the Weigh-Off in Colorado Springs

Here are some pics of the weigh-off on last Saturday in Colorado Springs. It’s always fun to see everyone’s results after growing these giants for 6 months or more. I planted all my giant veggie seeds on April 7 of this year-that was 188 days of the plants growing. No wonder we become attached! And the actual pumpkins/squashes were pollinated around July 10, which was 95 days for my pumpkin/squash to grow. That’s 448 lbs of growth in 95 days! Most growers get around 120 days to grow these behemoths but here in Santa Fe we have a much shorter growing season as most of you know plus we’ve been in drought this year and on a good year we don’t get much rain compared to say Ohio or New York or just about anywhere else!

This slideshow requires JavaScript.

How We Loaded the Giant Vegetables in a Truck

Mad Max and me looking like a mad hatter with that hair! Last day before cutoff.

Many of you asked how to I load these giant vegetables. Here are some pictures of the guys loading the giant pumpkins into the truck. If the pumpkins get much bigger, I’ll have to get them in with a hoist.

Many thanks to Janet and Tom Hiron for loaning me their truck, Pepe, for hauling these behemoths up to the weigh-off in Colorado and to the ‘Mad Max’ guys who loaded them. It truly takes a village to get help grow and promote these giants! Tomorrow I will post pics of the weigh-off.

This slideshow requires JavaScript.

4 New Mexico Giant Vegetable State Records Set in 2011!!!!

Giants Unloaded at Studio after the Weigh-Off

Four New Mexico Giant Vegetable State Records Set yesterday!

Yesterday I set 2 NEW New Mexico Records and BROKE 2 New Mexico Records that I set last year! My giant pumpkin, ‘Max’, ended up officially at 448 lbs breaking Kong’s record of 421 lbs last year. My giant marrow, ‘King Zuc II’ (zucchini) was 62 lbs which broke last year record of 43.5 lbs. My giant green squash, ‘Kryptonite’ (greenie) set a new record of 340 lbs and my long gourd, ‘Jake the Snake’, set a new record of 80″ in length. My giant pear gourd, ‘Gourdo’, weighed in at 103 lbs which was one lb more than the one at the State Fair earlier in September but there is no category for it. Sorry it took so long to post this but we had to get back from Colorado and get the guys back to unload all the giants at our studio! The next two posts will show the loading and Weigh-off but I wanted to get this out for all you following!