Perennial fruit care in spring

Strawberries grew unbelievably with the addition of Azomite last year

As far as perennial fruit goes, I already cut back the new raspberry plants a few days ago. They are a fall variety called Polana from Norse nursery online. They were fantastic last year with us harvesting lots of raspberries in their first year. So this is their first trimming. I trimmed them back within an inch or two of the ground and they are all still alive. I wasn’t sure as I forgot to water them last fall for a few months but with all the precipitation we got this winter, they are fine.

I also cut back the new blackberry plants called Triple Crown, and saw lots of new start-ups that rooted that I will move. Now I won’t have to buy some to finish up the blackberry row. Hopefully I will get blackberries in their second year.

Today I pulled away all the dead leaves around the rhubarb (Victoria) and they are starting to come up too. A very hardy perennial plant.

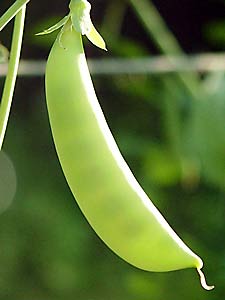
I checked the strawberries and pulled all the dead borage plants that grow up in the strawberry patch each year from dropped seeds. Borage is a good companion plant for strawberries and the bees love them. The strawberries need a haircut too-but not too short. The strawberries did fantastic last year.

The verdict is out on the artichoke. It came back last year in its second year but I don’t see any signs of life yet this year. They actually are not supposed to be grown here as a perennial because we are in a colder zone than they like, so we will see if it makes it or not.

Next up is to prune back the grapes and the apple trees and other fruit trees. I’m late on the apple trees but they need to be desperately thinned and pruned now before they come back to life. Last year I put Azomite, a mineral supplement, in my veggie garden which really helped the crops and I have some leftover which I will sprinkle around the fruit trees this year.

Plant peas this week!

Time to Plant Peas!

For me, I use St. Patrick’s Day to remind me to plant pea seeds OUTSIDE in my garden. Just an easy day to remember—we need to plant peas early so we can get some peas before we get too much heat.

I use a legume inoculate powder on the seeds. They pull nitrogen from the air and deposit it on little nodules on their roots.

Here’s some pea planting basics:
-Sun: They produces more in full sun in cool climate gardens. For warmer climates they prefer afternoon shade.

-Soil temp for pea planting: 40-75 °F– warmer soil will lead to faster germination

-Seed planting depth: 1″

-Space between pea seeds: I plant a double row of peas about spaced 2 inches apart in each row and each row is about 6 inches apart. I put them next to a trellis to grow up.

-Seed treatment: use a legume Inoculate for pea seeds.

-Days to germination: Approximately 12-14 days from planting seeds outside depending on soil temperature. They colder the soil, the longer they take to germinate.

So get out and plant peas soon!

Speaking of Seeds…

HOME GROWN NEW MEXICO IS HAVING THEIR ANNUAL SEED EXCHANGE THIS WEDNESDAY-This is a FREE event, so everyone is welcome! Please note new location this year. I’ll be there so hope to see you on Wednesday.

Wednesday, March 13th
4 pm to 6 pm

Home Grown New Mexico
Seed Exchange-FREE

If you are looking for free seeds for your vegetable or flower garden or have some to share, start this new gardening season with us at the Santa Fe Seed Exchange. *New this year– book sale of gently used gardening books and magazines-cheap!

Location: Santa Fe Area Home Builders Association building
2520-B Camino Entrada (next to Habitat ReStore on south side of building) • Santa Fe
Fee: FREE for everyone! No need to sign up-just show up!


NEW! Seed Starting Class-March 17

NEW! Seed Starting Class-March 17

DATE: March 17, 2019
TIME: 12 noon TO 2 pm
INSTRUCTOR: Jannine Cabossel/Tomato Lady
LOCATION: Tomato Lady mini-farm • 56 Coyote Crossing • Santa Fe, NM


______________________________________________________________________________

Why start seeds when you can buy plants at the nursery? There are many reasons to start seeds inside early. Start plants from seeds if:

• You want to grow unusual varieties that are not sold in the nurseries—this is the #1 reason I grow many of my crops from seeds. So if you want to try that unusual tomato or watermelon, you’ll probably have to start them from seeds yourselves.

• You want to get a head start on spring—start many crops from seed and get them in sooner

• You hate buying more plants than you need—many plants are sold in pony packs-maybe you don’t want 4 or 6 plants of the same variety

• Many times the plants are already root bound—the number one problem I see from nurseries

• You can save money by learning to grow your own veggies from seed

• It’s FUN!!

Participants will learn:

• Which seeds should be started inside and which seeds can be planted directly outside later when it warms

• Learn what dates to start the seeds & what dates to put out in the garden

• Learn about different soil mixes and containers-which ones are best

• How to transplant the seedlings up into bigger pots

• How to care for your seedlings

• How to avoid spindly transplants by using proper lighting

Certain veggies are hard to start from seed like beets and peas. They don’t like to be transplanted and are direct seeded into the cold spring soil and many times the seeds rot in the ground before they can germinate. Let me show you how to grow them from seed inside so they can be easily transplanted without stressing them. Stress free plants are happy plants, happy plants produce more. There are many things you can do to get started successfully, and I will share my knowledge with you. Handouts provided to take home to guide you.


HOW TO REGISTER: PAY BELOW and I will send you a confirmation to your email that you give to PayPal. I will send directions before the class starts.

Step 2: TO PAY: Purchase this class for $20 here (you don’t need a pay pal account, just a credit card):


Buy Now Button

Need to Contact me? Email me: jcabossel@hotmail.com

Groundhog day-Will we get an early spring or more winter?

Here’s a fun link to see Punxsutawney Phil from Gobbler’s Knob, the most famous groundhog in America, predict whether we will get more winter or and early spring.

https://weather.com/forecast/regional/news/2019-01-30-groundhog-day-forecast-2019-punxsutawney-phil

Greens started inside Jan 15

The weather outside has been very snowy since Christmas. More snow than I’ve seen in years. Should be a great spring for flowers. But inside I could not wait any longer so I planted some spinach, arugula and lettuce seeds under lights on January 15th. The greens popped up in 2 days and the spinach was right behind them. I guess they are as anxious as I am to get going even though the garden outside has 6 inches of snow on it and no end to winter in sight. But they are not destined for the garden. They will be going in the unheated greenhouse and the cold frame in about 5 weeks just in time for March madness (and I’m not talking basketball guys). And so the theory goes that I will have luscious greens come mid-March. I know it’s early but I looked up the last few times how early I’ve planted lettuce and spinach seeds and it’s always sometime in January. I guess I’ve recovered from the last season and looking forward to next gardening season.

Here we go again!

Winter spinach!

Nothing is better than spinach in the winter-sweet and tender. These pics were taken on November 23. I harvested all the outer leaves as they were slowing down their growth when the days got shorter and won’t start growing again till Jan 15. I harvested (two) 2-gallon bags of spinach!


Even the big leaves are tender. And it lasts a long time in the refrigerator!
Still good in late December. The variety is Carmel.


I still have the plants in my coldframe and hope they make it through winter. If they do, I’ll get 2-3 more harvests in spring. As of this storm last week, they were still alive. With this El Nino weather pattern, we had some much-needed moisture in the form of snow. Having been in an extended drought last year, this moisture is welcomed indeed. And now another storm is hitting us tonight on New Year’s Eve. We shall see how much snow it will dump by tomorrow. Today’s high was 25°F and tonight’s low is 15°F although it has gotten down to 5°F at night this last week.


Snow day!

KOKO likes the snow!


The gardens on a snowy day-Dec 26, 2018

Sleepy time for plants

When winter days are less than 10 hours a day in length, plants in the ground slow down or stop growing altogether. I’d like to think that the plants are sleeping. Eliot Coleman, who wrote The Winter Harvest Handbook, calls this time the Persephone Period. Our Persephone period here in Santa Fe is from Thanksgiving thru January 14th. What does this mean for us gardeners?

If you are thinking about transplanting plants that you started or bought into a hoop house, low tunnel or greenhouse, forget about it right now. Wait.

If you had planted greens in August for a fall harvest, you probably notice that they aren’t growing much anymore. But they should be big enough to harvest assuming you protected your cold hardy plants from our winter nights with winter weight row cover. I have 2 big cabbages still in the garden and a couple of kale that I plan to harvest this week since they won’t be getting bigger.

But plants that are small, will stay small now until Jan 14th when our daylight hours start to get longer again. Other parts of the country further north will have longer time periods of less light days. This has nothing to do with the Winter Solstice, which is the shortest day of the year but rather a time period of less light. After January 14th, daylight hours will start to get longer than 10 hours again. That’s when the plants wake up and start growing again.

So my recommendation is to hunker down with some good gardening books, get your gardening catalogs and plan next year’s garden (and get some rest too.)

Winter is here early

Fall harvest-tomatoes, Tahiti Butternut squash, Bradford watermelons and Craupadine beets

I just heard last night’s snow was the earliest on record for Oct 14th in Santa Fe. The weather apps have said it was going to be 27°F last night. Woke up this morning to a light snow, ice and the temperature was 24°F here. Harvesting has been intense the last few weeks. Why is there always so much to pick in the end? The only annual crops left are a few kale, beets and cabbages outside in the main garden and greens in the greenhouse and cold frame. I’m not sure how they fared as I wasn’t able to go out and check today, and in truth, with 34°F for a high, I was in no hurry to see if they made it. They were covered with winter weight row cover with the hopes they make it and I will check tomorrow. I was more concerned the barn animals were ok with this first cold snap and made sure all the heaters in the water tanks were working and the chickens had their heat lamps on. I guess winter is here.

Tips for Ripening Green Tomatoes

Get Ready for cold weather. We’ve been waiting all season for our tomatoes to ripen. What do we do when you know that a hard frost is going to hit and you still have lots of green ones on the vine? After ripening green tomatoes inside, I’ve had tomatoes into November and then I’m done. I won’t eat another tomato till the following season-July or August. A long wait but consider me a tomato snob as the store-bought tomatoes are never very good.

Tips on ripening tomatoes inside:
-Become a weather bug-we should check the weather for when the first freeze will arrive which historically comes mid-October here in Santa Fe.

This week Sunday through Monday is forecasted to get pretty cold at night–down to 34°F. This is not freezing (32°) but I will check the weather again on Saturday to see if it changes and if they predict a freeze or not. If it stays above 32°F, I will leave them as quite often we can squeeze out a few more weeks of decent weather for them.

-Pick em before the freeze-Pick all decent size green tomatoes and ripen inside. Leave the little ones. Ripening green tomatoes will never taste as good as sun-ripened tomatoes but they are still much better than store bought tomatoes. If you pick after the freeze, they will be ruined.

-Sort the tomatoes-Sort from rock hard green to almost ripe and put them in grocery paper bags and fold over the top. That way you don’t have to go through each bag every day and pull out the ones that are ripening sooner.
 Put them 2 layers deep.

-Use a slice of apple-In the bags with the green ones, I will put a slice of apple in the bag to help encourage ripening. An apple releases ethylene gas (the tomatoes produce this as well) which helps the ripening process. That is why you fold over the bag to help trap the gas that both the tomatoes and apple are releasing.

-Check bags every few days-When they start to change color, I pull those out and put them in other bags where they are all similar in the ripening stage.


-Leave them stem side up-they won’t rot as quickly.

-Almost ripe tomatoes-When your tomatoes are almost ripe, to increase flavor, pull them from the bags and place in a warm spot in your house a couple of days before you want to use them.


-Storage-Be sure to store them in a room that is at least 55 degrees. I made the mistake once and they didn’t have much flavor and many didn’t ripen at all. If they won’t ripen or aren’t flavorful they were probably stored in too cool a place or perhaps they were too small to begin with.

-Green tomatoes-Lastly you can always pickle green tomatoes or cook with them!

Better gobble up all the ripe tomatoes that you can! Soon the season will be over and we will be longing for flavorful ripe tomatoes again!


Remineralization-For Better Vegetable Gardens

Last winter I read about remineralizing gardens and how it’s not enough to add compost every year as minerals will eventually get depleted too as the plants use them up. I’ve been adding compost to my vegetable garden for ten years and have created a fairly rich soil but have never added minerals or trace minerals to my whole garden. So this season I decided two things-add something to remineralize the soil and get a soil test to see how my soil was. I haven’t had a soil test done in about 4 years so I knew I was long overdue especially since I garden so intensively.

The test results showed my soil was good except it was low in manganese, sodium and iron and medium for copper, boron, salt, magnesium and potassium.

So I researched out what product I should add and I decided on AZOMITE. Azomite is a rock dust mined from Utah and is actually an ancient deposit of aluminum silicate clay and marine minerals. It is a rich source of available potash (0.2%) and over 70 trace minerals, including calcium (1.8%), sodium (0.1%), and magnesium (0.5%). I bought online a 44 lb bag of micronized (consistency of flour) Azomite from Peaceful Valley Farms Organic site but they are not the only source-Amazon sells it in smaller size bags. After I added my usual 2-3 inches of compost in the spring while prepping the beds, I sprinkled Azomite on top of each garden bed and and gently turned it over in the top four inches of soil. I also read you can top dress your plants after you have them in with it. So for my strawberry plants, I just sprinkled it on top of the plants and watered in.

Here is my strawberries in April. It is just coming back from winter but was struggling

The results are amazing-WOW! is an understatement.

Strawberries grew 14″tall with the addition of Azomite this year

I don’t think I’ve had such a lush garden ever and I’ve had some amazing gardens. My strawberry beds went from struggling last year (part of that was the drip system wasn’t working very well but part of it was it needed something) to the tallest, happiest, most fruitful plants.

The main thing I’ve done differently this year is add Azomite. Now I know we’ve gotten some good rains in August which can only help a garden but all the plants in my veggie garden have gone ballistic growing and producing veggies-it’s like a frigging jungle.

I only used around half the bag in my 3000 sq foot garden, so a little goes a long ways. I will sprinkle the other half in next year and will get more for my perennial plants and fruit trees as well for next year. Once done, you won’t have to keep replenishing it every year but every few years, I’m going to add Azomite again.

Butternut winter squash-doesn’t attract squash bugs

Here is a winter squash that doesn’t attract squash bugs. I’ve grown the very sweet Waltham Butternut, an Italian variety called Rogosa Violina and this year a variety called Tahitian Butternut-all don’t seem to attract squash bugs, at least in my garden. And I grew these because I had read they don’t attract them.

In the last post, I talked about Rugosa Friulana, a summer squash that doesn’t attract squash bugs, so now we have both a winter and summer squash that don’t attract these pesky bugs. Try these two types next year for more carefree squash!

Rugosa Friulana Zucchini-doesn’t attract squash bugs

Rugosa Friulani

I’m trying a new variety of zucchini this year called Rugosa Friulana. It is a yellow, warty zucchini. It is growing 5′ away from my favorite green zucchini, Costata Romanesco. Both are Italian varieties. I thought I’d grow both and compare them.

COMPARSION

BUGS
I covered both plants with row cover after planting by seeds in late May. Male blossoms always appear first with squash, and then the female blossoms (with their little fruit attached at the base of the flower) appear. After the female flowers appear, I uncovered them both so the bees could get in to pollinate them. By keeping them covered early on, I avoided the Squash Viner Borer which appears earlier in the season and is gone by the time the female blossoms appears.

-The Costata Romanesco attracts squash bugs and I pick the adults and eggs off of the plant.

The Rugosa Friulana DIDN’T ATTRACT SQUASH BUGS IN MY GARDEN. That fact alone will make me grow it again.  It’s only 5′ away Costata Romanesco, so you’d think it would attract the squash bug but it didn’t. How thrilling is that!

PRODUCTION
-The Costata Romanesco started producing zucchini 2 weeks ago-mid-July

-The Rugosa Friulana just produced the first fruits now-Aug 7. Not that much difference.

Costata Romanesco

HARVEST

Harvest when Friulana is 6-8″ long. I have let them get bigger but they got woody and hard skinned so harvest earlier when they are smaller. The one in the picture is bigger than 8″.

TASTE
Now comes the taste test. I sliced both and sauteed them in olive oil with only garlic salt.

The Costata Romanesco tends to have less dense flesh and has a sweet nutty flavor. When you slice it into discs, it has beautiful fluted sides. It has always been my favorite.

The Rugosa Friulana has denser flesh when you cut into it (I like that) and has a slightly different flavor (hard to describe but kinda nutty too). When you cut it into discs, it also has ruffly sides from the warts. I like it just as well.

So if you only want to grow one zucchini plant, you might consider Rugosa Friulana– very flavorful and squash bug resistant.

Both are really good but just knowing Rugosa Friulana might not attract squash bugs  makes me want to grow it again. What a pleasant surprise!

LATER NOTE: Someone wrote me and said they did get squash bugs with it but I have not had that problem. So I should say it is squash bug resistant. That is still good enough for me.


Fall Vegetable Gardening starts in August


It’s hard to believe it’s already August. We’ve had plenty of hot days and hail storms to contend with this summer here in Santa Fe.  With August, temperatures should start to drop and daylight hours are getting shorter. This means August is a great time to plant a fall garden with some cool season crops, just like the ones we planted in Spring.

We are just starting to harvest our warm season crops like tomatoes and now we should think about starting our fall gardens. No rest for the wicked! Now some people are too burnt out to start more plants but some of the best crops do well in fall with cooler temperatures.

The day length is about 2 minutes shorter every day in the garden and fall crops may take a little longer to mature so get them in soon. This month you can still plant by SEED, many cool season crops like carrots and beets (plant these by seed right now as they take a little longer) Other cool season crops like lettuce, mesclun, chard, spinach, scallions, radishes, peas, arugula, bok choys, mustards, and other Asian greens can be planted throughout August by SEED. When planting by seeds, look for those varieties that have shorter ‘days to harvest’ on the packet. Pick something that is around 60 days or less to harvest so you’ll get a chance to eat some of the crops you’ll try before a freeze sets in, usually in October.

Other crops that do well, like broccoli and cauliflower and some cabbage should be started with transplants that you can get at a nursery. And if you procrastinate, you can still plant by buying all of the crops listed above as transplants up into early-September and enjoy some great crops. I’ve already planted peas (again-right on top of spring’s crop), and spinach and lettuces by seed. I already have enough bok choy, chards and beets growing from spring to take me into fall for those crops.

Here is a FALL PLANTING SCHEDULE for you to print for Santa Feans in Zone 6a:

FALL VEGETABLE PLANTING SCHEDULE