Soil Testing For Your Garden

Gardeners should consider getting their soil tested to see where their soil is at-if it has adequate organic matter, what the Nitrogen, Phosphorus and Potassium levels are at, what the pH is of their soil, how high the salt content is, and calcium, sulpher, iron, magnesium levels and much more. The problem is we use to be able to give soil samples to our county extension agent and he would send it off to the state lab for analysis but that service is no longer available to us here in New Mexico. You can still get a soil analysis done but will have to send it away.

I like A & L Labs in California and have used them before. It was well worth it as I found out a lot about my soil. The first time I submitted samples and the form, I had someone walk me through it as it seems complicated but is not. So here’s how to submit your soil samples to A & L labs. This one is in California but there is another one back east if you like. They offer many different kinds of tests but you only need a soil test.

1. Go to their site http://www.al-labs-west.com/

2. Click on ‘Analytical Services’ . They have many different services but you want the  ‘Soil Analysis’ section.

3. Click on ‘Sampling’ to see how to collect the soil specimens. Follow their procedures and send the samples (I put mine in a big ziploc baggie) to the address listed along at the bottom of the ‘Sampling’ section with the money $35.00. The price may seem a little steep but when you consider how much money we spend on gardening, it is not a lot to find out about your soil.

soil analysis report

SAMPLE-Soil Analysis Report-say what??! I didn’t understand this!

Graphical Soil Analysis Report

SAMPLE-Graphical Soil Analysis Report-I can understand this much better!

4. Then go back and look at ‘Example Reports’. See examples above. I got the ‘Standard Soil Report’ and be sure to get the ‘Graphical Soil Report’I didn’t understand everything in the standard soil test but you have to get it to get the graphical soil test which is easy to read and understand.

Scan

5, Next print out the ‘Submittal Form’ and fill it out.  See example above. Put what crops you are growing and other information they ask for. I just put in general vegetables. Check off  SC3 report (complete analysis-$35.00) and check off Graphical Soil Report-additional-$1.00. (The ‘soil analysis fees’ are in the blue column on the left side of the web page if you are wondering where I got these)

6. Mail soil samples, money and form back to them. Be sure to check off email return on the form as you will get it sooner than snail mail. It takes about a week to get the results after they receive it.

Seed Starting Date Calculator

Below is a seed starting date calculator from Johnny’s Seeds. I downloaded it from the interactive tools section on their home page. I put the date of our spring frost-free date (May 15 in the Santa Fe area) and it automatically put in all the dates from when to start seeds inside to when we can safely put the plants out in our gardens. I just copied the vegetable section here for you to see but it also has many flower planting dates as well-it was just too big to capture it all. If you live in another area or want to capture the flower information as well, then be sure to go to the interactive tool section at Johnny’s to get your own. But here it is for those of you who live in Santa Fe, NM for all the vegetables they list. If you click on the image it will show up clearer and you can print it.

2013 Johnny's seedstarting chart

USDA Plant Hardiness Zones and ‘average first frost free dates’ explained

NMSo what are USDA Plant Hardiness Zones? And what is this ‘first frost free date’ we hear about as gardeners so often?

The Plant Hardiness Zone is a standard set by the USDA (United States Department of Agriculture) and is calculated by accumulating many years of data. Zones are used by gardeners to help determine which plants will most likely thrive in their area. “The maps are based on the average annual minimum winter temperature, divided into 10 degree-F Zones”. There are 13 Zones, the coldest being Zone 1 and the warmest is Zone 13.

In Santa Fe, we used to be in USDA Plant Hardiness Zone 5 but now Santa Fe is in Zone 6b (-5 to 0°F). The reason our Zone has been changed according to the USDA is because it has better models to follow with more information gathered throughout the years- not necessarily because it’s getting warmer (although I do believe that too). Some areas in our county could be Zone 6a (-10 to -5°F) if they are closer to the mountainous areas. If you are not sure what zone you live in (where ever you live) go to the USDA plant hardiness site and type in your zip code and it will tell you what zone you are in-it’s as simple as that. So when you go to a nursery and the plant tag says zone 7-forget about it—it won’t survive our winters but any tag with Zone 6 or lower number should survive.

The average first frost free date is the date that we can safely put plants outside in our gardens. Notice I said average because some years we are colder and some years warmer. You’ll just have to watch the weather closely in spring for deciding if you want to try to sneak them out earlier in your area if spring appears to be a warm one. In Santa Fe our first average frost free date is May 15. So plant away outside after May 15, unless you hear we are getting a hard freeze! Of course if you are starting them in a hoophouse or greenhouse, you can start seedlings much earlier.

Now, once you know your planting zone and first frost free date, you can use the many tools available on the web for calculating all kinds of things from seed starting to succession planting to harvest times. Many seed companies have web tools to help you calculate the dates. In my next post I will show one such tool I use.

My favorite sauce tomato to grow-Goldman’s Italian American tomato

Goldmans Italian American tomato

Psst, I’ve got to let you in on a big secret of mine-Goldman’s Italian American Tomato. I think it’s the best heirloom tomato to grow for sauce bar none. It’s a big, meaty, ribbed, pear-shaped red tomato with exceptional flavor. Not too acidic, not too sweet.

Every year I grow a couple of plants of this tomato but never sell it at the Santa Fe Farmers Market as ‘The Tomato Lady’ because I’m too selfish! I want all of them for making the various pasta sauces I make. I sell all my other varieties of tomatoes, but not this one. A friend of mine said, ‘Well why don’t you grow more to sell?” A novel idea I should consider! It’s only downside is it does take 80 days to mature so you’ll get some of them sun-ripened and have to bring the rest in before it freezes. No matter-they ripen in the house just as well as outside. The plant gets big about 6-7 foot tall so you’ll need some space but it will be well worth it.

The Heirloom Tomato book

Amy Goldman found it at a roadside stand in Italy, and named it after her father’s grocery store in Brooklyn. Amy Goldman wrote the book, “The Heirloom Tomato” and I use it as the gospel for helping me pick my tomatoes to grow each year.

I start the seeds inside sometime around the beginning of April each year under lights and on a heating mat. You’ll have to get the seeds online as no one sells either the seeds or the starts around here. I get my seeds from Baker Creek Heirloom Seeds here.

Fall-Time to trim tomato blossoms off

As the tomato season starts to wind down in the fall, I believe it’s time to redirect the plants’ energy so I trimmed off most of my blossoms on the tomato plants. This helps ripen the remaining tomatoes on the plant.  I also cut off those crazy branches that are overgrown (and have blossoms) back to the last tomatoes that have been set on that branch. The idea here is to redirect the plant’s energy to stop making blossoms and put its energy into ripening as many tomatoes as possible before it freezes.

I also trim off any diseased branches where the leaves are dying or turning yellow and spray with Serenade again (probably for the last time). Late in the season, tomato plants are getting older and are more susceptible to diseases so my hope isn’t to cure any diseases but just keep it under control so we can still get many tomatoes. Besides we want all those green ones still on the vine that we have been patiently waiting for!

What’s wrong with this zucchini?

What’s wrong with this zucchini? The one on the left is yellowing and shriveling up. It wasn’t either fully pollinated (some bee didn’t do her job) OR once again it was too hot when pollination happened and it didn’t take hence it is self aborting. Just like tomatoes, all squash likes the heat but not when it is trying to pollinate. The zucchini on the right side of the photo is fine.

Why we don’t have ripe tomatoes right now

So if you still have tomato plants after the curly top virus hit many of our plants, congratulations! I had 84 tomato plants and am down to 48. Thankfully I planted more this year or I wouldn’t be at the Farmer’s Market. I’ve gotten many questions on why we don’t have many ripe tomatoes now. Lots of green ones, but few ripe ones and normally we would have LOTS of ripe tomatoes now. The reason is we had an unusually hot July with day temperatures over 90°F almost every day and the blossoms dropped back then, failing to set fruit.  The number one reason for blossom drop is high temperatures over 90°F  during the time blossoms would normally set in July (the number two reason is cold temperatures under 55°F). Once the temperatures dropped below 90°F in August they resumed setting tomatoes again hence the green tomatoes we are seeing now. So basically we are a month behind but should start seeing most of the tomatoes ripening.  Ahh, the challenges of growing vegetables in the high deserts!

Curly Top Virus -tomato problem right now

I’ve noticed a few of my tomato plants have got curled leaves, lost their bright green color and their veins turn purple and I’ve got several friends with the same problem who have contacted me about what this might be. I’m pretty sure its Curly Top Virus transmitted from the beet leafhopper which has been really prevalent this season. This is not to be confused with leaf roll where the tomato leaves roll. I think the combo of leaf roll and purple veins is the key. Read on.

Here is some info on Recognizing Tomato Problems from Colorado State University website. http://www.ext.colostate.edu/pubs/garden/02949.html

‘Curly top virus is transmitted by the beet leafhopper. This problem is common in western Colorado but seldom found in eastern Colorado. Infected plants turn yellow and stop growing. Upper leaflets roll and develop a purplish color, especially along the veins. Leaves and stems become stiff; fruit ripens prematurely. It is difficult to control because leafhoppers migrate from southern areas. Hot, dry springs with predominantly southwest winds usually indicate increased problems with this disease. No chemical controls are effective. Use row covers to protect tomato plants from the leafhopper.’ Of course this is for Colorado but applies here as well.

Unfortunately after tomatoes get the virus, you should pull the plants. I’m concerned that a leafhopper might bite an infected plant and then bite a healthy plant and infecting it.  So far 4-5 of my plants have this. I’m pulling them tomorrow..

Fall Vegetable Planting Schedule

Fall harvest. We only wish our gardens were this GREEN! Photo courtesy of http://gardening.ktsa.com

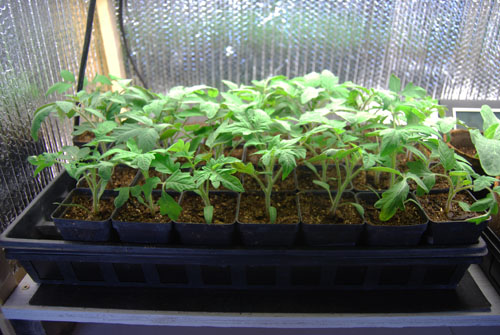
Ok, so now since it is time to plant my fall veggie garden, here is my planting schedule

FIRST-WHAT TO PLANT AND WHEN

Depends a lot on what you like to eat. Below is MY list of what I want to plant for a fall garden. Some of these are already growing in the summer garden and will be ready to harvest soon like the carrots and beets so I must decide if I want more in the fall.  All of these planting dates are estimates depending on the variety you grow and are based on planting outside, not in a greenhouse. Look on your package of seeds or on the plant label for seedlings for accurate harvest times and go backwards from Oct 3 for Santa F+ add 14 days.

JUNE

Fennel (Finnochio-bulb type)-Sow seeds mid June. OPPS! Missed this. The short cool days of fall are even better for fennel than spring. You can still plant this (IN JULY) as it likes cool nights although the bulbs may be smaller since we missed it’s prime planting date.

JULY-AUGUST


Asian Greens/Bok Choi- Sow seeds mid July. Can handle light frosts. Harvest days depends on variety. Look on seed package.

Beets- Sow seeds in mid July-early August. Can handle freezes but must mulch with thick straw or row cover. 45-65 days to harvest.

Broccoli- Sow seeds early July-mid July. Can handle light frosts. 55 days to harvest.

Broccoli raab- Sow seeds in early July-mid July. Can handle light frosts. 45 days to harvest.

Carrots- Sow seeds in early July-mid August. Can handle freezes but must mulch with thick straw or row cover. 70-80 days to harvest.

Chard- Sow seeds late July-. Can handle some light frosts. Cover with row cover when it gets cold to extend season. 50-60 days to harvest

.

Kale- Sow seeds early July. The short cool days of fall are even better for kale than spring. Kale that is established will last well into winter and can survive below freezing temperatures down into the 20s.

Lettuces- Lettuce baby- Sow seeds in early-August. Seedlings will need consistent moisture and shade from the afternoon sun on hot days. Cover when it gets cold to extend season but it will not survive freezing temps. 45 days to harvest depending on type and variety.


Peas- Sow seeds in early-July-mid-July. Likes cool but not freezing weather. 60-75 days

.

Radish- Sow seeds late July. 30 days to harvest.

AUGUST


Spinach- Sow seeds early-August. The short cool days of fall are even better for spinach than spring. Spinach that is established will last well into winter and can survive below freezing temperatures down into the 20s although it will stop growing. Why doesn’t it freeze? It produces an alcohol inside-alcohol won’t freeze! 45 days to maturity.

Endive, Escarole-Sow seeds early August. The short cool days of fall are even better for these than spring.


Lettuces- Lettuce head – Sow seeds in anytime August. Seedlings will need consistent moisture and shade from the afternoon sun on hot days. Cover when it gets cold to extend season but it will not survive freezing temps. 45 to 60 days to harvest depending on type and variety.


Mesclun mixes- Sow seeds in early-August. Seedlings will need consistent moisture and shade from the afternoon sun on hot days. Cover when it gets cold to extend season but it will not survive freezing temps. 45 to 60 days to harvest depending on type and variety.


Arugula- Sow seeds in mid-August-late August. Fast growing. Can handle some light frosts. 
30-40 days to harvest.


Kale- Sow more seeds mid August. The short cool days of fall are even better for kale than spring. Kale that is established will last well into winter and can survive below freezing temperatures down into the 20s

OCTOBER


Garlic-Sow largest cloves anytime in October after the first frost. Harvest in late-June-July

Shallots-Sow largest bulbs anytime in October after the first frost. Harvest in late-June-July.

I’m 

not a big fan of kale, endive, escarole and collards, but went ahead and listed them as I know many of you like them. Cabbage and cauliflower take too long to grow for me. Forgetaboutit!

SECOND-WHERE TO PLANT


Do you have garden space close to your house for easy watering and harvesting as it gets colder? This is important to consider if your main garden is far away from your home. I have two places to plant them now. My cold frame and my raised beds up by the house. If I ever get my greenhouse done, I’ll have another great place for veggies but for now I’ll plant in my two spaces.

Cold frame in previous year

My first space is my cold frame up by the house. Since it is too hot now, I think I will have to put some shade cloth over it to keep plants cooler inside. Also I want to get one of those automatic vent openers that will open the lid if the temps get too hot and close it when it gets too cold.

The shallots will soon be done in this raised bed and I will use it for fall planting

My second space is the raised beds also up by the house. Raised beds are great as they keep the soil warmer in the fall when it is getting cooler. Since I already pulled all the garlic in these raised beds, I will plant a few cold hardy vegetables in them and then plant garlic and shallots between them come October. The beauty of having some garden space close to the house is when it does get cold, I won’t have to walk down to the main garden to water and harvest. I can just get a watering can and go right outside the house. Also I can replace the light row cover that I keep my cool season crops under (keeps the critters and bugs away) with a heavy row cover on the beds if a sudden frost comes up. The cool season crops will be picked by the time winter hits and the garlic and shallots will sleep till spring!

Make a great tomato cage

Tomato in cage, drip underneath, trimmed up off the ground, straw mulch in well and staked to t-post

You need to ‘cage’ your tomatoes before they get unruly. I hate those tomato cages they sell in the store. They are too little and flimsy and the tomato plant will quickly outgrow them. I found a great way to make cages in ‘The New Victory Garden‘ by Bob Thompson.

First use concrete reinforcement wire to make your cages. It is heavy-duty wire that has 6 inch openings so you can get your hand through the openings with a fat tomato. Think optimistically – you’re gonna get a 2 lb giant juicy tomato on you plant and need to get out of the cage! You can buy it by the sheet, which is 4 ft high, or by the roll which is 5 ft high. One sheet will make one cage. The only trouble with the 4 ft height is it is too short for many heirloom tomatoes but some people stack two of them together to make an 8 ft high cage!

I buy the roll, which isn’t cheap, but is a one-time cost and the cages you will make can also be used for beans and cucumbers, in fact almost anything you want to grow vertically and will last a lifetime. A roll is 120 ft in length and will make about 18 cages so if that is too many than I suggest you go in with another gardener friend (or 2) and share the cost. Cut the wire with bolt cutters or an angle grinder not hand wire cutters-your hand will be wrecked-I speak from experience. Here’s how I do it:

1. If using a roll unwind it and hold it down with some BIG rocks or bricks so it doesn’t wind back up. Count 13 squares and cut off one side of the wire leaving it long.

2.  Then bend the long wire into a ‘u’ and hook it back on itself as shown in this photo.

The cage will be approximately 24 inches in diameter when finished. Then I cut off the bottom leaving all the ends pokey (not shown) so I can push the ends into the ground so it won’t blow over.

3. If using a sheet, I wouldn’t cut the bottom edge as I do with the roll to keep as much height as possible.

4. Stake either cage with a 3 ft high green t-post pounded next to the cage and tie the cage to the green post to keep the cage from falling down from wind as shown in the top photo.  This is important when the plant gets top heavy. If you are next to a fence, you could tie it to that. The point being that you don’t want your tomato plant to fall over. Some people growing in pots just put the cage over the whole pot and the pot keeps the cage from falling over as the plant gets bigger.

PS: More on the dreaded squash vine borer

I just posted about the squash vine borer and a gardening friend, Gene, mentioned that his squash is smaller than in the video in a comment in the earlier post on squash vine borers. I forgot to mention that while the squash is small before they blossom, I keep them covered with row cover which keeps both the SVB and the squash bugs out but once the plants are bigger and blossoms, we have to take the row cover off for the bees to be able to pollinate them-that’s when we should use the foil.

More tasty tomatoes and peppers with Epsom Salts

Get more tomatoes with Epsom Salts

Epsom Salts May help increase blossoms in tomatoes and pepper plants. Increase in blossoms means more tomatoes and peppers!

Epsom salts contain magnesium sulfate, two important elements for plant growth.

Magnesium– can become depleted in soil usually later in the season. Magnesium helps strengthen plant cell walls, helping the plant to absorb nutrients. It also helps to increase blossoms.

Sulfur– improves the growth and overall health of plants, it may also help our high alkaline soil here in the southwest.

There are two ways to use Epsom salts for tomatoes.

1. Mix 1 tbsp of Epsom salts into the soil at the bottom of the planting hole when transplanting tomatoes or peppers or mix 1 tbsp in a gallon of water and water the transplant. It may help plants absorb Calcium and other nutrients from the soil.

2. Use as a foliar spray of 1 tbsp per gallon of water when the plants flower. Epsom salt helps set more blossoms.

I’ve used Epsom Salts on my tomatoes, peppers and even roses for years. It will help roses produce more flowers. Scratch in 1/2 cup of  Epsom salts in soil around rose bush and water in.

Started planting tomatoes May 11

15 TOMATOES PLANTED

I started transplanting tomatoes into the new garden section. My friend Tom, and I got 15 of them in the soil-all ready to go. We added to each hole: more compost, yum-yum mix, mycorrhizal fungi (for root growth), worm castings, epsom salts (for many blossoms), and dry milk (adds calcium to avoid blossom rend rot later). And this year to (hopefully) conserve on water usage, I’m trying silicon gel granules and some volcanic ash, both of which will keep water longer around the plant root zone.  All this stuff is mixed up with some of the existing soil in the hole.  Then we put the tomato plants in (and if they are rootbound, open the roots up a little), made a well around each one and water each hole several times to get the soil wet. Then I go back a third time and water in some Superthrive and seaweed fertilizer (helps with plant transplant shock). Afterwards I put a drip line around each plant and then put a wall-of-water around each of them to keep them warm at night because just when we think we are out of the woods weatherwise, it gets cold again.

To keep the wall-of-waters from collapsing when the wind gets blowing hard, I put some bamboo stakes inside the walls as shown in the second picture. Overkill? Maybe. But I will get some fantastic tomatoes during the season. I still need to put the main drip hose (1/2 inch size) around the perimeter of the patch and connect each individual drip line to it but I can hand water every other day for now till I get to it. Planting is the hands on intensive part-later it will be a breeze watching them grow..

Tomorrow-May 16, Amy Hetager, from Home Grown New Mexico, is coming with her students from Americorp to plant some more tomatoes. No shortage here-still got 55+ tomatoes to put in the ground!

Make a Soil/Rock Sifter for New Garden Beds

My friend Adam made a sifter to sift out rocks from soil when creating new garden beds. It is a simple contraption made with stuff I had lying around. He found a pallet and cut it in half. Then he screwed 2 layers of chicken wire onto the pallet. He used two 2×4 as portable legs to lean it up on an angle. Then you just put a shovelful of your rocky soil on it and the dirt falls through while the rocks roll off. The soil is light and fluffy and ready to add compost or horse manure to it. When I later looked up how much one is you can buy online, they were $250! Here is Caleb using it on a new garden bed.

Seed Germination Trouble-seed heating mat too hot!

Some new tomato seedlings coming up among the others

This year I have been struggling with my seed starting this year. Many seeds have not germinated. The seed germination mats seemed way too hot. I’ve never had this problem before (usually it is too cold) but when I did some research, I found out the mats are suppose to be 20 °F over the ambient temperature. This spring so far has been very warm (especially inside the house even without the heat on) and when I took the temperature of the soil in the little pots it was between 95 and 1oo°F! Way too hot for germination. No wonder very little was coming up—I’ve been frying the seeds!

So I got a soil germination thermostat that will control the temperature which I keep at 80°F and within 3 days I had 11 tomatoes come up. Wow what a difference. I will have to replant some tomatoes seeds but hopefully I will be fine. Guess I won’t have to worry about the plants growing too big this year before I transplant them in the garden.