Transplanting tomatoes

IMG_8961

So many have asked, “Am I’m going to plant my tomatoes in the ground soon?” The answer is not too soon. I just transplanted all my tomatoes into 2″ pots and they need to get bigger! (Look Linda and Lava, how big they are already!) All you who ordered your tomatoes will get them, don’t worry. When? As soon as they are ready.

I actually delayed starting them this year as I don’t want to put them in their wall of waters (WOWs) too big. Wall of waters are great protecting our tender plants from the cold nights and from the WIND. I will still put my plants in WOWs even if it doesn’t freeze at night anymore because they like the warm environment the WOWs provide. And tomatoes love heat. It does look as if the freezing nights are over but one never knows. Might be one of those early warm years. Wouldn’t that be great!

Many newbies and some of us oldies get impatient to plant outside as soon as the May 15 (or even sooner) magical date has arrived. Really? It’s a guideline, not carved in stone. Will you be out there come hell or high water, cold temperatures or crazy winds trying to get an early start? To what advantage? I’ve found those with patience have the biggest advantage as they know that if they wait maybe just a little longer than that magical date, they may not only catch up to those who planted sooner, but may surpass them in growth. Why? Because the earth gets warmer, the nights gets warmer and the days will surely get warmer too-all good things when planting tomatoes (and other warm season crops). So don’t be in such a hurry-slow down and enjoy the beginning of this next growing season.

Gardening this spring

trini

But first one last memorial-I couldn’t resist because I found this photo. I haven’t written much lately because I’ve been sadden by the death of my favorite kittie-kat, Trini. Above is a photo taken by Genevieve Russel several years ago when Trini was younger that I just found and wanted to share. Wasn’t she beautiful? She had a heart of gold too. She would let you do anything to her-toss her around, make her dance or dress her up in doll clothes and put her in a high chair (Flynnie did that years ago). I even made her play the drums with me once! And whenever you answered the phone, there would be Trini, meowing loudly in the background so as not to be ignored. Absolutely had no boundaries (which is unusual for a cat). We have two other kitties (with boundaries) who would never let us do any of those things (probably claw our eyes out), who are wonderful too, but Trini was a very special being.

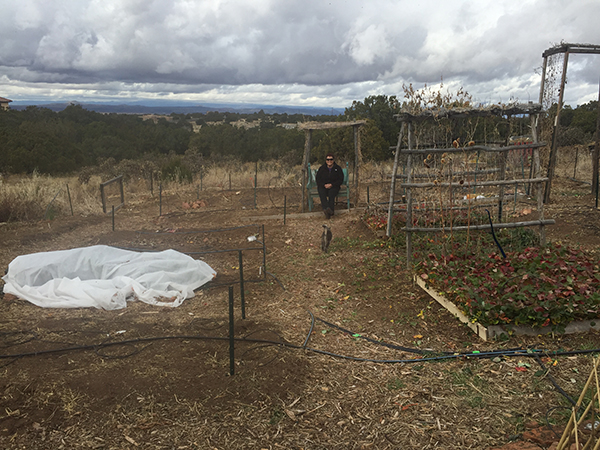
But I haven’t been sitting around either. I’ve been sooo busy finishing planting cool season veggies outside in the greenhouse and coldframe, and doing succession planting of more lettuces as I use them up. Here’s what’s been up around the farm:

coldframe+04-2016

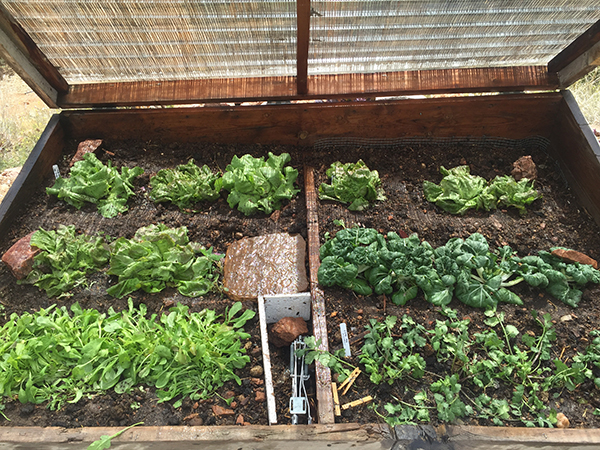
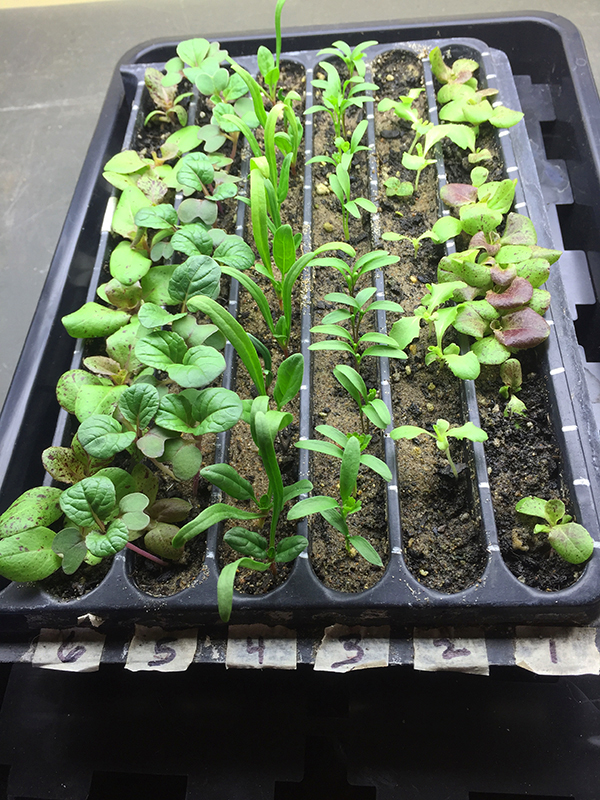
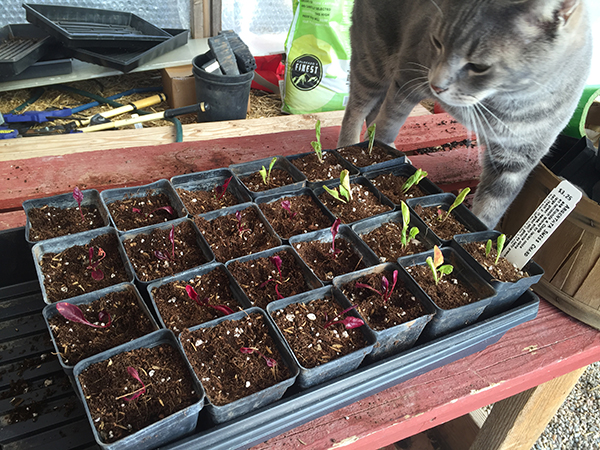
Wrapping up all cool season crops-lettuces, bok choys, kale and chard are going outside either in the greenhouse, cold frame or in the main garden. Many have already been growing (and eaten). Pictured above, my coldframe shows lettuces, cilantro and bok choy ready to harvest. As we eat them, new ones go in any empty place. This cool spring has been great for the cool season crops this year. Absolutely no bolting yet-wonderful! Notice the bamboo shade screening on the outside of the top of the coldframe. It was cut to size and screwed on and provides wonderful shade to help keep the plants cooler and keep them from bolting. I won’t be planting any more lettuce greens for a while, but when I do, it will be with HEAT TOLERANT lettuces for summer outside in the shade. Besides I have enough to eat for at least a month…

GH_04-2016

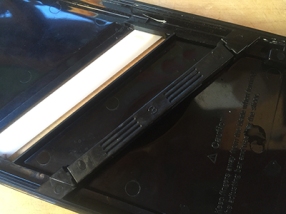
Here are some other lettuces inside the greenhouse we’ve been munching on since winter. This variety is ‘winter wonder’. I’ve already harvested a bunch and will soon finish it as this variety likes cooler weather. In case you’re wondering, that hardware cloth in the pic above the lettuce, is a lid covering all those beautiful lettuces. I propped it up to show the lettuces. I built it to keep the mice from eating them first. Last year was terrible for me and great for the mice-they ate anything young or tender. The lid is working-no lettuce has been eaten in the greenhouse by mice, only me! Haaa!

BT in GH

But maybe the presence of one of our cats, BT (broken tail-hey we didn’t do it, we got him that way!) the great mouse hunter, also has been an influence on no mice in the greenhouse! Here he is checking out my building skills.

Bt in lid

And here he is trapped in one of the lids!


spinach spring


spinach bed with shade clothWonderful spinach-this variety, Carmel, shown above has some radishes growing with them. You can still buy starts from Aqua Fria Nursery but soon the spinach season will be over so don’t plant by seed now. To extend the season at this time of year, I put a shade cloth over the bed (right) so they will last a little longer and not bolt. Meanwhile the spinach has been wonderful with this extended cool weather we’ve had. Better enjoy it now as it’s gonna get warm soon.


kale floweringLast year’s kale is toast. Finito. The pic on left shows them bolting (flowering) and putting all their energy into making seeds and fighting off the aphids. Kale is a biennial plant, meaning they will live two years, putting most of their energy into making leaves the first year and making seeds the second year. Since I don’t want to keep the seeds this year (I have plenty), I will pull them and give the plants to my chickens after they finish flowering (the bees like the flowers). The chickens will enjoy the kale and get extra protein with the aphids-perfect. Otherwise if I had no chickens, I would be composting them. There would be no problems with the aphids as they need living plants to feast on. In the compost pile, as it heats up, they will become toast anyways (I like that word)! But don’t worry, I have another crop of kale going in this week!

red orach reseeded

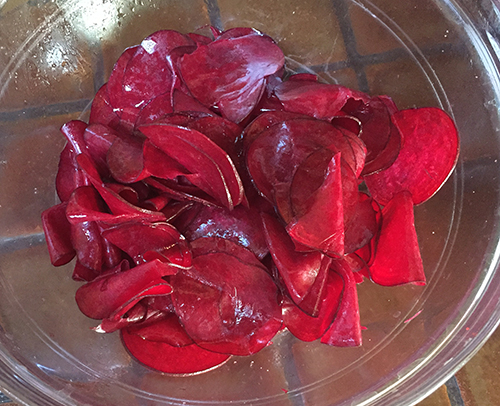
In the left pic is Red Orach. Plant it once and you’ll have for a lifetime. It readily reseeds itself. It is very tasty—kinda like spinach (in the same family) so you can cook it or put it into salads. Here it is growing willy-nilly everywhere.


garlic and shallotsIn the right pic is garlic growing nicely. Planted it last fall and mulched it with straw to help keep moisture in the soil. It’s not a cool season crop but does come up with the other cool season crops. I bet you wonder why I have a ladder across the bed-well it is to keep the neighbor’s dogs off of it and it works! They use to come over and lay or wrestle on top of the garlic and straw and now they don’t bother it at all.

rhubarb spring

And let’s not forget rhubarb this year! Mine is up and I’ve already cut off the flowers so all of their energy will go to the leaves and stalks. Only eat the stalks as the leaves are toxic. They have concentrated levels of oxalic acid in them.  How toxic? I don’t know how toxic for humans but I once saw a dead mouse who ate part of a leaf and died under it! Soon there will be rhubarb-strawberry pie-yum!


potato bags in herb garden

Finally I planted some of the potatoes in ‘potato gro bags’ in the herb garden. Can’t wait to see how they do! These are “purple’ potatoes whose variety name I can’t remember, but they are a fingerling type. The herbs are doing well too. This is the second year for these perennial herbs. There is marjoram, oregano, kitchen sage, winter savory, thyme, chives, tarragon, lemon thyme and garlic chives. We beefed up some of the drip system so they should get plenty of water this year. Lavender is in another part of the garden and lots of basil will go down in the main garden later when it warms up!


Trini 2000-2016

trini on pillow

Our lovely kitty-cat, Trini passed away on April 9, 2016. Part Maine Coon cat, she was the most friendly, loveable cat I have ever had the pleasure of loving. She was always happy, especially if she was on your lap. She is sorely missed by all.

Woo! Hoo! Eldorado can raise chickens following appeals court ruling

IMG_5694

Sophia, one of the giantveggiegardener’s ‘girls’ is a beautiful Ameraucana chicken and lays blue green eggs. No chicken little here!

For several years now, some of the Eldorado residents who wanted to raise a few chickens fought with their Homeowner Association (HOA) as to whether they can keep chickens as pets. The HOA said they could not raise them in the Eldorado subdivision just southeast of Santa Fe. The homeowners took the HOA to court at great costs and now the appellate court has ruled in their favor of allowing them to keep chickens.  YEA!! It’s about time that the courts saw the value of keeping chickens even if the HOA does not. Chickens are not noisy, they are friendly, and they lay eggs! What pet gives that for you! A pet with a purpose! Nothing better than fresh eggs! Congrats to all who fought for their right to have chickens! To read the story in The New Mexican, go here.

Transplanting seedlings

Every year I get lots of questions on how to start seeds and transplant seedlings. To see how I start the seeds go here, but here’s how I transplant my baby seedlings up into larger pots.

transplanting seedlings_before transplanting

Here are the seedlings today from when I planted on February 8.  Notice the first true leaves are showing. They are now ready to transplant. Can’t let them get too big in these shallow seedling trays. With my marks, I can see what didn’t germinate.


seed starting tray with journal entry.jpg

Here’s the line up of what each number represents again if you want to see how each seed variety grew.


transplanting seedlings_rinse packs

I use 4 and 6 pack pots for transplanting up. I disinfect them in a kitchen sink full of water with about 2 tablespoons of bleach. Just dunk the pots and any trays you may use and then rinse them off and they are ready to plant. You don’t have to scrub them, just dip them in quickly, like they use to do with the glasses in those old college bars (oops, giving away my past!) If they are brand new, never been used before, then skip the bleaching.


BATCH 64_MOONSHINE

I’m using ‘Moonshine’ planting soil. I talked about it here. Great stuff.


transplanting seedlings_moisten soil

Be sure to pre-moisten the planting soil. Here I’m using a shallow ‘Tub Trug’. I love those tubs—so handy-from this to harvesting crops later and they come in fun colors.


transplanting seedlings_make holes

Make some holes with your finger big enough to accommodate the root ball. You’ll be surprised how big the little rootballs are.


transplanting seedlings_using knife

I take a small knife (this one plastic) and gently pry up the seedling out of the tray and carefully put it into a hole I made in the soil.


transplanting seedlings_transfering to 4 pack

Pick up seedlings by the leaves NOT the stem. The stems can get easily damaged so always handle them from the leaves. Notice the roots! I usually like to put the stems a little deeper in the hole so they stand upright.


transplanting seedlings_tamp soil

Gently pack the soil around them so they are sitting up nicely and not leaning.


transplanting seedlings_use seaweed

Water them with a diluted solution of  seaweed fertilizer and Superthrive to help with any transplant shock. Do NOT give them any fish fertilizer as that may give them too much nitrogen when first transplanting and send them into shock. Wait a couple of weeks before giving them any fertilizer with nitrogen. The seaweed and thrive help reduce any transplant shock.

transplanting seedlings_flat of transplants

Here is one of the first flats transplanted. Ain’t they pretty?! Now they are ready to take off and really grow! The next replanting will be into the greenhouse raised beds when they are bigger!

Seeds already germinating!

seed startingseegermination 02-16

I planted some lettuce and greens seeds on Feb 8 and by Feb 11 some are already germinating! That’s only 3 days. Wow. Unbelievable! Here’s the lineup again and how they’re doing so far:

#1 Yugoslavia Red lettuce just peaking up

#2 Santoro barely peaking up

#3 Slow-Bolt Cilantro not up

#4 Carmel spinach just starting to come up

#5 Baby Pak Choi way up

#6 Forellenschuss lettuce way up

Not surprising, the two larger seeds #3, the Slow-Bolt Cilantro and the #4 Carmel Spinach are slower to germinate. I imagine the bigger the seed, the longer it takes to germinate. But to my surprise, the spinach is starting to come up already and the little seeds like lettuce just exploded through the soil. Amazing. I’m totally surprised how fast some of them have germinated.

Now I just got to make sure to mist them heavily 2x-3x a day to keep the soil moist while they all germinate. I will spray diluted Chamomile tea on the baby seedlings tomorrow to keep Damping Off disease from coming. It works great.

Older Seeds-how to test for viability

seeds

If you have gone through your seeds and find packets that are over 3 years old, you may want to test them for viability. Are they still good enough to plant again? Many seeds are good for 2-3 years and some much longer if they didn’t get wet or damaged. I grew the state record for giant green squash (345 lbs) from a seed that was 8 years old. I was amazed. Read about the giant green squashes here; https://giantveggiegardener.com/2011/10/04/greenies-battle-it-out-for-who-will-go-to-the-weigh-off. So sometimes older seeds are fine too. Here are some things you can do with older seeds.

  1. First,  if they are over 3 years old I may toss them in the ground later in spring (especially flower seeds) to see if they germinate or
  2. I may test the seed packet (look at the date on the package) to see if they are still viable. Three years or older? Test them. To test them, take 10 seeds and soak them in water for a few hours to overnight and then put them in a damp paper towel and put them in a Ziploc bag and on a shady, warm windowsill or on top of your refrigerator (not a sunny place, you don’t wanna fry the seeds). Then in a few days check them to see how many have germinated.
  3. I use this chart  “Germination tables from Heirloom Seeds – Know when to plant all your vegetables.” to see how long it should take to germinate a particular seed under ideal conditions.  If none have germinated, keep checking them. After a few days, you’ll see some of them have germinated. So if 8 out of the 10 germinated, you have a 80% germination rate. If 5 out of the 1o seeds germinated, then you have a 50% germination rate, if only 2 have germinated than you have a 20% germination rate and so on.  I would probably toss those. This chart is also great to have when we are actually ready to start seeds inside under lights or directly outside (later) to see what is the optimum soil temperature is for each seed and how long it will take to germinate. I will post later on that when starting seeds inside or outside. This is just to test for seed viability right now.

Time to get seeds!

275px-Painted_Pony_Bean

It’s time to start getting my seeds for this coming growing season. I have most of my seed catalogs that I want and have looked at them. This is an exciting time for growers! So many things I want to grow and many new varieties too!  Here are some things I do when starting this process:

  1. The first thing I do is go through my seed storage boxes where I threw the packets in last year after planting. I have to organize them first to see what I still have.
  2. After reorganizing my seed boxes, I decide what I want to grow this year. Now the fun begins! Scouring over all the catalogs, I start to make a list and I need to decide where they will go in the garden because every year I over buy and run out of room in my garden. Many of the catalogs are so beautiful that I want to buy everything! I call it garden porn!  I too run out of beds to grow everything I want! Imagine that! Some of you have seen my gardens last year-I have 4000 sq feet of gardening space and still run out of room.
  3. I have a few rules I try to follow when purchasing seeds. Rule number one for me-I only grow things I love to eat so celery will never be on my list and if my partner didn’t love radishes so much, I wouldn’t grow them either (they taste like dirt to me). Why grow vegetables you don’t really like? Rule number two-I grow some vegetables that are more expensive than others. For example, I grow shallots instead of onions. Shallots are expensive, onions are cheap. Rule number three-I grow vegetables that I can’t find as starts in the nurseries. I’ve gotten some great vegetables that just aren’t available unless you grow them. You can either start them inside or direct seed some of them outside when the time is right. Also:

Home Grown New Mexico is having its 2015 Seed Swap on
Wednesday, March 15th at Frenchy’s Barn  on Agua Fria from 3 pm to 6 pm.
It’s free and you’ll get great seeds!

Other groups who will be at the Seed Swap:

The Santa Fe Master Gardeners will have several info tables there where you can get how-to info on composting, growing native seeds and more.

In addition the Seedbroadcast truck people will be there getting people’s seed stories and putting them online. Do you have a great seed story? Tell them!

The Tomato Lady (that’s me) will be there at the Home Grown New Mexico table inside the barn. I will have some of my tomato seeds and giant vegetable varieties available as well if any of you want to try growing a giant this year!

This is great resource for gardeners and a fabulous way to start off the growing season. Vegetable, flower and herb seeds will be available.

If you have any seeds you can bring to swap that would be great, but if you don’t you can still come and get some fabulous seeds for this year!

Quiet time

Koko Snow Dec_BLOG

Next time the snow is falling softly, go outside and listen. I love to go outside when the snow is falling-it is so quiet. It muffle all noises. I listen as I walk down to the barn each morning to take care of my barn friends. What do I hear? Nothing. Sometimes with all the sensory stimuli we are bombarded with each day, I like the sound of nothing. I call it quiet time.

Right now the garden is quiet, the trees are quiet, the earth is quiet, all sleeping soundly, waiting for spring to arrive. The sun wakes up late and goes to bed early every day. It is a quiet time for me too when I am home. I love cooking up hearty meals. I don’t do this in summer, I don’t have time- I’m too busy in the garden. But now I do have time for this luxury. I love having fires in the fireplace. I love the smell of piñon burning and the crackle of cedar wood. I love catching up on my reading.

BLUE SNOW

I miss the green of the summer gardens but love the blue snow of the winter gardens, the stark shapes and silhouette of the trees and perennial plants. Suddenly I see their bone structure without all the greenery. They are beautiful, draped in the snow.

I collected all the gardening catalogs that came in the mail in December, but I do not look at them-not just yet. There is plenty of time for that in a few weeks. That’s why the universe made winter-to give us time to reflect and rejuvenate and be quiet. Be still thy busy mind…

Winter Solstice/ El Nino here

GARDEN_PANORAMA

Winter Solstice has come and gone but it doesn’t feel or look like it yet. Yes, daylight hours are starting to get a little longer again but who can tell with all these winter storms hitting us here in the southwest? So far my projection of good precipitation this winter is coming true but that was based on a big, no make that a huge El Nino coming in. How big is this El Nino? They say it might be as big as the 1997-98 El Nino and may become the biggest ever! El Ninos affect all parts of the earth differently-some places droughts, some places more typhoons but here in the southwest US they notoriously bring more moisture when they hit us. So while it is in the 70’s on the east coast, it is cold and wet with snow here in Santa Fe this winter.  The trees are thirsty, the plants are thirsty and the ground is thirsty no more. Which is a good thing as we are now out of a long, long, drought that has been going on for years. As a gardener, this is great as mother earth is doing all my watering this winter so far.

Transplanting winter lettuce and chard


chard crowded

I went down to Agua Fria Nursery and got some lettuce and chard starts back in mid-November intending to plant them right away. I waited too long to transplant them and they got stunted and crowded in each cell as shown above.

chard just transplanted

Chard transplanted on Dec 1

When I did transplant them I teased them apart and planted them in small pots. Here they are right after I transplanted them on December 1. ‘BT’, the man of the house, inspects them.

chard_2 weeks old

Chard transplants on Dec 14

Here are the Chard transplants on Dec 14-only 14 days later! Look at the difference between the two pictures. I’ve grown all the lettuce and chard transplants under my lights in the house as it is too frigid to put them in the greenhouse now. I figured I could wait till after the Persephone period was over and by then they would be just big enough to transplant in the GH. The Persephone period will be over on January 15th here in Santa Fe when the daylight hours get longer again. The plants will be ready to transplant way before that time period. The chards are coming along nicely. I’m growing ‘Argentata’ chard and ‘Ruby Red’ chard.

BATCH 64_MOONSHINE

I planted them in a new potting soil called Batch 64-‘Moonshine’ which is available at Agua Fria Nursery in town. It’s fantastic with everything growing very fast. When I went back to Agua Fria Nursery and talked to Bob, he said he had the same experience last year, especially with the tomatoes.

Here are the ingredients in it: coconut coir, perlite, pumice, rice hulls, expanded shale, humus, worm castings, biochar, feather meal, fishbone meal, blood meal, alfalfa meal, oyster shell, metamorphosed evaporite, flaxseed meal, cotton seed meal, dried molasses, kelp meal, azomite, potassium sulfate, limestone, yucca extract, and mycorrhizae. Phew-quite a list!

The lettuces planted on Dec 1 are ready to transplant now! They have absolutely gone crazy growing super fast in this potting soil. The varieties I’m growing are North Pole, Winter Wunder and Marshall Red Romaine.

Snow Day!

This slideshow requires JavaScript.

Yesterday I hunkered down in the house after receiving 10″ of snow the night before-truly a winter wonderland! The trees and bushes got watered so I’m off the hook for a while! Plus we are due to get another storm tonight. Welcome El Nino!

Veggie chips-yams, beets, carrots & red potatoes

veggie chips final

After making kale chips, I thought why not try making other veggie chips from some of my vegetables. After all, I’ve seen veggie chips in the stores and thought it would be fun to try make some. So far I’ve done yams, beets, carrots and red potatoes. Some of them I did in the dehydrator and some I did in the oven.

mandolinemandoline setting


For all of them I used a mandoline. Mandolines are used for slicing things very thin. The one I got was not very expensive but does the job well. It has 4 settings with #1 setting slicing the thinnest and #4 the thickest and all of the settings still slice thinner than you could do with a kitchen knife. Not having used one before, I started using #1 setting which slices super thin. I then tried #2 setting which I liked better for the dehydrator and then used the #3 setting which worked even better for both the oven and the dehydrator. It was all an experiment. Here is how I did them:

Yams
I started using the #1 setting of the mandoline to slice the yams which was too thin. Hard to believe it can slice veggies that thin. More like shavings. One big yam filled 10 trays!  I like the dehydrator for these as you don’t have to watch them so closely and they keep their gorgeous color. After they were done, they were paper thin. Subsequent batches I used the #2 and #3 setting which were more like a potato chip in thickness.

yam sliced

After cutting the slices of yams, I put lemon juice on them, about a tablespoon of olive oil and massaged them in till everything is coated.

yams on dryer

Then I put them out on the trays. You have to spread them out being careful to not overlap them so they can crisp up.I lightly put some crushed rosemary on some of them and just lightly salted all of them. The rest just had salt but no rosemary. Experiment. I set the dehydrator to 145-150°F for 2 hours and then turned it down to 135°F till the chips were crispy. Hard to say how long they take as it depends how thin you slice them and what temperature you use. It took 2 hours for super thin and maybe 4 hours for the #2 setting on the mandoline. They should be crunchy like potato chips.

beets sliced

Beets
I used the#2 setting on the mandoline but think you can use the #3 setting as well for a more substantial bite. I put lemon juice and olive oil on some of them and on some of them I dipped in a cane sugar solution to make the beets sweeter-no lemon juice on those. I saw that as an ingredient in the store bought chips but afterwards felt it is not really necessary. Put on trays and lightly salt them.

carrots drying

Carrots
I used the #2-3 setting on the mandoline. Do the same as above with just olive oil and salt.


Red potatoes
For these I decided to try them in the oven as the thought of dehydrating raw potatoes didn’t really appeal to me. They were easy. I sliced them in my mandoline using the #3 setting which works well. I think they need to be a little thicker when using the oven as it gets done faster than using the dehydrator.

potatoes ready

When using the oven to dehydrate or baking the chips, you must really pay attention. If you do them in the oven, set your oven on 250°F (the lowest setting on many ovens). They cook pretty fast-about 45 minutes. You’ll have to watch them closely towards the end so not to burn them. Some recipes say set your oven at 300-400°F but when I did that they burned very quickly and were inedible.

For these I put about a tablespoon of apple cider vinegar and olive oil massaged in, then spread them out single layer on cookie sheet lined with parchment paper and then added salt on some, salt and pepper on others and salt and smoked paprika on still others. I tried onions but they turned out kinda funky.

potatoes_dried

Here are the finished potatoes.

Hard Boiled Eggs-Not!

eggs steaming

I just read about a new way to ‘hard boil’ eggs which doesn’t really entail boiling them at all but instead you steam the eggs. Why would you want to steam them? Well, have you ever had hard boiled eggs that were hard to peel? The reason eggs can be hard to peel is because they are the fresher eggs. The fresher the eggs, the harder to peel. But when you steam them with the pointy side down and the fat end pointed upward, they peel perfectly every time. Just put them in a pan with your steamer and water underneath and lean them against each other so they stay upright and steam them for 20 minutes, then rinse them in cold water. I also mark my eggs so I know I ‘hard boiled’ them if I put them back with the other eggs which I’ve been known to do but without the markings. Then it’s a guessing game! I have chickens that lay every day and since I’ve been steaming them, they are now always easy to peel. No more frustration when peeling eggs.

Finally the Garden is cleaned up-Nov 23

Nov garden 2015

The garden is CLEAN! Here I am siting on the bench on Nov 23. How desolate it looks compared to the picture below in summer. I put all the dead tomatoes and squash plants in the trailer to haul to the dump. The reason they go to the dump is tomatoes and squash are prone to diseases and I don’t want to use them in the compost piles if they don’t get hot enough to kill pathogens. I don’t want to be spreading diseases in the garden. The rest of the garden is in the compost bins which are now overflowing. I will make some more compost later this week when it is warmer. The winter weight row cover in the pic is covering the last little bit of my garden that is still alive-the kales. I have Russian Red kale and Winterbor Curly kale. Unbelievably they are still alive even with the bitter cold nights with temps dipping in the teens. The other thing you see are my strawberries to the right which are quickly going dormant.

garden bench summer 2015

Here is the garden in the summer. I miss it already.