Veggie chips-yams, beets, carrots & red potatoes

veggie chips final

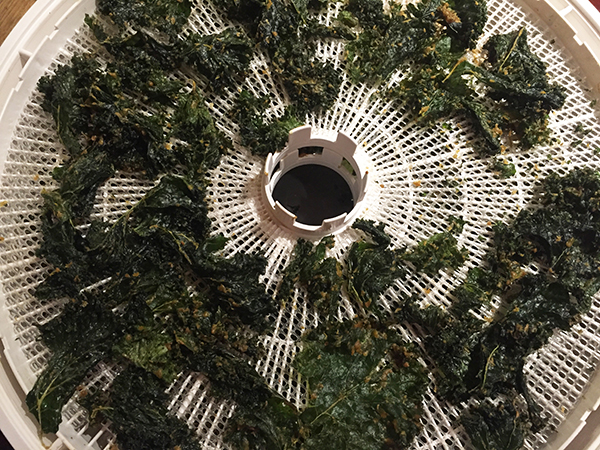
After making kale chips, I thought why not try making other veggie chips from some of my vegetables. After all, I’ve seen veggie chips in the stores and thought it would be fun to try make some. So far I’ve done yams, beets, carrots and red potatoes. Some of them I did in the dehydrator and some I did in the oven.

mandolinemandoline setting


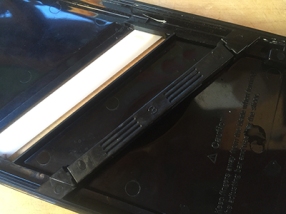
For all of them I used a mandoline. Mandolines are used for slicing things very thin. The one I got was not very expensive but does the job well. It has 4 settings with #1 setting slicing the thinnest and #4 the thickest and all of the settings still slice thinner than you could do with a kitchen knife. Not having used one before, I started using #1 setting which slices super thin. I then tried #2 setting which I liked better for the dehydrator and then used the #3 setting which worked even better for both the oven and the dehydrator. It was all an experiment. Here is how I did them:

Yams
I started using the #1 setting of the mandoline to slice the yams which was too thin. Hard to believe it can slice veggies that thin. More like shavings. One big yam filled 10 trays!  I like the dehydrator for these as you don’t have to watch them so closely and they keep their gorgeous color. After they were done, they were paper thin. Subsequent batches I used the #2 and #3 setting which were more like a potato chip in thickness.

yam sliced

After cutting the slices of yams, I put lemon juice on them, about a tablespoon of olive oil and massaged them in till everything is coated.

yams on dryer

Then I put them out on the trays. You have to spread them out being careful to not overlap them so they can crisp up.I lightly put some crushed rosemary on some of them and just lightly salted all of them. The rest just had salt but no rosemary. Experiment. I set the dehydrator to 145-150°F for 2 hours and then turned it down to 135°F till the chips were crispy. Hard to say how long they take as it depends how thin you slice them and what temperature you use. It took 2 hours for super thin and maybe 4 hours for the #2 setting on the mandoline. They should be crunchy like potato chips.
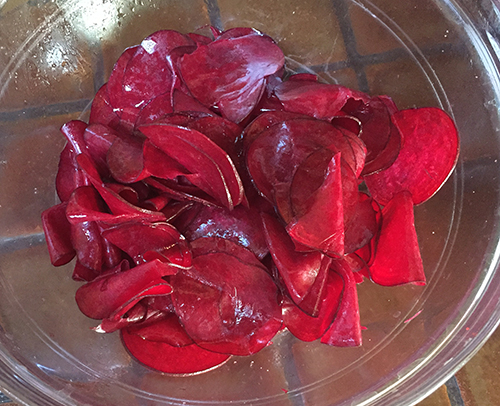
beets sliced

Beets
I used the#2 setting on the mandoline but think you can use the #3 setting as well for a more substantial bite. I put lemon juice and olive oil on some of them and on some of them I dipped in a cane sugar solution to make the beets sweeter-no lemon juice on those. I saw that as an ingredient in the store bought chips but afterwards felt it is not really necessary. Put on trays and lightly salt them.
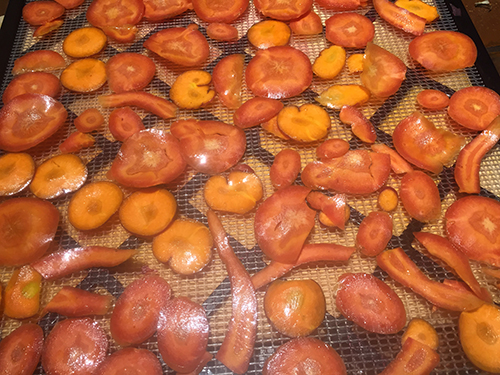
carrots drying

Carrots
I used the #2-3 setting on the mandoline. Do the same as above with just olive oil and salt.


Red potatoes
For these I decided to try them in the oven as the thought of dehydrating raw potatoes didn’t really appeal to me. They were easy. I sliced them in my mandoline using the #3 setting which works well. I think they need to be a little thicker when using the oven as it gets done faster than using the dehydrator.

potatoes ready

When using the oven to dehydrate or baking the chips, you must really pay attention. If you do them in the oven, set your oven on 250°F (the lowest setting on many ovens). They cook pretty fast-about 45 minutes. You’ll have to watch them closely towards the end so not to burn them. Some recipes say set your oven at 300-400°F but when I did that they burned very quickly and were inedible.

For these I put about a tablespoon of apple cider vinegar and olive oil massaged in, then spread them out single layer on cookie sheet lined with parchment paper and then added salt on some, salt and pepper on others and salt and smoked paprika on still others. I tried onions but they turned out kinda funky.

potatoes_dried

Here are the finished potatoes.

Hard Boiled Eggs-Not!

eggs steaming

I just read about a new way to ‘hard boil’ eggs which doesn’t really entail boiling them at all but instead you steam the eggs. Why would you want to steam them? Well, have you ever had hard boiled eggs that were hard to peel? The reason eggs can be hard to peel is because they are the fresher eggs. The fresher the eggs, the harder to peel. But when you steam them with the pointy side down and the fat end pointed upward, they peel perfectly every time. Just put them in a pan with your steamer and water underneath and lean them against each other so they stay upright and steam them for 20 minutes, then rinse them in cold water. I also mark my eggs so I know I ‘hard boiled’ them if I put them back with the other eggs which I’ve been known to do but without the markings. Then it’s a guessing game! I have chickens that lay every day and since I’ve been steaming them, they are now always easy to peel. No more frustration when peeling eggs.

Finally the Garden is cleaned up-Nov 23

Nov garden 2015

The garden is CLEAN! Here I am siting on the bench on Nov 23. How desolate it looks compared to the picture below in summer. I put all the dead tomatoes and squash plants in the trailer to haul to the dump. The reason they go to the dump is tomatoes and squash are prone to diseases and I don’t want to use them in the compost piles if they don’t get hot enough to kill pathogens. I don’t want to be spreading diseases in the garden. The rest of the garden is in the compost bins which are now overflowing. I will make some more compost later this week when it is warmer. The winter weight row cover in the pic is covering the last little bit of my garden that is still alive-the kales. I have Russian Red kale and Winterbor Curly kale. Unbelievably they are still alive even with the bitter cold nights with temps dipping in the teens. The other thing you see are my strawberries to the right which are quickly going dormant.

garden bench summer 2015

Here is the garden in the summer. I miss it already.

Cherry tomato varieties review

cherry tomatoes group

There are many varieties of cherry tomatoes but this year I had 7 different varieties of small or cherry tomatoes. Six were heirloom or OP (open pollinated) varieties and one was a hybrid. Open pollinated varieties will be the next new heirlooms when they get to be 50+ years old. Six are shown above from left top row – Juane Flamme, Indigo Cherry Drop, Bottom row from left Artisan Blush Tiger, Artisan Purple Bumblebee, Artisan Pink Bumblebee and Sungold – not shown Black Cherry tomatoes (forgot to take picture!) I think it was way too many cherry tomatoes because of the time it took to harvest all of them every week (exhausting) but having said that, they were all very tasty. Three of the tomatoes pictured above were completely new to me. So let’s look at those above and review them.

tomato_juane flamme

Juane Flamme tomatoes

Juane Flamme – heirloom variety, mid-season tomato – originated by Norbert Perreira of Helliner, France. Extremely prolific. A favorite of my patrons at my Santa Fe Farmers market stand. Yellow turning tangerine color when ripe. Very sweet. Bigger than a cherry tomato but still small, about the size of a golf ball. The only problem I’ve had is in my garden, it was susceptible to Early Blight getting it 2 years in a row. Since I didn’t use any fungicides this year (but I did last year), I’m not sure that is fair although all my other tomatoes didn’t get Early Blight till the right at end of the season which I consider normal as they get more susceptible to diseases as they get old. Still if you like a very sweet tomato, you might try it and just be sure to use an organic fungicide early on to control it and you’ll be fine. You’ll need to get seeds unless we can talk the nurseries into growing them next year. Recommend it.

tomato_indigo cherry drops

Indigo Cherry Drops and Indigo Rose tomatoes mixed

Indigo Cherry Drop – OP (open pollinated) variety, early mid-season tomato-NEW to me this year. Excellent sweet flavor and incredibly large yields 1 inch cherry tomato. Part of the famous Indigo family where the shoulders are black and bottoms are red. Indigo Rose was the first tomato to come out and is a cross between a South American and Galapagos Island tomato. Any Indigo tomato-Indigo Rose (2-3 oz), Indigo Blue Beauty (4 oz) , Indigo Apple (4 oz), Indigo Blue Berries (too tiny to bother with) are the new darlings at the market and all the varieties have to do with the size of them as they all taste the same-excellent flavor hard to describe. Many of the Indigo varieties are available at the nurseries as starts in spring. Extremely prolific. I like them. Bigger Indigo varieties recommended but not the Cherry Drop-too small

tomato_artisan blush tiger

Artisan Blush Tiger tomatoes

Artisan Blush Tiger-OP (open pollinated) variety from Artisan Seeds, mid-season tomato. NEW to me this year. Unique julienne cherry tomato that is yellow with subtle pink stripes-very beautiful. Everyone loved this new variety. It has a fruity sweet, tropical flavor. Feathery foliage is different from regular or potato leaf types so don’t be alarmed – it’s normal. Did well and was disease resistant in my garden. You’ll need to get seeds unless we can talk the nurseries into growing them next year.  Recommend it.

tomato_artisan purple bumblebee

Artisan Purple Bumblebee tomatoes

Artisan Purple Bumblebee-OP (open pollinated) variety from Artisan Seeds, mid-season tomato. I actually grew these last year and liked them enough to grow again. They are dark purplish with green stripes. They have a superb sweet flavor. Very productive. You’ll need to get seeds unless we can talk the nurseries into growing them next year. Recommend it.

tomato_artisan pink bumblebee

Artisan Pink Bumblebee tomato

Artisan Pink Bumblebee-OP (open pollinated) variety from Artisan Seeds, mid-season tomato. NEW to me this year. I love this tomato as it has a very bright sweet flavor-a burst of flavor when you bite into it. Good disease resistance. You’ll need to get seeds unless we can talk the nurseries into growing them next year. Recommend it.

tomato_sungold

Sungold tomatoes

Sungold-hybrid variety. My only hybrid cherry tomato-early season. I’ve grown this for years as it is a supersweet tomato and when people ask for the sweetest tomato, I recommend this. Small yellow cherry tomato turns orange when ripe. Ripens early.  Extremely prolific. Available at the nurseries in spring. Recommend it.

Black Cherry tomato

Black Cherry tomatoes

Black Cherry Tomato – Heirloom tomato originally from Russia, mid-season tomato. I have grown this for years as it is a favorite of mine and the patrons at the Farmers market. Sweet, earthy complex flavors so common with dark purple or black tomatoes. Good size cherry tomato that is a dusky purple. Available at the nurseries in spring. Recommend it.


Lookee! A new bench for the garden!

new bench

I have been so busy harvesting and preserving the garden food that I haven’t had time to share something that my friend Tom surprised me with last month.  He told me to come over to his house as he had a surprise. When I arrived, he opened up his garage door and there was a beautiful bench he built for my garden sitting area where I take breaks. It’s incredible!

greenhouse_Tom and JCTo give you a little background on Tom, he was the main friend who helped me finished building my greenhouse a year and a half ago (or should I say I helped him). I could not have finished it without him. The upright posts had been in the ground for 3 years with no progress until he came over and offered to help. We worked every Friday on his day off till we got it done. greenhouse in augustWe were like a dog with a bone-we couldn’t let go of it till it was done. That was a lot of Fridays he gave up for me and my project.

Then last fall he came back and built some great shelving that essentially doubled my space for starts in the greenhouse and now this bench! He now has a lifetime supply of any veggies from my garden that he may want in the future. Tom your the best! Thank you!

Glass Gem corn experiment

Glass Gem corn 1

I like to do experiments in the garden and try different things. Last year I grew for the first time Glass Gem corn which you can read about in my post Glass Gem corn. When I harvested it at the end of the 2014 season, I got fantastic colors when I picked it. It truly is a special corn. But of all the many ears of corn with different colors, I got only little 2 ears of a gorgeous pink color which was like no other. I saved the pink kernels and cataloged all the colors i harvested which you can see in my post, Glass Gem corn colors. It was the only corn I grew and no neighbors grew corn so I feel reasonably certain that it is pure. This year in 2015, I decided to grow out those pink kernels and only them. I wanted to see if I would get more pink ones. Now since all the glass gem corn cross-pollinated with themselves, one would think I might get a great mix of colors this year again with such a big genetic pool, but not so.

glass gem corn ears pink

The majority of the corn was pink! Out of those 2 ears of pink corn (didn’t plant all the kernels), I got 27 ears of corn this year. I got 18 pink (3 not shown). That’s 66%. The pinks were in many different shades of pink as well.

glass gem corn ears mixed

I also got 6 mixed colors with very little pink if any and 3 more that were predominantly pink but had some purple in them too. If you include the other predominately pink ones as well, then that would be 77% of the corn I planted was in the pink family. That astonished me.

So what would happen if I planted the pink that I got this year for next year? Would I then gt 100% pink? Probably not. I think I would have to keep growing it out for about 5 years to keep eliminating any other color genes but it was a great experiment. Now there is something to be said about maintaining diversity. It tends to make stronger strains but I just might try it again next year in 2016 from this year’s corn and see what happens!

First REAL winter storm Nov 16

winter storm_ Nov 2015a

Sure we had some light snow on November 6th but it only lasted a couple of hours and promptly melted off but it still felt like fall. This Monday November 16th we returned a day early from the San Juan River fishing trip because of a storm coming in. Didn’t want to be caught hauling an RV trailer on icy roads. Good thing we did as it turns out we had our first major snow and now it feels like winter. This pic was taken about 4 pm on Monday after coming home. We got about 5 inches total by Tuesday morning. Yikes! The garden is dead but isn’t out yet. I have to get it out soon before the ground freezes!

I’m finished with tomatoes for the year 2015!

JC at Farmer's MarketFinally this week there are no more tomatoes sitting around in the house! FINITO! NONE! DONE! Nice to see the kitchen table again! This week I made the last batch of tomato tapenade and the last batch of raw tomato sauce (24 frozen gallon bags of raw tomato sauce). Phew! As a friend Deborah says, ‘That’s the part no one tells you about’-preserving your produce. It goes on and on and on for months. Soon before Christmas, I will have to can some spaghetti sauce from some of the bags of frozen sauce. But not now-I’m gonna take a week off!

JC with fishIn fact right now I’m on a flyfishing trip on the San Juan River below Navajo Dam in our cozy SCAMP trailer. It’s cold outside tonight-going to get down to a lovely 20F° but the trailer is nice and warm inside (thanks Nevan for getting that great heater!) and do you believe it, we have internet access which is great as you want to be inside by dark because of the cold and going to bed at 6pm is a little early for me. Tomorrow we start fishing for some big ol’ trout HOGS. The fishing shops said today the dry fly fishing has been great. So I hope to catch some montrous fish and get some R&R while here for a few days. Better get some sleep (what me?!), although I don’t plant (freudian slip meant to say plan) to be out too early tomorrow…

Kale

winterbor_russian red kale

Russian Red Kale on left and Winterbor Curly Kale on right doing well with the cold nights

This year I grew 3 different varieties of kale-above is the Russian Red and Winterbor Curly kale growing together

lacinto kale

Lacinto kale (also known as Dino kale) It is the dark green in front of grape vine

Here is the Lacinto being shaded by the grape vine with carrots growing in front

Of the 3 varieties, Winterbor Curly Kale is my favorite and it is the most cold hardy. I started growing them the last week of July just before the Home Grown New Mexico Tour I was on. I had some holes in the garden so I ended putting some kale there. The Lacinto was partly shaded by a grape vine so it did not receive full sun. The Lacinto got heavily attacked by aphids. I sprayed all of them with water to help keep the aphid numbers down. But the Russian Red and Winterbor were planted elsewhere in the garden. I put them next to some tall tomato plants on one side and some tall sunflowers on the other side so they never got full sun either. They do well in our hot summers with some partial shade. They were not attacked by aphids. All three are still doing well. I’m not a great fan of kale so I’ve been looking for recipes that make me want to eat it. Here’s one wonderful way to eat it.

Kale Chips– you can use any variety of Kale to make this. This is now my favorite way to eat kale-dried! Kind of like potato chips but way more nutritional. Here’s a great simple recipe.

Kale Chips recipe courtesy of http://www.somastudio.net/2013/02/crispy-kale-chips/

Crispy Kale Chips
This kale chip recipe is easy to make and is so tasty you’ll want to make a double batch!

Ingredients:
2 big bunches of kale
1/2 cup raw tahini
1/4 cup olive oil
1/4 cup wheat free tamari
1/4 cup raw apple cider vinegar
1/4 cup nutritional yeast
2 cloves garlic
1 teaspoon onion powder
1 tpsp maple syrup
optional 1 tsp of chilli flakes

Instructions:
Rinse, de-rib, and rough tear the kale into a giant bowl.
Put all the other ingredients into a food processor or blender and mix until smooth or use a hand blender
Pour the mixture over the kale, and use your hands to toss it all together. Squish Squish! Get it good and covered.

Oven method:
Spread the kale out evenly on lined or oiled cookie sheets. You want them to be as ‘dehydrated’ as possible, instead of baked.  250º for 4 hours (ish). Every oven is different so you’ll need keep an eye on it and be your own judge. Just remember that too much heat will change the flavor.  Don’t overcook them!

Here is the recipe in PDF format for printing:
Kale Chips recipe

___________________________________________

MORE METHODS

Dehydrator method by http://www.giantveggiegardener.com :
Spread the kale out evenly on the dehydrator trays. Set temperature 115°F° or lower for about 4 hrs or more. Chips should be dry and crunchy when done. Every dehydrator is different so drying time may vary. This is still considered raw food done this way.

Raw food is food that is dehydrated at 115° F or lower to be the most nutritious and not lose vitamins. Above that and you start losing the nutritional value.

Here is some visuals of the process:

kale_squishing

Put cleaned, dry kale in bowl with the recipe ingredients below and squish with your hands so kale is well coated.

kale_putting on trays

Put on dehydrator trays

kale_drying

Dried Kale chips

kale_dried in jars

Store in jars or zip-loc baggies-I like storing in jars as the pieces don’t break up so much.


.


2015 honey

bees on bar

Bees on a brood bar capping honey

Before I talk about how our bees did this year, here are some mind boggling facts about bees and honey that should make you appreciate them.

—Bees need to visit 2 million flowers and travel about 50,000 miles to make a pound of honey.

—In its lifetime a bee makes about 1/12th of a teaspoon of honey so it takes 36 bees to make a tablespoon of honey.

Honey bees make little flakes of wax about the size of a pin head. It takes 500,000 flakes of wax to make one pound of bees wax.

—Bees pollinate about 90% of our food crops.

In a strong hive there are 70,000 – 100,000 bees in a hive in the summer and their numbers go down in the winter.

—Bees do not hibernate.  They stay inside their hives maintaining a temperature of about 95-96-degrees at the middle of their cluster all winter by beating their wings to stay warm.  Bees rotate from the outside of the cluster to the inside as they get cold while the ones on the inside rotate to the outside, all the while keeping the queen warm.


honey in jars

Our 2 hives produced over 8 lbs of harvestable honey this year which is wonderful as we haven’t collected honey in two years. We always left them with enough honey to get through winter which sometimes didn’t leave us any. With all the rain and flowers this year, they were super busy making honey and there was plenty for all. We left lots of bars of honey for them for winter. In our land with many droughts, plenty is not a word we use a lot when it comes to honey production. For other areas in the country, this may not seem like a lot, but for us it makes us appreciate our girls more. Oh yea, all the bees that you see outside on the flowers are girls-go girl power!

Based on the info above, our bees visited 16 million flowers to make that 8 lbs! Unbelievable! So next time you spread that tablespoon of honey on your toast, think about all 36 bees it took to make it and appreciate all the bees for their wonderful gift.

honey final_2015

We’ve put them to bed for the winter last month in October. We’ve put a false wall to make their living area smaller so they stay warmer and straw bales around each of their hives to give them extra insulation from the wind and cold. We hope they make it through winter.

UV light – bees – and gardening

UV morning glory folded

UV light on a folded morning glory

Being a beekeeper, I’ve been fascinated that bees can see a broader spectrum of light than we can see with our eyes. Bees can see ultraviolet (UV) light and always wondered how flowers might look to them with their UV vision and why they like certain flowers. I read that some flowers have UV colored runways that attract bees and other insects to land on them and lead them toward the pollen and nectar in the center of the plant. This was created by the flowers to help with pollination. Ingenious isn’t it?  Mother Nature really knows what she’s doing! We see the sky as blue but bees see the sky as Ultraviolet (UV). What color is ultraviolet? Well, it is the next ‘color’ past violet in the color spectrum. We can see violet but ultraviolet is invisible to us because we don’t have cones in our eyes that can see UV light. As an artist, this is fascinating to me. I would love to be able to put on a pair of glasses (kind of like the glasses we get when we go to the 3_D movies but see UV light instead).

Then I read that one can spot tomato hornworms with a UV light. Ah ha! First I didn’t know that about hornworms and second I didn’t know there are UV portable lights! After investigating UV lights I got a UV flashlight just before the last frost came and ran down that night to see what the flowers looked like in the garden even though most of them were finished. I knew the hornworms were gone by then also so I’ll have to ‘see’ if that is true next year but it makes sense because white really glows with a UV light and the tomato hornworms have some white stripes on them.

This slideshow requires JavaScript.

Anyways there I was holding the flashlight in one hand and trying to take pictures in the other hand in the cold night. There weren’t many flowers left but I got a few and the results were interesting. Some glowed in the UV light and some did not. I can’t wait till next year when the flowers are all out. I will be taking lots of pictures with the UV light. Of course I’m also anxious to see if the flashlight helps spotting the hornworms on the tomato plants!

Check this short video out:
Insecta Spectra
Simulated Butterfly and Bee vision

How to Save Tomato Seeds

Some of you may still have the last of your tomatoes inside your house ripening. If you would like to save the seeds or if you don’t have any seeds but would like to learn how to save them for next year then read on. It’s a simple procedure where we must remove the gel from around the seeds before drying them.

But before that, the first thing to consider is if the tomato is a hybrid or an open pollinated (OP) or an heirloom tomato. Don’t save hybrid tomato seeds as they won’t grow out true meaning they will not grow out to be the same tomato. They revert to one parent or the other and are unstable so you won’t know what you’ll get. If you have open pollinated (OP) or heirloom tomatoes you can save the seeds as both will grow out into the same tomato. An exception to this might be if you plant cherry tomatoes close to the tomatoes whose seed you want to save. Cherry tomatoes could cross-pollinate with other tomatoes but most heirloom tomatoes do not cross with each other. Just grow your cherry tomatoes away from  your other ones.

Put tomato seeds in a small jar of water (viewed from the top)

Put tomato seeds in a small jar of water (viewed from the top)

First you want to save a tomato that is really ripe and soft. To save the seeds from tomatoes we must remove the gel from around the seeds. Cut the tomatoes open and squeeze the tomato with the gel and seeds into a jar and add about 2-3 inches of water. Cover the jar.

white mold grows on top of the water

white mold grows on top of the water

In a few days you will notice that there is a white mold growing on top of the water and most of the seeds will have sunk to the bottom of the jar. Don’t freak out, this white stuff is fermentation working on your seeds.

drain the tomatoes and stuff off

drain the tomatoes

After about 4 days, strain the tomato seeds in a fine sieve or strainer and wash the yuck and tomato stuff off of the seeds. If you wait too long the seeds will start to germinate which will ruin them.

Put your seeds on wax or parchment paper. Write down the variety.

Put your seeds on wax or parchment paper. Write down the variety.

The seeds can now be put on wax paper to dry. If you use paper towels, the seeds may stick to the paper causing trouble removing them. Be sure to label them so you remember which variety they are. After they are thoroughly dry, store them in a plastic bag or jar for next year. It’s fun to save seeds and see what happens next year.

Drying tomatoes

IMG_7961

So someone gave me a jar of dehydrated tomatoes in olive oil and I thought they looked very beautiful and I know when you put them in pasta dishes, it’s bursts of intense tomato flavor. A great addition in the kitchen. So I thought, that’s what I can do with all those little cherry tomatoes! Look how beautiful they look when first put on the trays. I’ve dehydrated some during the last 2 weeks. I put all kinds together and not just cherry tomatoes.

tomatoes in oil

Here they are in the olive oil in a jar. I love these jars from Italy-Quattro Stagioni.
You can get them at Amazon. These are the 5 oz size.

I want to still eat some fresh while they last but there is definitely more than I or a small army can eat before they go bad. Today I also made 4 more pans of tomato tapenade. Pantry is getting full quick!

Amy’s Tomato Salad

tomatoes in sherry vinaigrette

I don’t know about you but I still have a lot of cherry tomatoes that I picked the other day. I love to serve them as a tomato salad in a sherry vinaigrette. It’s divine with the sweetness of the cherry tomatoes. A friend of mine, Amy Hetager, who is no longer with us was kind enough to share it with me.  I call it Amy’s Tomato Salad. Here’s the recipe below.

Amy’s Tomato Salad (Cherry Tomatoes in a sherry vinaigrette)
2-1/2 lbs tomatoes cut into same size or cherry tomatoes
1/2 cup red onion, thinly sliced
2 shallots, thinly sliced
1/3 cup fresh coarsely chopped herbs (basil, parsley, marjoram, whatever you got)

Toss everything together with the sherry vinaigrette below. Let it sit for a few hours before serving.

Sherry Vinaigrette Dressing
This is good on fresh kale salads too
1 garlic clove
3/4 tsp Kosher salt
1-1/2 TBL lemon juice
1-1/2 TBL sherry vinegar (this is sherry vinegar, not sherry wine)
1-1/2 tsp Dijon mustard
1 tsp sugar
black bepper
6 TBL extra virgin olive oil

Blend or shake it all together so it emulsifies before pouring over the tomatoes.

Here it is in pdf format for printing:
Amy’s Tomato Salad


Stella’s view

Stella's view

One of our indoor cats, Stella, always sits by a particular window looking out. I’m sure she’s looking at the birds outside and sees a mouse now and then too. It’s like it’s her TV. Yesterday, when I looked out her window with her,  I understood why she always looks out this particular window. The view was stunning with the yellow leaves of the aspen trees and the snow falling softly on the ground. We didn’t get much snow, maybe a half an inch but between the cold wind and the snow, it made me pause to look out with her and enjoy the view.