Lettuce-starting seeds outside

lettuce planted heavily for mesclun (cut and come again)

I just went through my lettuce, spinach and arugula seeds to see if the seeds are still viable. Lettuce seeds last from 1-6 years so look on your packages to see the date they were packaged.

There are several ways to grow cold season crops:outside by direct seeding or inside under lights. For this post I will discuss planting OUTSIDE. A previous post was on planting seeds inside. Two very different scenarios.

I use to plant later outside, and the crops would bolt (produce flower stalk and get bitter) as soon as we got some warm weather.

I think most people plant their lettuce, spinach and arugula way too late outside.

PLANTING BY DIRECT SEED OUTSIDE:
If you plant seeds outside in April, it will get warm sometime in May and the crops will bolt (grow flower stalks) and get bitter. I’ve learned to plant earlier. Warm temps one day and freezing cold weather on another day-fickle weather!

STARTING DATES
To beat planting too late, back up your start date for starting seeds (for example 30-45 days) depending on Days to Harvest for each variety (see chart below) from the time you want to start harvesting them. So if you want to start harvesting in early April, start 30 days earlier in the ground. If you see dates on the seed package or on a chart, that means you can start picking outer leaves around the earlier date and harvest whole plants on the later dates. Don’t take any leaves from the center where they are produced or you can kill the plant. Only take the outer leaves. This scenario of course depends on the soil temp when you plant. Planting outside takes longer for germination. ALSO don’t plant all the seeds at once but stagger the planting dates so you can get a continuous supply.

Here is the chart below in a pdf format for you to print:

COLD SEASON CROPS to plant early-days to harvest


SOIL TEMPERATURE
-When direct seeding outside, the soil needs to be a little warm (at least 40 degrees) or the plants may have trouble germinating. You’ll need to get either a soil thermometer or a compost thermometer.

A soil thermometer is good for taking temps in shallow soil. A compost thermometer is good for taking the temps deeper in a compost pile.  But with a compost thermometer, you can check the temp deeply in a compost pile or shallow for soil temperatures. You will not have to measure the temp deeply for greens-maybe 1-2″ deep max because you will plant them so shallow.

-Lightly loosen your soil (like 3 inches) unless you have never started a garden in which case you’ll need to dig it deeper-5-6 inches. Add compost, rake in.

-Make a row for lettuce, arugula, spinach. Plant seeds as directed on package. Add maybe a 1/4 ” of soil on top or I like to sprinkle play sand over the seeds to barely cover them. Most greens don’t need to be planted deep. You will have to water by hand with a hose or bucket till it warmer.

-Don’t forget to water everyday after planting seeds! If you do direct seed outside in early March, cover the bed with one sheet of medium weight row cover directly over the dirt where you planted the seeds. Row cover should help protect the seedlings as they come up. Cold Hardy crops can handle colder weather in early spring. On really cold nights, add 2 layers of row cover. Pull off the layers the next day when it is warmer and cover plants at night.

-In addition, if you have a raised bed, you could put some row cover over the seedlings. Place another row cover on top of the hoops, including the ends, so this will essentially add double protection. If you already have hoops, you probably can get by with just the one layer unless it will be below freezing.

I went back thru this blog and pulled another post when I did a class on growing lettuce outside.

Starting COLD HARDY VEGETABLES Super Early


How to Start Greens/lettuce seeds inside

Greens/lettuce seeds started inside January, 2026 (this is an updated post with more current info from a previous post here on my blog).

I’m trying to grow cold season crops even earlier inside in 2026. I planted some lettuce and greens seeds.
Here’s how I did it:

seed germination tray

I cut this tray into thirds but you don’t have to. You can keep the tray intact.

I like shallow containers to start SMALL seeds as it is easier to get the correct soil temperature needed for germination and I can plant a lot of seeds in a small space. Bigger pots for small seeds are harder to get the soil temperature correct. Optimal seed germination temperature for greens and lettuces it is 65-70 °F and it should take between 7-10 days to germinate.

seed starting tray_dots

I mark each row every inch and plant a seed there

Before I put in the seeds, I marked each row with a dot (I used a silver sharpie) one inch apart so I could evenly space the seeds and that way I can also see if a seed germinated by that dot.

I use to get ‘Moonshine’ from Agua Fria nursery here in Santa Fe but now it’s called, ‘White Lightning’-same great product, a different name. Only at Agua Fria Nursery here in town. I don’t know if you can find it online. I pre-moisten the soil. Don’t plant seeds in dry soil and keep the soil moist. Picking s good soil or starter mix is important. Many people have shown me their plant basically suffocating from too wet of soil that never dried out You want planting soil that dries out and White Lightning works great. Everything germinates sooner in it.

seed starting tray_seeds

Put kiddie (play) sand on top after putting seeds in rows.

I used a pencil to make a small hole in the White Lightning and put a seed in it. Afterwards I put ‘kiddie’ play sand over each row to cover the seeds and pat it down. Small seeds can easily break through the sand when germinating. I would use bigger pots for larger seeds. You must keep the soil moist at all times till they germinate. Because the trays are so shallow, I only have to mist the pre-moisten soil with a sprayer, sometimes several times a day. You could put a clear top on it till germination happens. I never put the trays under a faucet to water as that could move the seeds around.

thermostat probeseed starting tray with thermostat

Here I have them sitting on a heat mat but I don’t turn the mat ‘on’ for greens.  For greens/lettuces I put the probe in the soil to see what temperature it is at with the thermostat. I find for greens/lettuces the lights above the seed trays provide all the heat needed to stay in that temperature range.  Here the thermostat reads 66°F. I’ll turn seedling heat mats on later for warm season crops like tomatoes which like the soil temperature much warmer for germination. The thermostat is great for controlling the temperature.

I identify each row with a number and then keep a record of what each number represents instead of trying to write down what it is on that little piece of tape. There are 12 dots so that means since there are 6 rows in each ‘mini-flat’ that there are 72 seeds in this tiny space! After they germinate and their first two true (cotyledon) leaves appear, I will transplant them each plant into a 4 pack and from there directly into a cold frame, low tunnel or greenhouse. Still too early to  throw them outside without protection.

Here is what I planted:
1-Santoro butter lettuce

2-Lettuce bowl-loose leaf

3-Yugoslavian Red lettuce-butterhead

4-Carmel Spinach and Escalade

5-Forellenschuss (SpeckledTroutback) lettuce-romaine

6-Arugula

NOTE: Cold season crops-Left is a Days to Harvest chart, to help me decide what i want to plant and when. Some plants have a much shorter days to harvest and others take longer. When it says 30-50 days to harvest that means you can start harvesting as early as 30 days after germination by taking the outer leaves. The higher number is if you want to harvest a mature head but you can harvest anytime as well. Here it is as a pdf for you to print COLD SEASON CROPS to plant early-days to harvest


And lastly, here are some previous posts on this subject from my blog here:

https://giantveggiegardener.com/?s=lettuce&submit=Search


2025 year end for flowers and fruits

Here are some photos of my 2025 veggie garden’s fruits and flowers. I already did a year end on the veggies but didn’t include these and want to share now before I start planting for 2026. The flowers were gorgeous and the fruits did very well last season. Enjoy! Garden eye candy for winter!

FLOWERS

I grow many different varieties of flowers each year. I love the color and the pollinators they attract.

FRUITS-Perennials

I have 4 apple trees, 1 pear tree, 1 apricot tree, rhubarb, raspberries, blackberries, strawberries, currents, and grapes. The pear tree is only 3 years old so it only had two tensie pears in 2025. The apricot tree only gives us apricots sporadically now as it is mostly in shade now but is a lovely shade tree as well


Water your perennial plants in January

January, January 4, 2026

We’ve haven’t gotten precipitation since last November (2025) when we got 2 storms that produced 1 inch total at the property for the whole month. In December, we got no inches precipitation-well, maybe a trace, but really nothing. Looks like it’s going to be a dry winter.

Today is a good time to water your perennial plants if you haven’t already as it is going to be in the low 50’s today. Then the highs will be in the 40’s for tomorrow, Mon Jan 5 – Thursday, Jan 9th. On Friday, Jan 10, the high will be in the 30s making watering more challenging (frozen hoses-be sure to empty them) which is why I always water when it is above freezing and I always empty out my hose after each watering in winter.

So you’ll know what I’m doing today…

Stella

STELLA-2011-2025

Yesterday, December 21, 2025, we had to put down Stella, our cat. She got cancer and we didn’t know about it till the last week that something was terribly off. Cats are so stoic. She was a skittish cat and would run and hide when most people came over. But she warmed up to us and was a joy to be around. So soft and sweet. We had her for 12 years. We adopted her from Feline and Friends in 2013, where they found her behind the Re-Store on Cerrillos when it was located there.

She was a bit difficult at first, pushing Elodie’s glass art off some kitchen cabinets crashing on the stove and floor the first night, and finding a hiding place IN one of our walls the second day, where it was very difficult to get her out. We had to tear apart our pantry to get to her-all in the first 2 days. She hid from us for weeks. I wasn’t sure that she was a good fit but Elodie, who loves cats said to give her time, so we did, and she warmed up to us and turned out to be one of the most loving creatures. She would sit every night next to us on the couch, so we could pet and love her and she loved us back. Although she still was skittish her entire life around other people, she loved affection from us. We miss her so much. She left a big hole in our hearts.

End of 2025-veggie garden review

We tore out all but the chard and perennial fruit plants in the garden. I can hardly believe the Argentata chard is still doing good as of Dec 9th in the garden what with the nighttime temps getting down into the mid-high 20’s and only the rainwater now. It has green leaves with white ribs that are very tender. All the other chard are gone now.

But now on with the review!

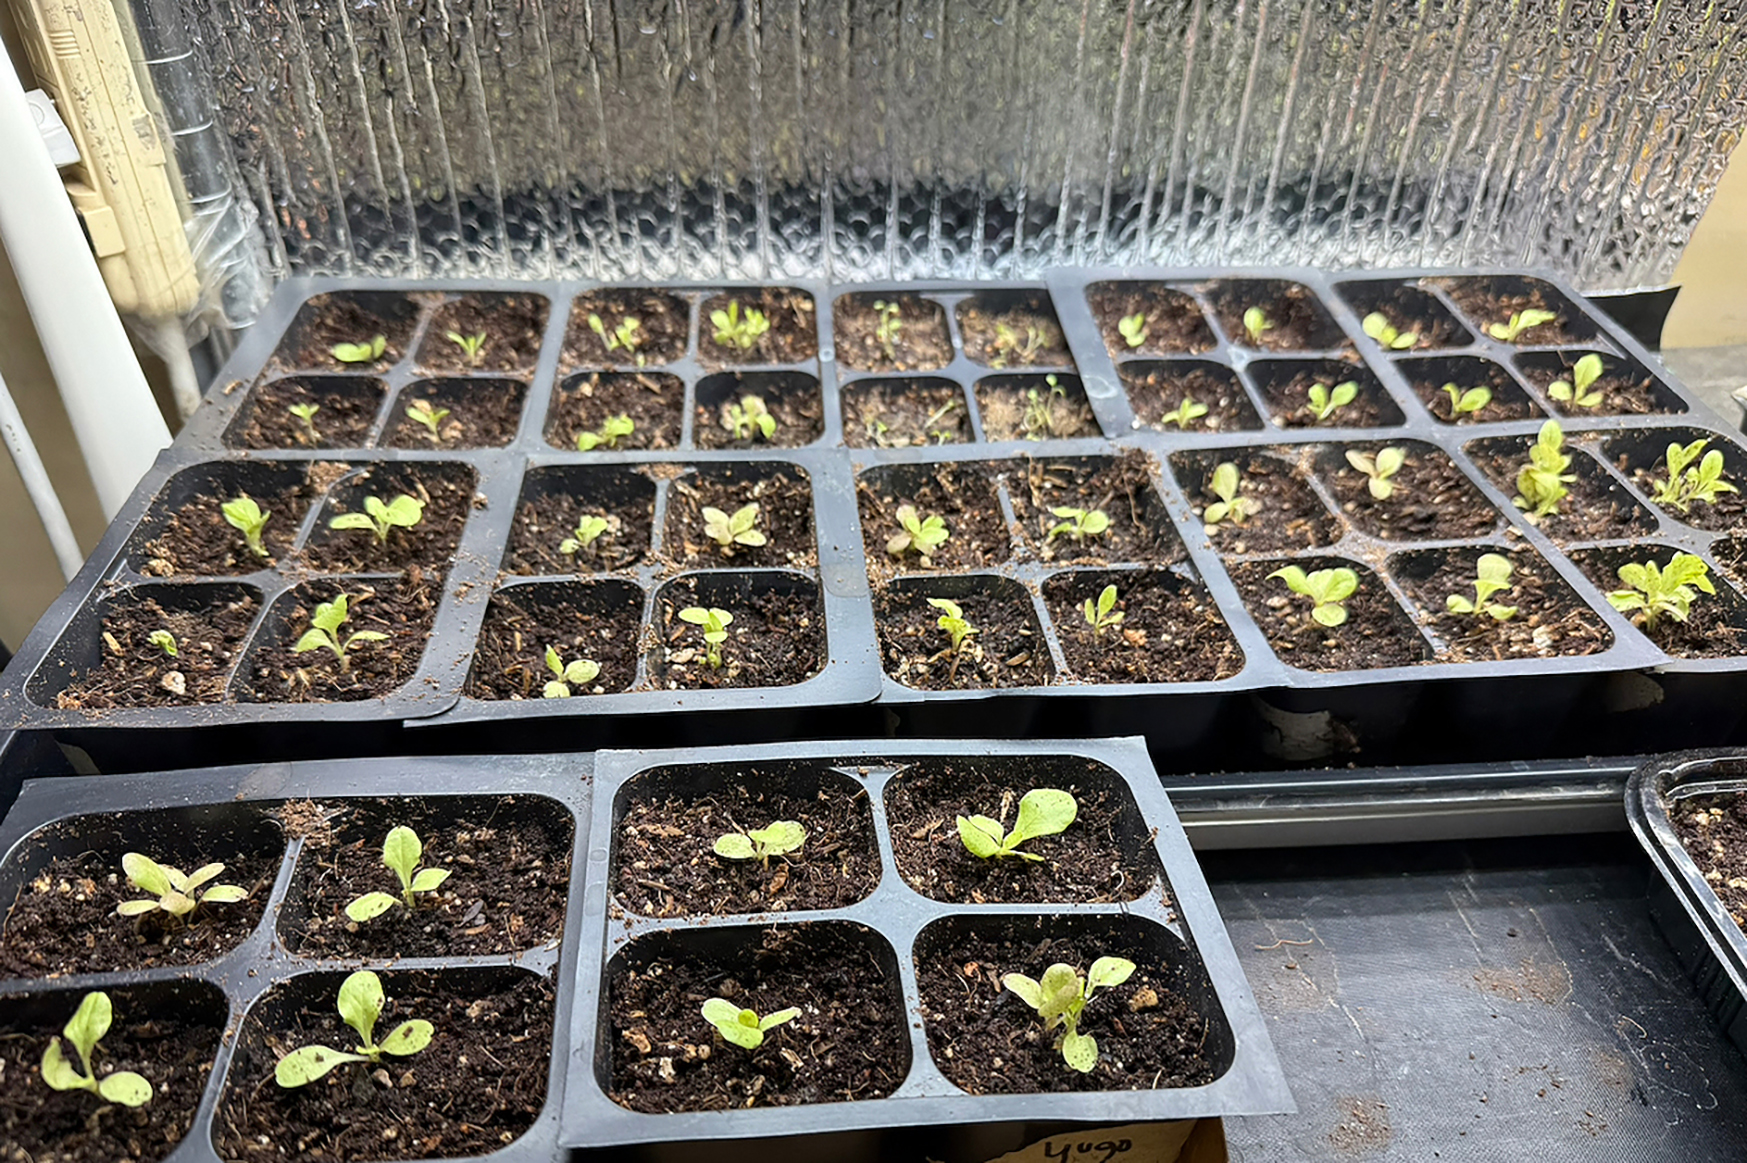
I got a late start in sowing seeds this year due to us being in Europe in spring. When we planted seeds inside on March 28, it was a full 2-3 weeks later than I normally start seeds so this affected the harvest. This year in 2026, I’m going o drop some tomatoes and grow some others alongside my favorites. It’s fun to experiment and perhaps I’ll find some new winners in 2026.
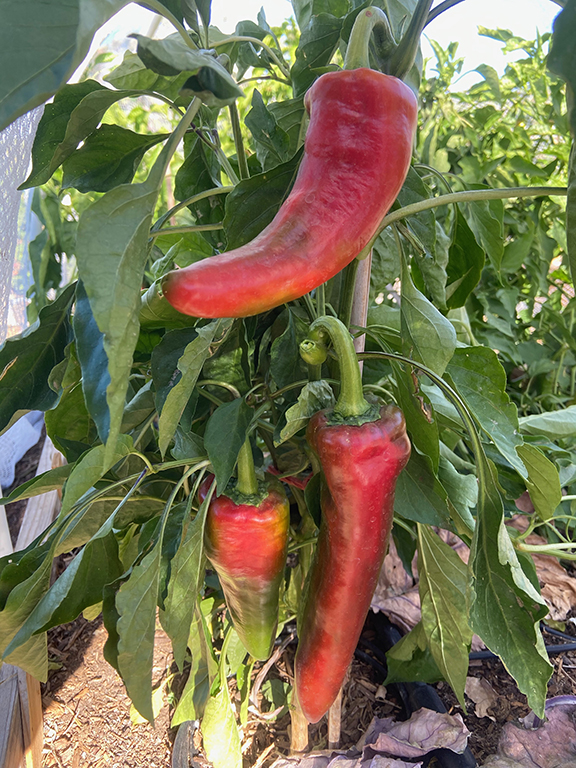
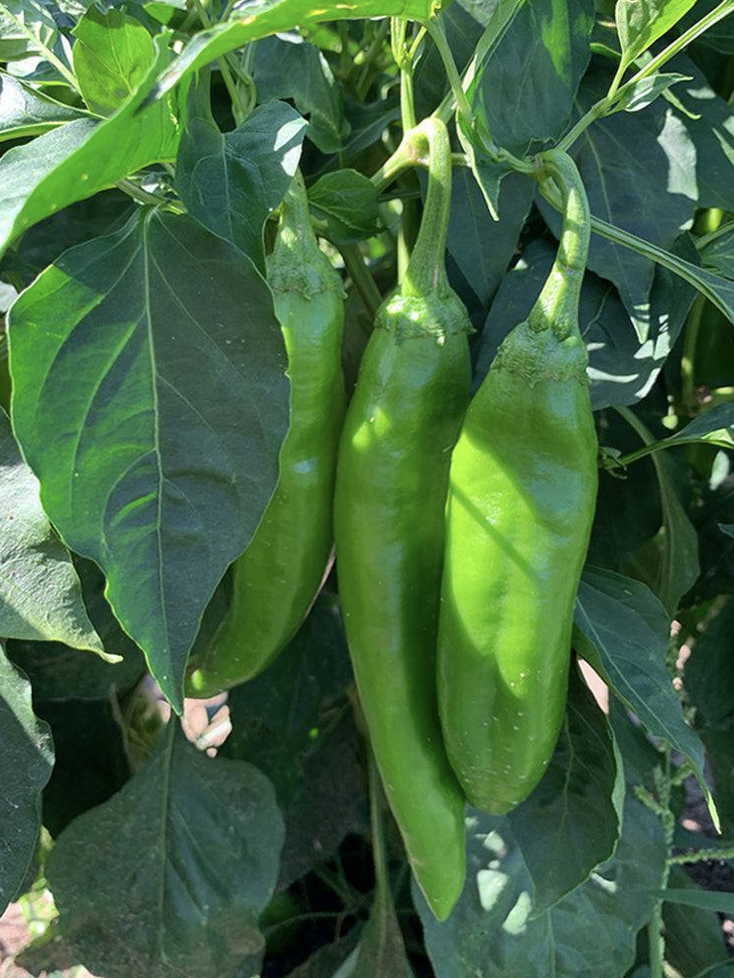
 

PEPPERS
I thought I might not get peppers this year due to the fact I normally start pepper seeds inside in early March as it take 8-10 weeks to be big enough to plant outside by the time the frosts are gone. I wasn’t too far off as we had a less than spectacular pepper season with most producing only a few peppers before the season ended. But one outstanding variety, Sweet Calabrian Caviar pepper produced exceptionally well and saved the pepper season. Next year we are planning to be here during seed starting season. So, Poblano, Lava Red, Jimmy Nardello, and three other pepper varieties only got a few peppers. Over the years, I’ve come to like sweet peppers more than hot. I like to grill or saute them. Because they’ve done well in previous years, YES to all for next year.

TOMATOES
Surprisingly we did pretty well with most of the tomatoes this year despite the late start. The plants didn’t get as tall (4+’) but most produced well. We planted them outside on May 28 due to some late freezes and they were only 4-5 inches when they went in the ground. 8 yes and 5 no. Read on for details.

CHERRY TOMATOES
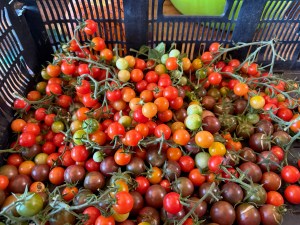
Super Sweet 100-red cherry tomato-very prolific and very sweet-good continuous harvest throughout the season. YES for next year.

Black Cherry-dark purple cherry tomato-very prolific and very sweet, smoky flavor-good continuous harvest throughout the season. YES for next year.

Sungold-yellow cherry tomato-very small, disappointing, average harvest. Fruit were too small for me although the flavor is always very sweet. Looking for a larger yellow cherry tomato for 2026. NO for next year

EARLY SEASON TOMATOES
Large Barred Boar-I’ve always like the flavor of this mahogany colored with green metallic stripes tomato BUT it does not have a long shelf life once picked. You must eat them within a few days or they turn soft-too soft. For 2026, I’m  looking for a dark tomato with a longer shelf life and great flavor. Let me know if you know one. NO for next year.

Sunny Goliath-yellow medium size tomato-my second year growing them. Nice tomato but not very prolific both years. NO for next year.

Goliath Pio-red medium size tomato with little to no cracks-Great old fashioned flavor with balance of sweet-acid. Always a star, My biggest producer this year. It did not disappoint this year-good for canning or fresh eating.YES for next year.

MID SEASON TOMATOES
Black Sea Man-black/purplish-75 days to harvest
-med-small size tomato with good flavor and good  production.Going to try other black tomatoes this coming year. NO for next year.

Cherokee Carbon-Purple with green shoulders-75 days to harvest
-med size-tomato with good flavor and average production. Unusual this year but perhaps because they got in so late, they didn’t produce as well as previous years but it is a winner. YES for next year.

Cherokee Purple-purple color-75 days to harvest
-Perhaps because they got in so late, they didn’t produce as well as previous years but it is also always a winner. YES for next year.

Pantano Romanesco-Red-70-75 days to harvest.Red medium size tomato-old fashioned flavor but didn’t produce that well. I had others that did much better. NO for next year.

Jaune Flamme-orange-70 days to harvest
-Can’t say enough good things about this one. Outstanding flavor, very prolific. YES for next year.

LATE SEASON TOMATOES

Lucky Cross-yellow with pink blush inside-74 days to harvest-Every year either Lucky Cross or Virginia Sweet do well. I like both but Lucky Cross didn’t do as well this year so NO for next year.

Paul Robeson-black/brick color-75 days to harvest-exceptional flavor-wins all kinds of tomato tasting awards. YES for next year.

Big Zac-red-80 days to harvest
. Not very productive this year and fruit were a little smaller than the large fruit they truly are. Excellent old-fashioned flavor. NO for next year.

Virginia Sweet-yellow with red blush inside-80 days to harvest. Did fantastic this year, producing many very large-1.5 to 2 lb tomatoes. A real treat. YES for next year.
_____________________________________________

CUCUMBERS-A bumper crop of 2 of the 3 cucumber varieties I grew this year. So much so, I got tired of making pickles and pickle relish. We couldn’t eat them or can them fast enough.

Poona Kheera-Our favorite fresh eating cuke. A yellow cuke that did exceptional well-sweet melon flavor that we use for fresh eating only. Good producer. Non bitter. YES for next year.

Boothbys Blonde-Another great yellow cuke-I use this variety for making bread and butter pickles and pickle relish. Good producer this year. YES for next year.

Salt and Pepper-new variety for me this year. Not a good producer and small. NO for next year.

Parisian-I use this variety for making cornichon pickles but I still have many jars I canned from last year, so I didn’t grow any this season but I love this one, especially if you like Cornichons, which mean tiny tart pickles.


RADISHES-Two new varieties this year and one I always grow
Pusa Gulabi and Pusa Jamuni-I loved these two and I don’t love radishes so that says a lot. Both were great flavor and look beautiful. They are not round but long. Seeds from Baker Heirloom. YES for next year.

Watermelon radish-I love this variety too but it takes a little longer till harvest. YES for next year.


PEAS
Super Sweet Sugar Snap pea- I normally try to grow these in a pot in SPRING- I say ‘try’ as the plants and harvest are usually small but this year I grew them in the garden in the FALL in a raised bed. What a difference that made! Super big 5′ plants and great producer! YES for next year.


CAULIFLOWER
I grew both orange and white varieties and both did well in the spring/summer. In the previous year, we had a hot summer and I tried a purple cauliflower that didn’t do well in the heat, so I stuck with the other two this year not knowing if we would have a hot summer.
Freedom-white variety-love this. YES for next year.

Cheddar-orange variety-love this. YES for next year.


CHARD
Argentata-a big winner with the white stalks soft like butter when cooked. Very cold and heat tolerant.
YES for next year.

Orange and Ruby varieties-both grew great and looked good together when cooked. YES for next year.


CARROTS
-All carrots did well this year.
Dragon Purple
-Purple outside with orange inside. YES for next year.

Atomic Red-Red outside and orange inside. YES for next year.

Black Nebula-Black inside and out. Makes the most beautiful, tasty purple soup. YES for next year.

Scarlet Nantes-standard orange inside and outside but big! YES for next year.


SQUASH-I grew a yellow, bumpy summer squash called Friulana-looks kind of yellow green in this photo and Butternut winter squash-both did well. YES for next year.


BEETS
Cylindra
-deep red cylinder shaped- grows upright out of soil-easy to pull. Cuts into nice even disks-nice flavor. YES for next year.

Badger Flame-beautiful reddish ,orange-yellow outside with yellow inside. Exceptional flavor. YES for next year.

Chiogga-I can’t resist these red outside with concentric circles of red/white inside-like a bullseye.YES for next year.


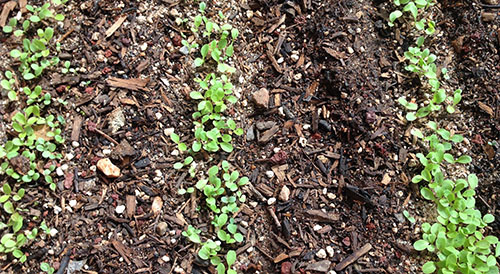
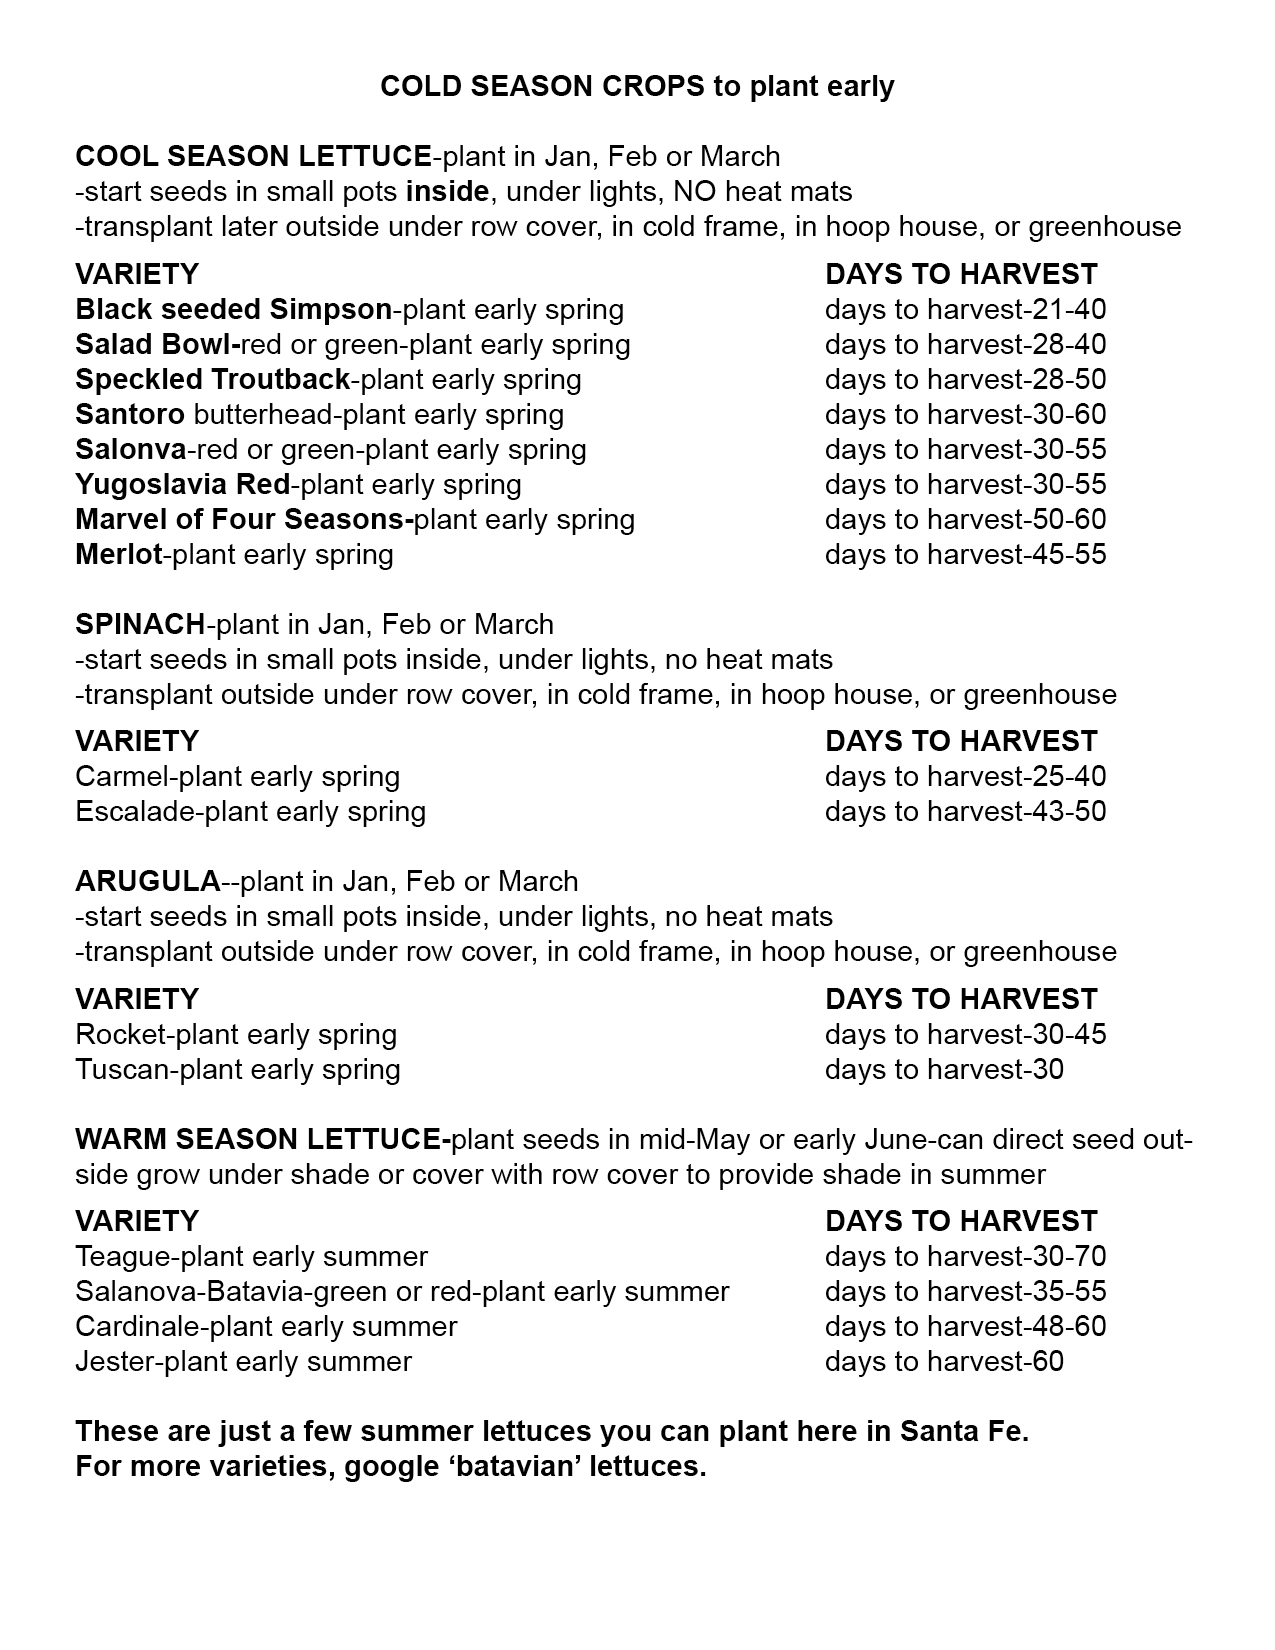
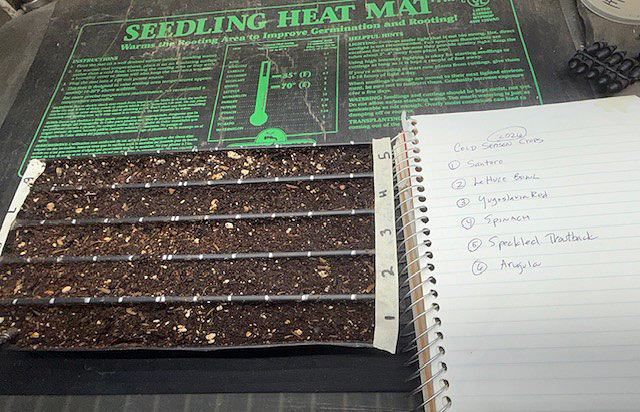
LETTUCES– I grow many varieties under 30% row cover this year outside starting in
early spring. All did well under shade.
Santoro–butterhead
-My favorite lettuce-YES for next year.

Yugoslavian Red-butterhead-good cold tolerant-YES for next year.

Salanova-butterhead-red and green-good cold tolerant-YES for next year.

Oakleaf-good heat tolerant-YES for next year.


NOTE:Fruits and flowers will be in separate posts coming up.


Treat Early Blight when it shows up

Early Blight is a fungal disease that attacks tomato plants starting on the bottom leaves of the plant and works it’s way upwards.  The leaves start turning yellow and get blotchy with brown areas. If left unchecked, it can take over your plant killing it although it won’t die immediately and there are things you can do to reduce it.

Where does it come from? It comes from water splashing soil up onto the lower leaves. The culprit is a bad soil fungus (there are good soil fungus as well).

But before I write about how to treat this disease, I do this first. I always trim off the lower branches so they are not touching any soil and I put straw under each plant so the soil can’t splash up on the tomato leaves. In fact I put straw over the whole bed as the tomato plants get bigger. Water splashing up from hand watering your plants or even rain can splash soil up on the lower branches. But I never cut off branches that have flowers! Flowers=tomatoes! The picture above shows a plant with the lower branches trimmed off and straw over the soil. Underneath the straw is my drip system. The goal is to keep the soil from splashing up and the fungal spores will start to go upwards from the bottom of the plant.

There are several things you can immediately do to help with this disease when you see it

1. The first thing you do is trim off the affected branches where the leaves are yellow.  This week I trimmed all the lower branches off my tomato plants paying particuliar attention to the ones that had a few leaves just starting to yellow with EB (Early Blight). This year I had 3 out of 20 plants showing the beginning of EB. Me bad-I didn’t add the straw or trim them up after I removed the wall of waters earlier. I also tie a ribbon on the diseased plants so I can keep a close eye on them. I’d much rather deal with Early Blight than Curly top virus (which is always fatal and not much we can do about it). At least you can control Early Blight. Keep trimming up your plant as needed.

ALWAYS DISINFECT YOUR CLIPPERS IN BLEACH WATER BEFORE GOING ON TO PLANTS THAT DON’T HAVE IT-it is contagious!

2. Beside cutting off diseased branches, trim any branches to make sure they don’t touch the ground

3. Stake  or tie up any branches that might touch the ground.

4. Mulch with straw underneath the plant so the soil can’t splash up on plant when it rains or if you water overhead.

5. I have used a product called Serenade in the past, but it is no longer available. If you have some discard it as the ingredients only lasted several years.

So now I use Monterey Complete Disease Control which I have had good luck with in curtailing or slowing down the disease. Follow instructions. Spray in early evening both on top and UNDERNEATH the leaves.

I also use this for keeping Powdery Mildew at bay on all squash plants.

IT’S TIME! Take your row covers off of your tomatoes

IT’S TIME! Take your row covers off of your tomatoes! Monsoon season has arrived! I’ve been gone on a flyfishing trip but kept up with the weather news. Just got back last night. So today I will be taking off all the row covers off the tomatoes. Then I can see the plants again-yay!

Here is a link to a time lapse video I did taking off the covers several years ago-Enioy!


Time to take your wall of waters off your tomato plants now!

Walll of waters

If you still have your tomatoes in wall of waters, take them off now because the temperatures are suppose to get into the 90’s next week and if that happens, it could fry your plants. I’m taking mine off the next few days.

Covering up the tomatoes with row cover.

Since we haven’t really had much rain to speak of, after I remove the wall of waters (WOWs), I will put cages on and wrap my cages in medium weight row cover (.55) from top to bottom completely covering the cage. This is to protect the tomato plants from getting exposed/bitten by the Beet Leafhopper which can give your plants CTV (curly top virus) which will be fatal to the plants. I will take the row covers off when the monsoon rains come in ernest which is usually just after July 4th weekend but has come earlier in some years. The bug seems to leave or get suppressed once the monsoons start.

Meanwhile June is getting it’s usual heatwave which is normal for June in the Santa Fe area. Come on rain!

Tomatoes are in-FINALLY!

Tomatoes in wall of waters (wow) May 23, 2025

Today Elodie and Bob and myself planted 18 tomato starts today.THANK YOU! YOU BOTH ARE THE BEST!

I grew them from seeds inside the house under lights and heat mats since early spring. The tomatoes are so happy to be free-FREE at last! I don’t think I’ve ever put them in so late.

I was suppose to plant them on Monday but the weather was horrible and the nightime temp was down to 31 degrees at our house so I’m glad I waited. It was so cold and windy this past week-what a difference a few days can make. No need to stress them out.

We did plant them in wall of waters (WOWs) out in the veggie garden to help with our cold nights. I will take off the WOWs sometime in June when the plants either reach the top of the WOWs or the temperature gets into the 90’s. You don’t want to leave them on when it gets hot-you could fry them. But the weather has warmed up nicely and today the high is 80 today and a low of 48 degrees tonight. Perfect temps!

18 tomatoes is smallest number of tomato plants I’ve ever planted. Back when I was at the Santa Fe Farmers Market selling tomatoes, I use to grow 120 tomato plants and would sell out by 11 am. I’m so glad I retired from the Farmers’ Market after ten years there. Farmers work hard!

Now it’s a more reasonable pace. As I’ve gotten older, I realize I need to slow down a little and I’m glad I listen to my inner voice (sometimes). With age comes wisdom (well, maybe a little!)

May 19, 2025-Tomato plants still inside!

This has been an unusual year for spring-freezing cold then warm then cold again and warm again. Today it has turned cold again-windy and 55°F high/31° low tonight. I was suppose to plant my tomatoes outside in wall of waters today but it won’t even get warm enough for the wall of waters to warm up before night.

Supposed to be no more frosts from May 15th
on but not tonight.

I have been able to get my tomato plants in the ground the first week of May in previous years, but not this year.

So it looks like it will be warm this Friday, May 23rd-a full 8 days past that date when we are supposedly safe. No sense in rushing it at this point. Looks like I will get tomatoes later this year… sigh.


Wall of Waters-what they are and how to use them

A

Wall of waters (WOWs)

Wall of waters are season extenders to use to protect plants. I use mine as plant protectors in the spring to get certain plants like tomatoes and peppers out earlier in the season when they are smaller than what is normally recommended and cold at night.  Never use them in summer when it is hot-you will ‘cook’ your plant inside them.

What are wall of waters (WOWs)?

When the cells are filled up with water, they keep the plants warm by heating up in the daytime and releasing the heat for the plant at night. Wall of Waters are about 11″ tall so your plant will need to be small enough to fit inside to get protection.

Any taller plants will not be protected if they extend past the top of the wow. It acts as insulation to protect tomato plants from cold, rain, snow and wind.

Always put them around your plant in the morning, on a sunny day, so the water has time to heat up to protect them at nite.

Why do I do this?

-Living in a short growing season area, I can get plants outside earlier, knowing they will be protected from a freezing nite-actually down 26 degrees (I’ve even read it can protect to lower temps!) By using them, I can transplant my tomatoes outside earlier. The last few years, I’ve shaved off about 2 weeks from my schedule. I use to put my tomatoes out around May 15th which is the supposed first frost FREE day here in Santa Fe, NM-Zone 6B. Now I sneak them in the first week of May but maybe not this year with the wild temperature swings. And they work beautifully. This means that I will get ripe tomatoes sooner than if I waited for the outside temps to warm up before planting outside.

-The other thing they do is offer protection from our WIND, which can be ferocious in the spring and thrash your crops.

-And I even used them for my pepper plants too, which are even more cold sensitive than tomatoes. I will wait to plant pepper plants this year till the first week of June. Both tomatoes and peppers are warm season crops. You could even try them for eggplant starts. Wall of Waters come in a 3-pack. There are also many me-too products of wow that should be fine.

You can see the video here of how to use the wall of waters. Notice I plant the tomato in the ground, make a well around the plant, put drip line around the plant if you are using drip, and then put a 5 gallon bucket inverted over the plant, and put your empty wow over the 5 gallon bucket. This helps keep it from tipping over and squishing your plants when you start to fill the plastic cells with water. I usually do 2 cells on one side, and then go across to the opposite side and fill 2 cells and then start to fill the other cells around adjusting the wow to stand straight till all cells are filled up and then reach in and pull out the bucket and the wall of water will stand up. Because I live in a windy area, I also put some bamboo stakes inside right up against the wow on the inside but do not pierce it. This helps fight against the wind from knocking the wow over.

Be sure you take off the wows when it gets hot in June as leaving them on can fry your plants (remember the walls are heating up and it could get really hot inside). I only use these as an aid to get plants out earlier in spring.

-Let them dry out after you are done and store your wow’s in some kind of mouse-proof container to keep mice from eating holes in them in the off season.

Row cover-what is it and how to use it

One of two of my favorite aids to use in the garden

If you look at my vegetable garden throughout the season, you will see lots of white row cover over everything newly planted in my garden especially in spring when first planting crops out.

What is it? How can you use it? Where can you get it?

What is row cover?

Row cover, also called Remay as it is also called is a polypropylene material that you put over your crops or plants for protection from cold, to keep animals out and to help plants acclimate to our environment. Rain or water can go through it and sun comes thru although reduced if you get mid or heavy weight. It is not like a sheet, which doesn’t protect our plants. You’ll need to protect them in some kind of mouse proof container in the winter or the mice will eat holes in them. I store mine in a garbage can in the winter.

It comes in several ‘weights’

winter weight– is for when you need the most protection down 4-6 degrees below freezing. It lets in about 70% of light. I don’t use winter or heavy weight  anymore and  I would never use this weight in summer, the plants don’t need that heavy of material. I want more light to come through in the summer. My go-to now is medium weight.

medium weight– The medium weight of this row cover is 0.50-0.55 oz.
Medium weight covers allow 85% light transmission and provide frost protection down to 28 degrees. Medium or heavy covers is what should be used during our winters (that’s if you have crops then).

I use medium weight the most, especially in late spring and early summer when I’m first planting seeds and transplanting plants outside. If the night is going to be really cold, sometimes I double up the medium weight at night and fold it all back in the day. So if you only want to buy one weight, get this one. No matter what, always fold back the row cover so light can reach it in the day time and cover it back up at night if you have freezing temperatures. This exception is if it is below freezing in the daytime. Then keep it covered for that day. It lasts 2-3 years depending on the wind ripping it up.

light weight-I never use this as it tears up too easily in our spring winds. Waste of money.

How to use row cover

-I use it to protect new transplants from our high altitude sun. Also offers protection from wind.

-I use it to cover seeds I direct plant in the ground to help keep the ground from drying out.

-I use it to keep some plants (especially newly planted) from getting sunburned.

-I use it as a physical barrier to keep bugs that will damage plants off of them.

-I not only use it to protect newly planted plants but also when I put direct-seed like corn or beans in the soil, I put it over the crop-it protects from birds eating the seeds, giving them a chance to germinate. I uncover them when the sprouts are 3-4 inches tall. Birds just love corn and bean sprouts!

-I just lay a sheet of row cover directly over my plants, tacking it down with rocks or 2 x 4 wood so it doesn’t blow away. If you have a cold frame or want to use it on a raised bed, it helps to put some PVC hoops over the bed and then cover the hoops completely with heavy plastic for more protection with the plants inside with the row cover on top of them. You will need to uncover the plants in the daytime and cover at nite AND you need to vent the ends of your mini hoop house to let heat out in the day. You can google how to make a mini hoop house this way. Not hard to do and it let’s you get some crops in sooner.

Freezing weather gone

Screenshot

Last week we had 2 nights in the 27-28 degrees temperature wise. Hope if you planted outside, you had covered your plants with medium weight row cover. (no-sheets don’t work to cover plants). I leave my row cover on but pull it back to expose plants when it is nice out in the day and cover them back up at night.

You can find med weight (.5-.6) row cover in some nurseries, or online. Don’t get heavy weight row cover (.9+ weight-too heavy). Row cover is best for springtime fickle weather when one night it might be 40 degrees and the next night in the 30’s or even colder. We call this the shoulder season with both the daytime and nighttime temperatures swinging wildly in the transition time from winter to spring to summer.

Here is the forecast-Don’t get caught off guard.

Carl Foerster perennial garden

Today I want to share an experience I had while in Germany in March. I went to Paris and Berlin. While in Berlin, my friend, Lava, drove us to a Kandinsky exhibition in the Barberini Museum near Berlin in Potsdam, Germany. It was fantastic. Never seen so many Kandinsky in one museum.

I’ve been dying to see some green-not evergreen green but spring green as spring has been so harsh here in Santa Fe with the horrid winds. Both in Paris and Berlin spring was barely starting-not much green yet. After the Kandinsky exhibition, Lava drove to a garden in Potsdam that she thought I’d like.

It was the green I was craving. It was a small informal garden vs the very formal gardens seen elsewhere in Paris and Germany. It was arranged so beautifully!  It was a highlight while in Germany. I took a lot of photos while in the garden with it’s meandering paths.

While home and organizing my photos, I called my friend and asked if she knew the name of the garden. She said, Karl Foerster garden-I never knew that while there. She didn’t really know who he was but I did.

The garden is over 100 years old and his house, nurseries and greenhouses and a beautiful rustic birdhouse for doves on the property exist there.

So who is Karl Foerster? He is one of Germany’s most famous botanists. He was a German gardener, nurseryman, garden writer, and garden philosopher. He bred over 350 new plant specimens including some delphiniums, phloxes, and Karl Foerster reed grass that many of us in the states have in our perennial gardens.

The story of Karl Foerster grass
‘As the story goes, Karl was on a train when he saw the grass along the tracks. To seize the chance to collect the specimen, Karl pulled the emergency brake, stopped the train, and then quickly collected the specimen that now bears his name’-courtesy of https://thedailygardener.org

My guess was he was the train operator to be able to do that. While many gardeners have heard of Karl Foerster Grass or Feather Reed Grass, I didn’t know the story, or where he was from or really anything about him except that he was one of the most famous botanists in Germany and had a grass named after him.

“Grasses are the hair of mother earth.” I love this quote from him!

Karl kept his Jewish friends employed all through World War II war. After the war East Germany became under the control of the Soviets. Karl was allowed to have his gardens and nurseries.

Karl Foerster grass was the Perennial Plant of the Year in 2001. Karl’s plant performance expectations and appreciation for low-maintenance spaces with year-long seasonal interest helped shape the New German Garden garden design style. Karl Foerster garden had signature plants: grasses, delphinium, and phlox. https://thedailygardener.org

Foerster’s philosophy of planting is current today as we try to create gardens that are friendly to wildlife and the environment.

He bred hundreds of new perennial plants-over 350! What interested me was his influence of making his gardens with year-long interest for every season, hence his garden was already in spring and i got to see it. I hear it is glorious in the summer and fall but it was already beautiful to me in the beginning of spring.

Here are some photos I took while there.


“In my next life, I’d like to be a gardener once again.
The job was too big for just one lifetime.”

Karl Foerster